

In the Map module, you can track assets and driver activities and manage places. The Map module comprises the Assets, Drivers, and Places tabs.
Assets #
On the Assets tab, you can track assets on the map and view their recorded data history. You can also view the asset status, such as Driving, Loading, or Standstill.
Track Assets on Map #
You can view the current location and delivery route of an asset on the map.
In the Map module > click the Assets tab, and then select the required asset from the list. The asset location and route details are displayed on the map.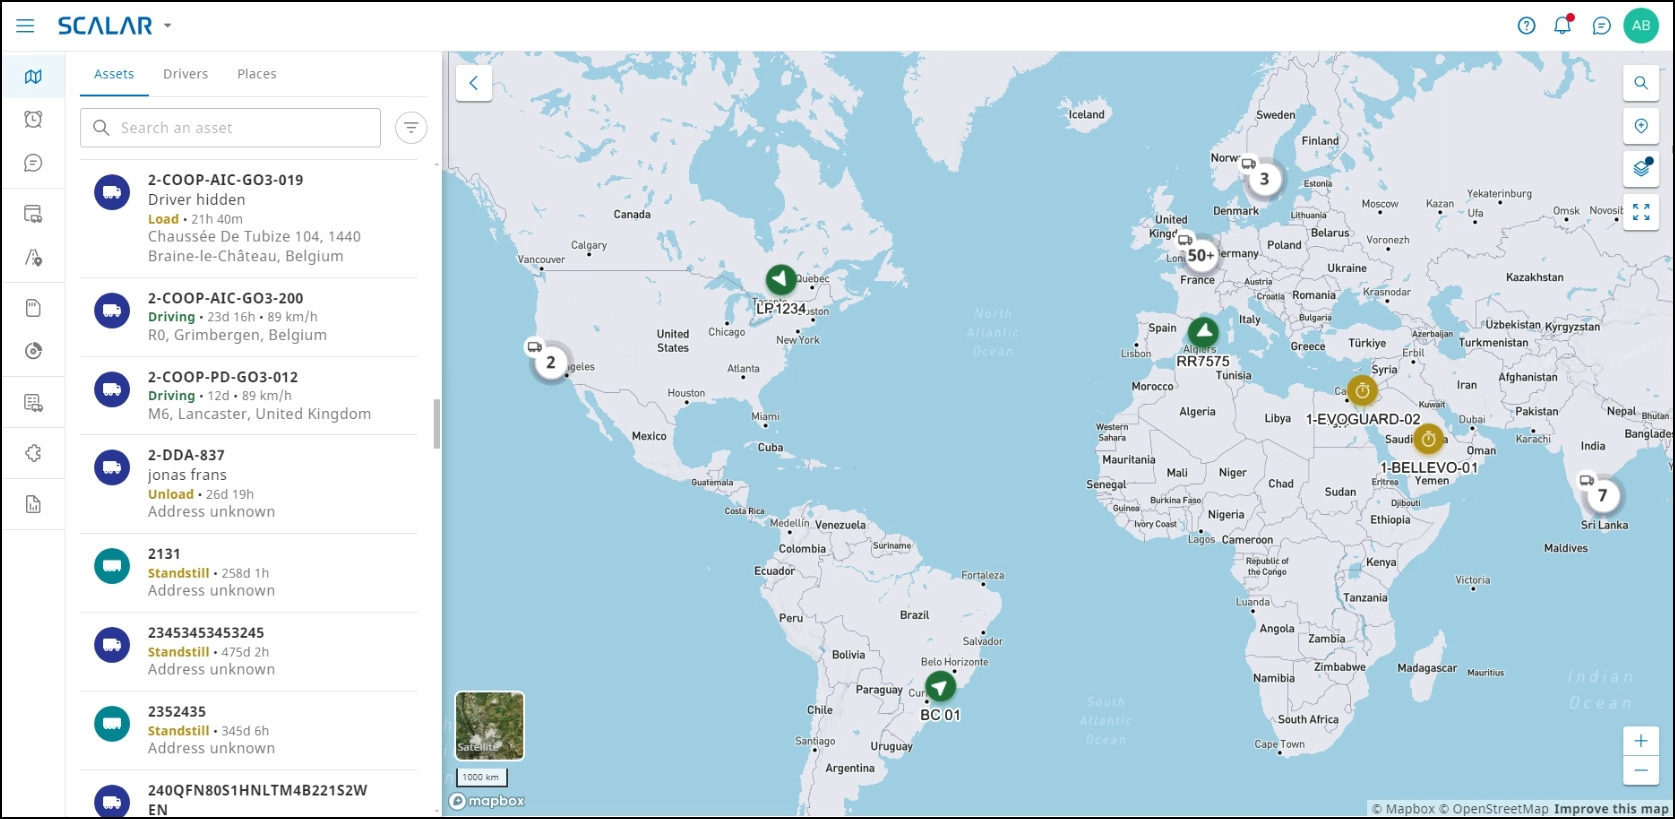
Map Legend
| Button | Description |
| | Searches an address, asset, location, or coordinates on the map |
| | Creates a place |
| | Shows or hides map layers NOTE: After you click the button, a shortcut menu is displayed. Select or click to clear the Places and Traffic checkboxes to reveal or conceal the map layers. |
| | If no asset is selected on the Assets pane, all the assigned assets on the map are shown When an asset is selected on the Assets pane, the asset information pane is displayed and its complete route over the last 24 hours is shown |
| | Enables you to zoom in and out to view the map area at different scales |
 | Switches to the map’s satellite view |
View Traffic Information #
You can view live traffic information on the map.
In the Map module > click the Assets tab.
On the map, click the Show/hide map layers ![]() icon to open the Map layers section, and then select the Traffic checkbox.
icon to open the Map layers section, and then select the Traffic checkbox. 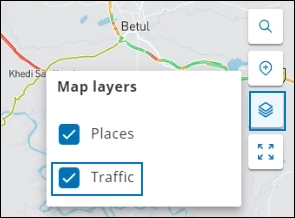
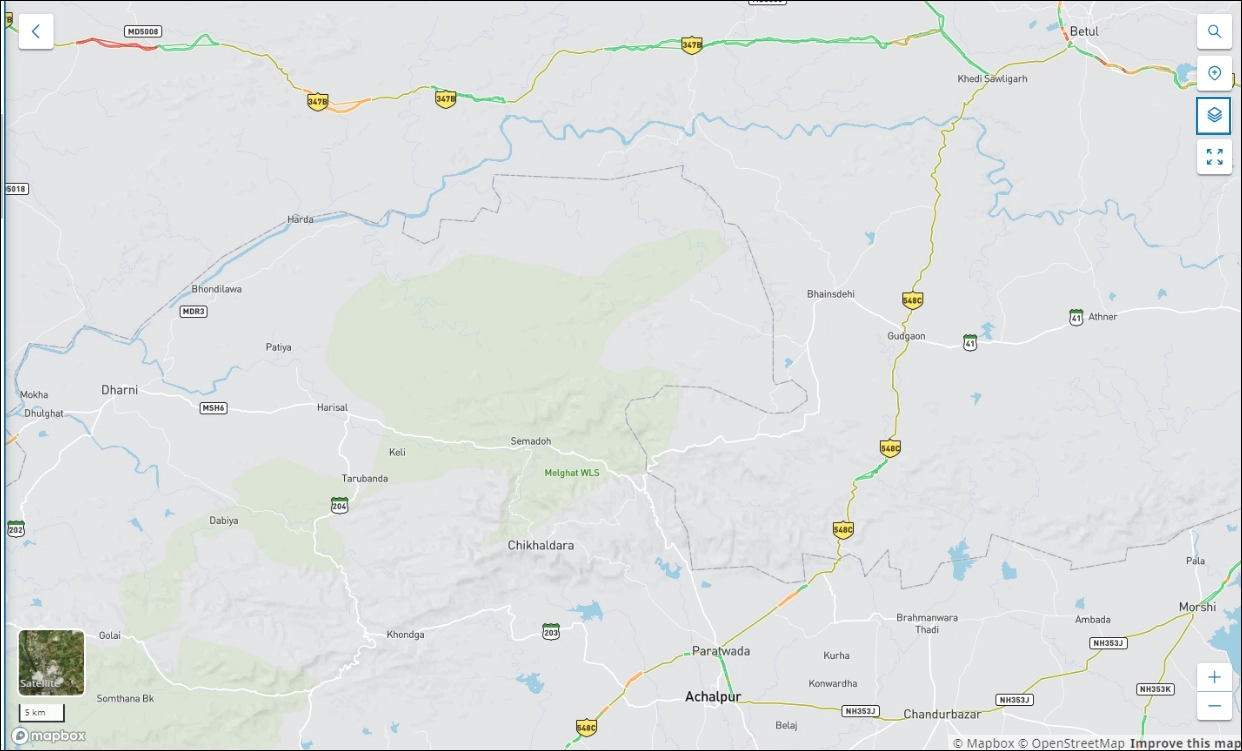
You can zoom in to view the live traffic information. Traffic information at the Mapbox server is updated every 8 minutes. If no panning or zooming occurs on the map, no new data will be retrieved.
View Asset History #
Various activities of assets are recorded on the SCALAR platform. You can view the general information of the asset on the General info tab and historical data on Activities, Alarms, Temperature, Remaining, Tachograph, and Notes tabs.
In the Map module > click the Assets tab, and then select the required asset from the list. The asset information pane is displayed.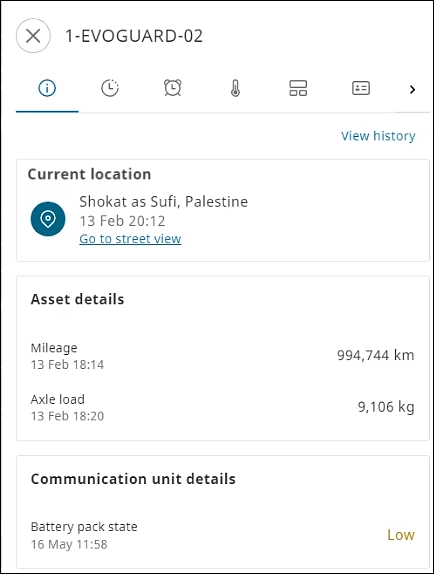
View General Info #
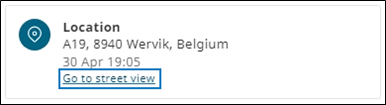
You can view general information of an asset, such as location details that include the Google Maps street view, asset details that include the mileage and axle load, and communication unit details.
On the asset information pane > go to General info ![]() . The location, asset details, and communication unit details are displayed.
. The location, asset details, and communication unit details are displayed.
Switch to Street View #
You can switch to the street view for the selected asset on the map.
On the General info tab > go to the Location section, and then click Go to street view. The Google street view for the selected asset is displayed in a new tab window.
This is a representative impage of the Google Maps street view.

View Asset Details #
You can view the mileage and axle load information for the selected asset in the Asset details section on the asset information pane.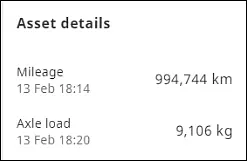
In the TBS warning field, None represents the brake performance status of the asset.
View Information on EV Vehicles #
In the Asset details section, you can track the live status of EVs (Electric vehicles), the remaining charge, the estimated range of the asset (estimated distance the vehicle can travel before it must be recharged), status of recharging, and verify whether the temperature is optimal for charging.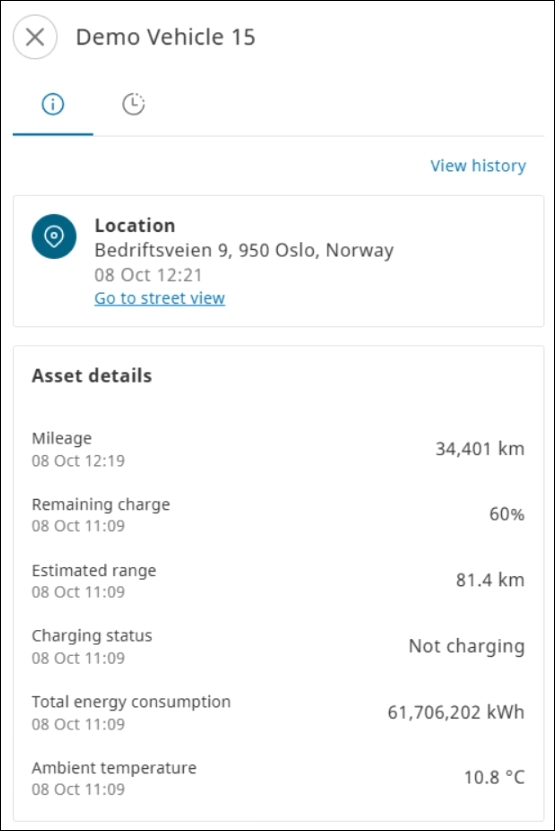
The possibility of showing certain data regarding EV depends on both the asset and the communication unit that is connected.
Currently, the integration is validated with SCANIA through MCU (Multi Controlller Unit) integration. However, other integrations are possible in future. Please contact the Service Desk for more details regarding possible integrations.
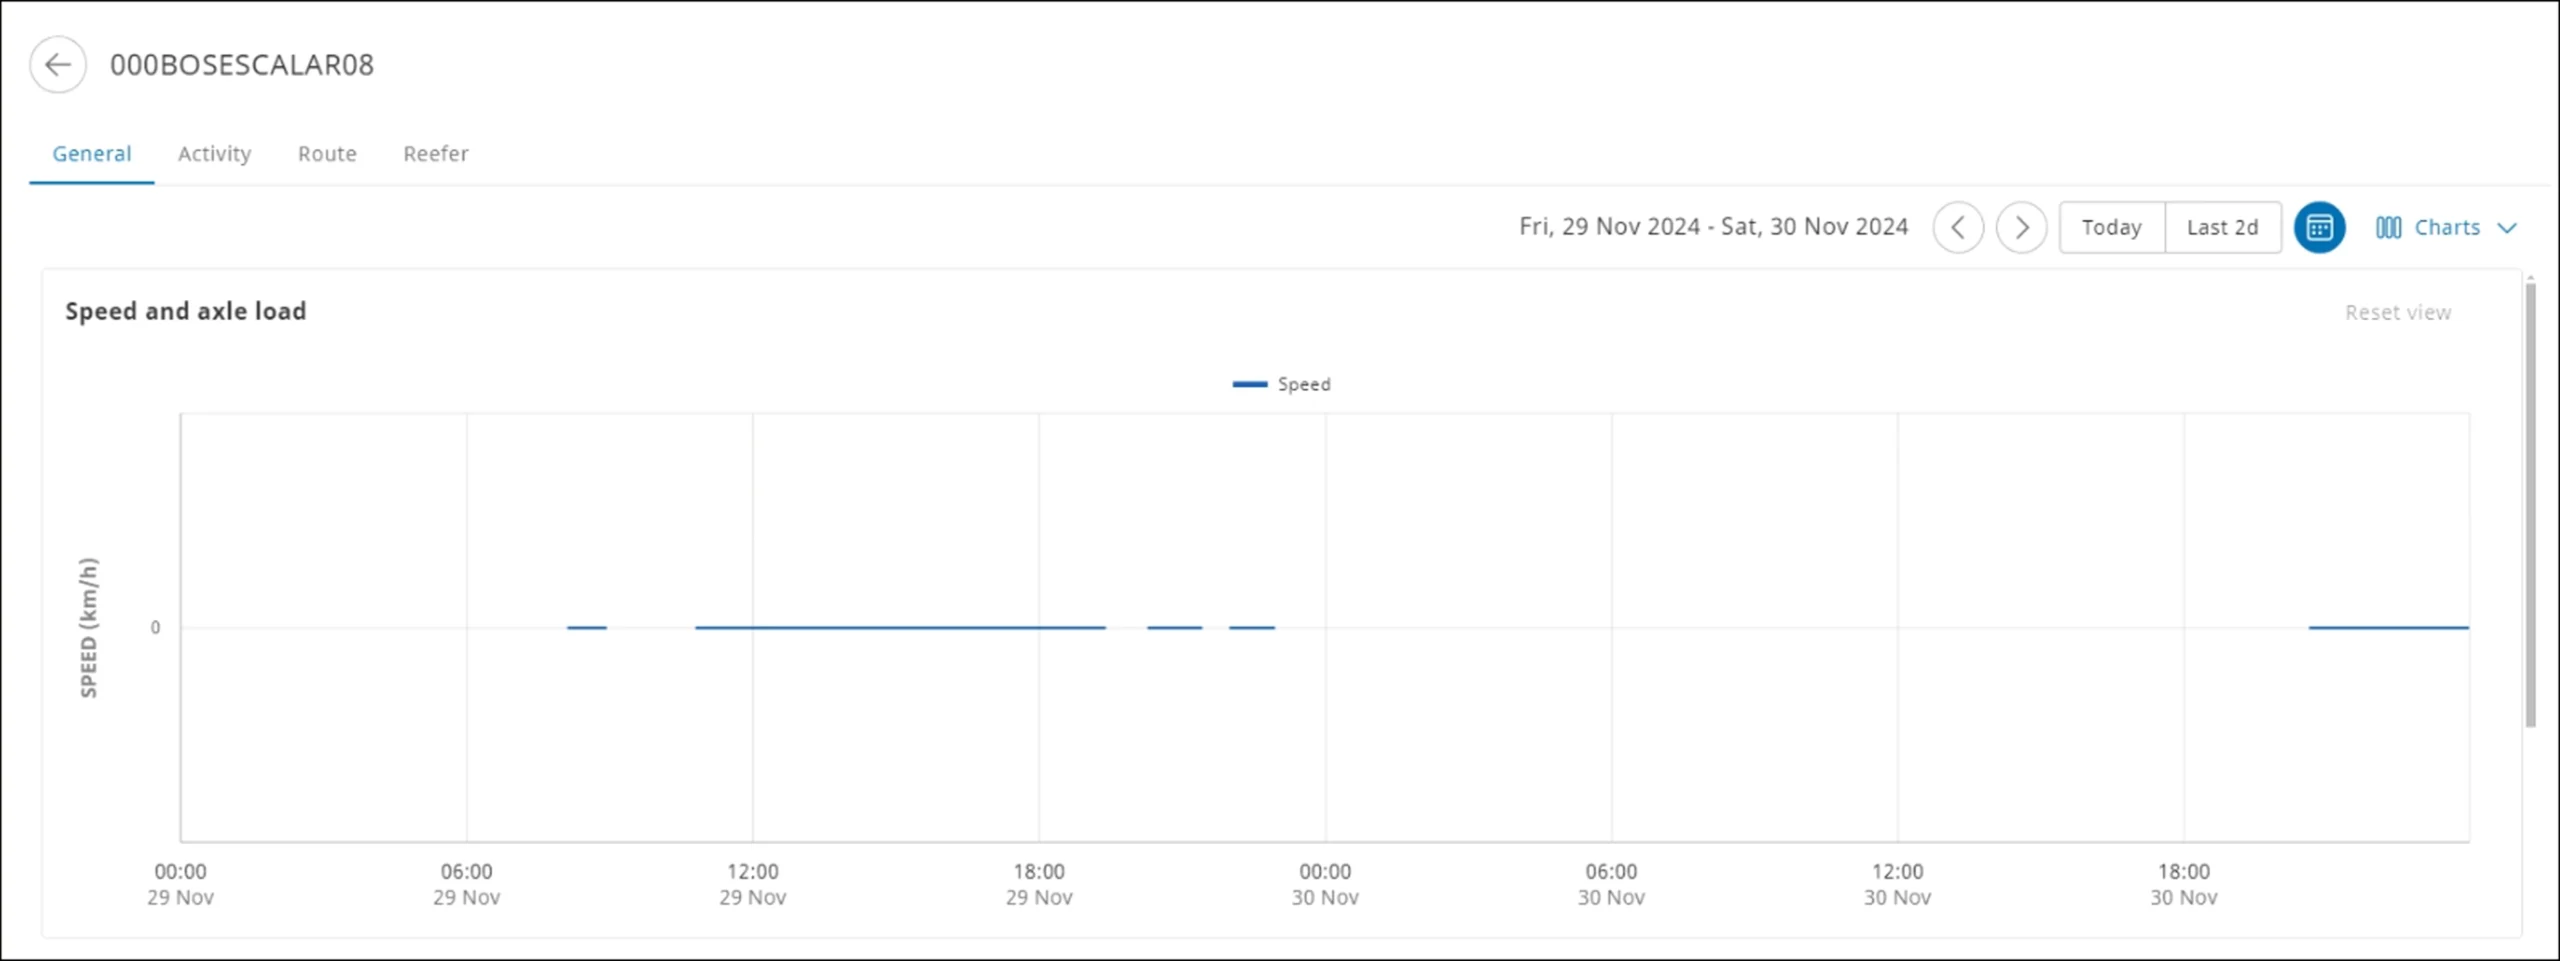
View Speed and Axle Load Data History #
You can view speed and axle load data for the specified period for the selected vehicle.
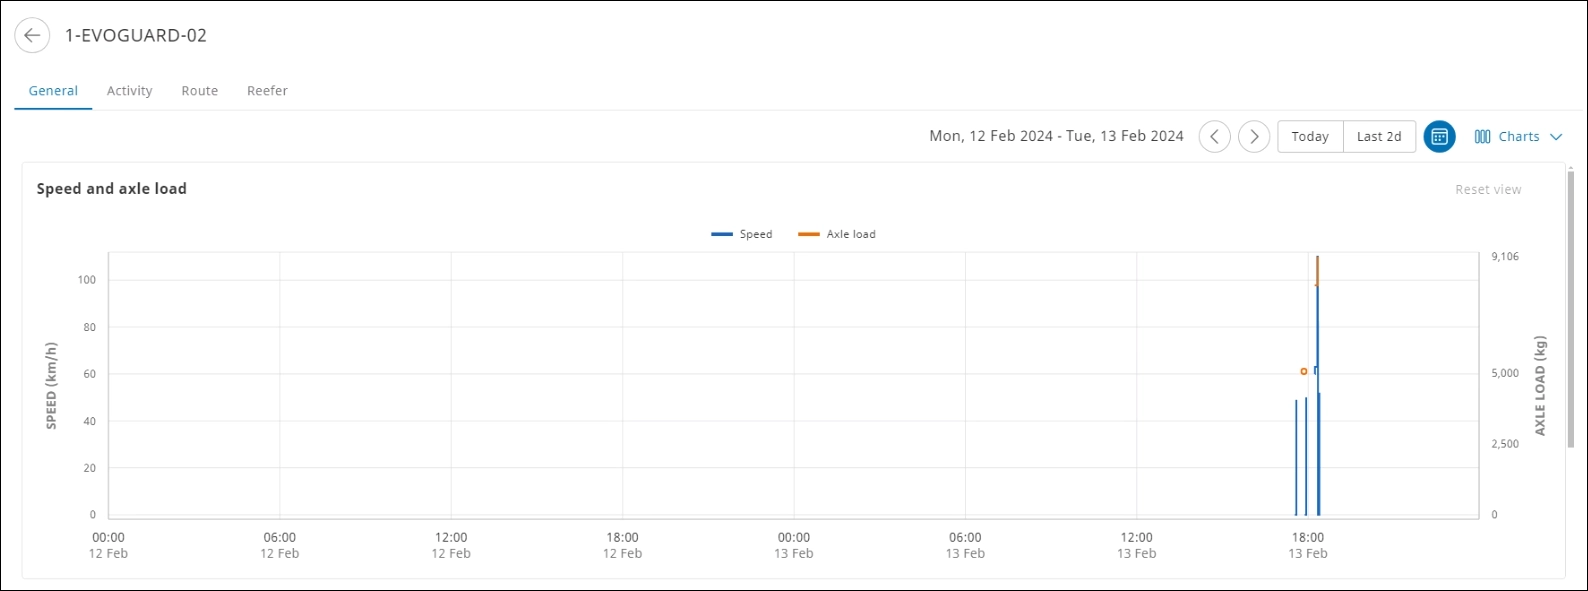
- On the General info tab, click View history. The General tab is displayed on the asset information page that charts the speed and axle load.

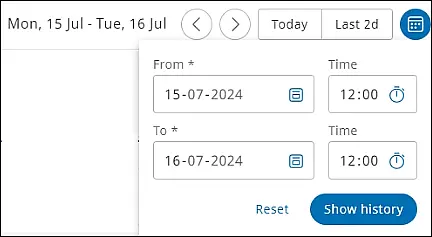
- From the toolbar > click the calendar picker
 , and then select the required date and time range.
 - Click Show history. The speed and axle load data history for the specified period is displayed.

On the asset information page, you can also view the activity, route, and reefer details of an asset.
The maximum period you can select is for two days. You can also select one of the pre-defined options to view the speed and axle load data history.
Customize columns
You can customize the view to show or hide columns while viewing records on the General tab.
- On the General tab > click Charts. The Chart Display list is displayed.

- Select the required checkboxes that correspond to different columns. The colums selected are displayed while viewing the records.

To restore the default settings, click Reset.
View Activities #
You can view the assets activity history that are recent or for a specified period.
Track Activities for the last 24 hours
On the asset information pane > click Activities ![]() . The last 24 hours’ records are displayed.
. The last 24 hours’ records are displayed.
Track activities for a specific period
- On the asset information pane, click View history. The Activity tab is displayed on the asset information page.
- From the toolbar > click the calendar picker , and then select the date and time range.

- Click Show history. The activity history for the specified period is displayed.

The maximum period you can select is for one month. You can also select one of the pre-defined options to view the activity history.
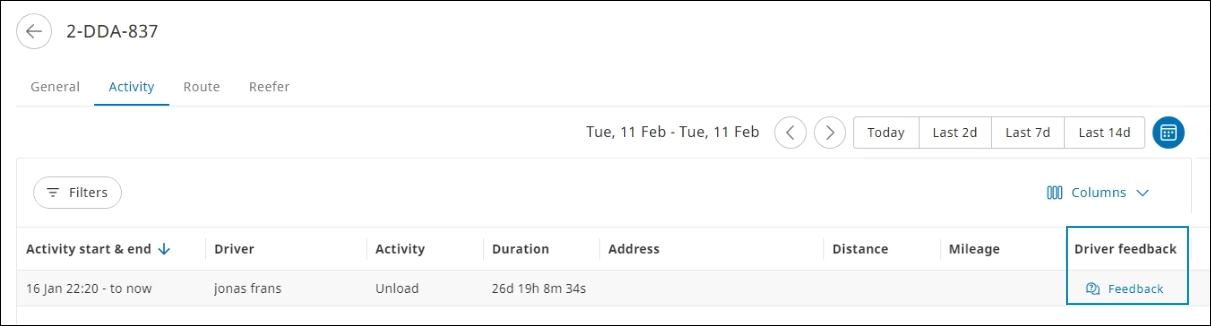
Click Feedback to view the feedback submitted by the driver in the SCALAR Cargo app during trip execution.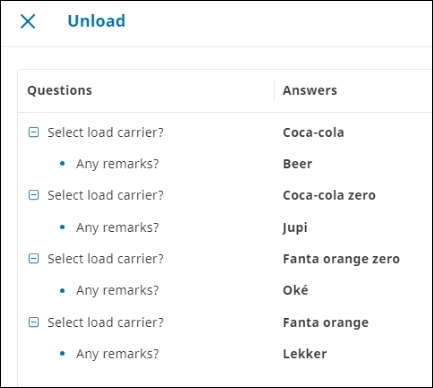
Customize columns
You can customize the view to show or hide columns while viewing records on the Activity tab. For more information, see Customize Columns.
View Alarms #
You can view the recorded alarms history triggered by assets.
On the asset information pane > click Alarms ![]() . The recent alarms recorded are displayed.
. The recent alarms recorded are displayed.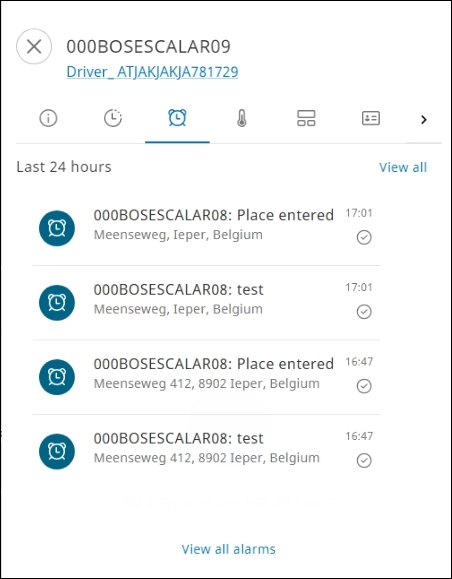
Click View all to view all the recorded alarms history available for the selected asset.
View Temperature #
The temperature function helps ensure that the optimal temperature for an asset is maintained during deliveries. You can also apply filters to view specific records.
Recent temperature records #
On the asset information pane > click Reefer  . The recent temperature records for the asset are displayed.
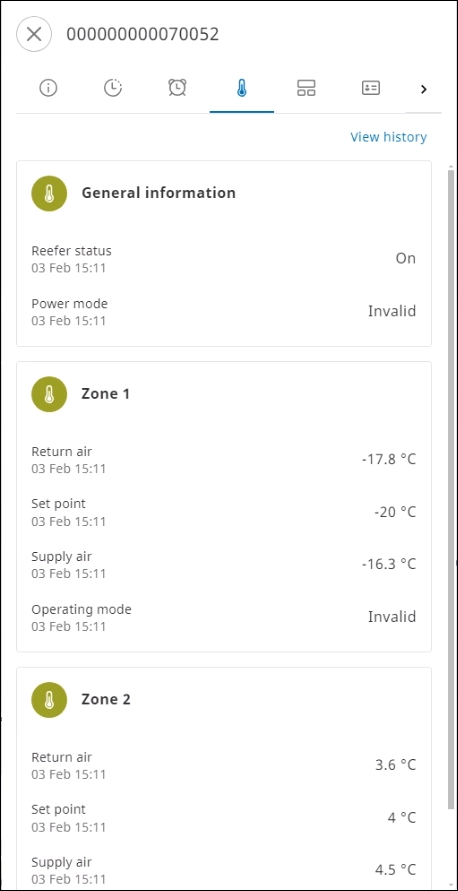
Temperature records for specific period #
- On the Reefer tab, click View history. The Reefer tab is displayed on the asset information page.
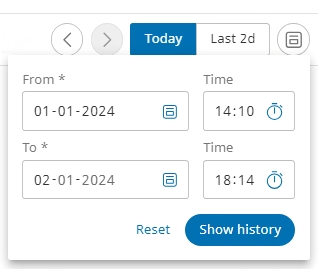
- From the toolbar > click Calendar
 , and then select the date and time range.
 - Click Show history. The temperature history for the specified period is displayed.
 , and then select the date and time range.
The maximum period you can select is for two days.
Customize columns
You can customize the view to show or hide columns while viewing records on the Reefer tab. For more information, see Customize Columns.
Track Remaining Times #
You can view the driving and resting time data of the drivers to ensure that they are following the stipulated rules and regulations.
- On the asset information pane > click Remaining . The information is displayed in the service time section.
- Select the Driving or Resting option. The information for the selected option is displayed in the Service Time section.

 . The information is displayed in the service time section.
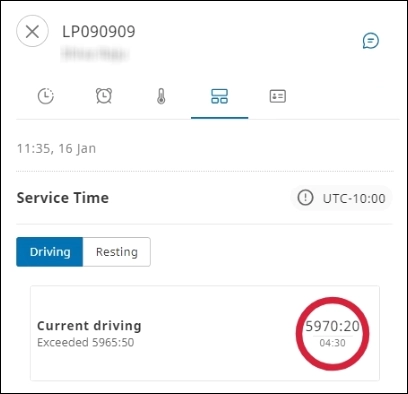
Track Tachograph Data #
Tachograph data is recorded for activities, resting times, driving times, and service times of assets.
On the asset information pane > click Tacho  . The recent available tachograph data is displayed.
Request an image to show the tachograph data. 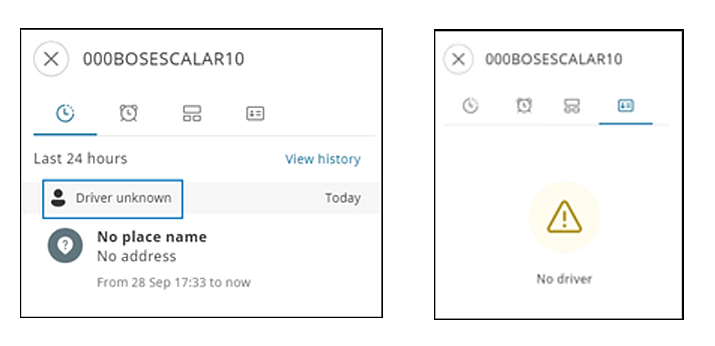
- Tachograph data is legacy data that cannot be edited.
- If no driver is assigned to an asset, you cannot view data in the Remaining and Tacho tabs.
Manage Notes #
Dispatchers can use the Notes functionality that can be referenced by themselves or other dispachers to communicate important or critical information with the drivers for an asset. These notes can also serve to follow up or assist a driver by providing vital information or tips during a trip.
- All dispatchers who can access the Track & Trace module and follow a specific asset can view the note added for that asset.
- A maximum of 1000 characters can be added to a note.
- A maximum of five notes can be added per asset.
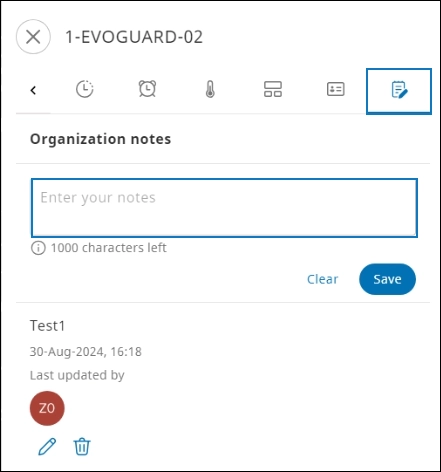
Add Note #
- On the asset information pane, click > to view Notes
 . The Organization notes section is displayed.
- Enter information in the box, and then click Save. The note is inserted.


Edit Note #
Click Edit (![]() ) to make modifications to the note. The note is now in editable mode. Click Save to save your changes. The note is updated.
) to make modifications to the note. The note is now in editable mode. Click Save to save your changes. The note is updated.
Delete Note #
Click Delete (![]() ) to remove a note. A confirmation message is displayed. Click Delete to confirm deletion. The note is permanently deleted.
) to remove a note. A confirmation message is displayed. Click Delete to confirm deletion. The note is permanently deleted.
Filter Assets #
You can filter assets based on their activity, asset type, and system tags available.
- In the Map module > on the Assets tab, click Filter
 . The Asset filter pane is displayed.
- Select the required options in the Activity, Asset type, System tag of the asset, and Map sections, and then click Done. The asset records that fulfill the criteria are listed.
Available filters: - Activity
- Asset type
- System tag of the asset: Pending (Asset was created, but no incoming data was received yet).
- Map: Show asset assets visible on map. The filtered list will be updated as you move the map or zoom in/out.
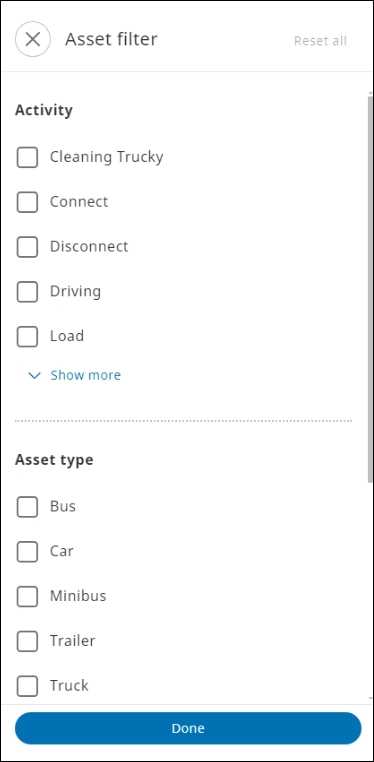
You can select multiple options in the Asset type section.
Search an Asset #
You can search specific assets on the Assets tab.
In the Map module > click the Assets tab, and then enter a name in the Search an asset box. The search results matching the search criteria are displayed on the Assets pane.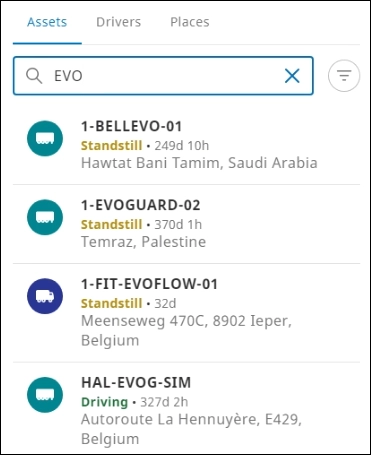
Enter at least three characters to start a search operation.
Trace Activities on Map #
On the Assets tab, after you select an asset, you can view its current position on the map.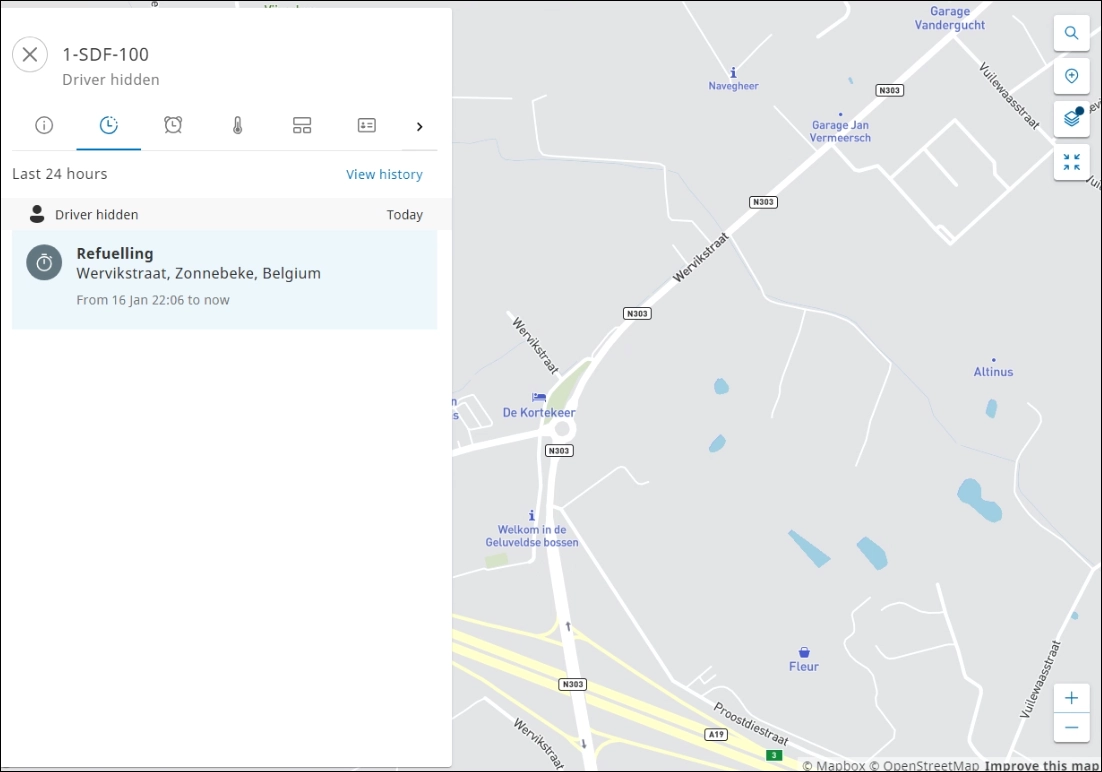
View Grouped Activities #
A set of activities performed at the same place are grouped on the map. The number denotes the number of activities executed during a trip. 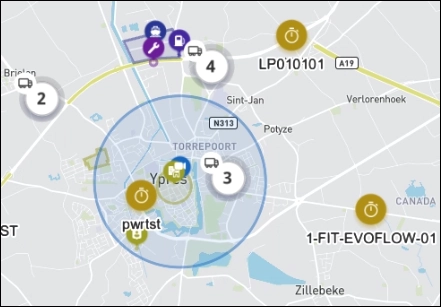
Click the number that appears next to the asset to view the activity details on the Activities tab.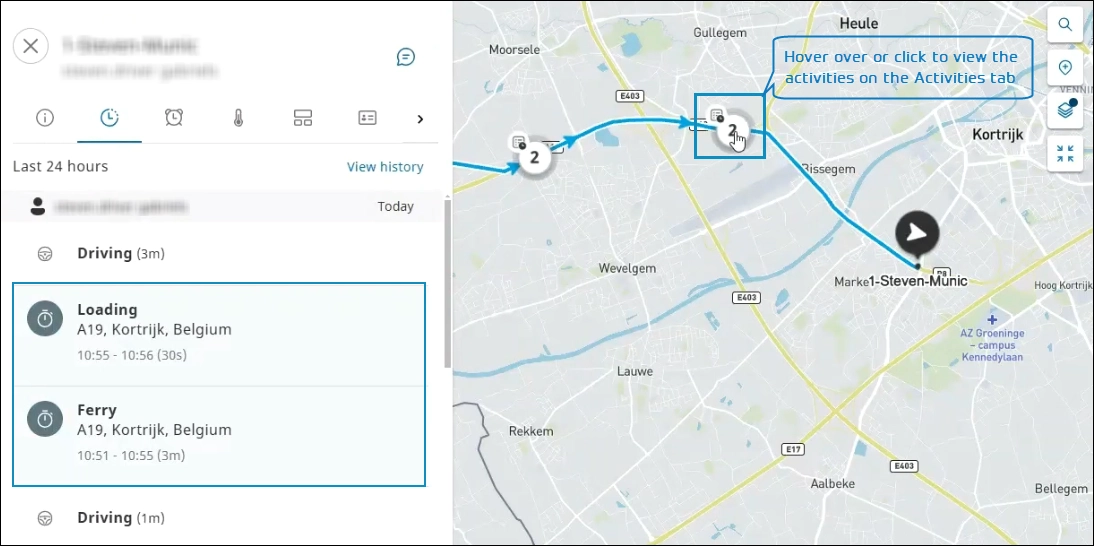
The slight differences in coordinates for activities performed at the same place during a trip are represented as shown in this image.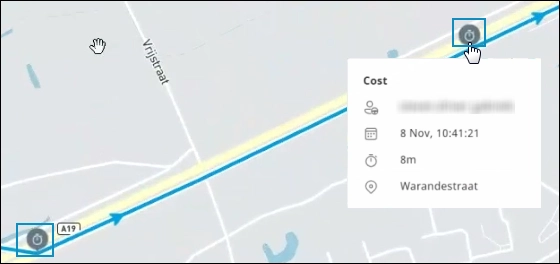
To view assets on the map, ensure that the Show assets visible on map checkbox is selected:
On the Asset filter pane, scroll through to view the Map section, and then select the Show assets visible on map checkbox.
Manage Drivers #
On the Drivers tab, dispatchers can monitor driver information (current location, current activity, and asset details), service times (remaining driving and resting times), and the status recorded by the tachograph.
The service time, which includes remaining driving and resting times (RDRT) of a driver, is visualized in real-time on the Drivers tab.
The information on the Drivers tab is fetched from the on-board computer. However, the RDRT information can be obtained irrespective of whether the asset is linked to an asset. For example, in case the driver removes the tacho driver card while changing the truck, the service time can still be reflected on the Drivers tab.
View General Information #
In the Map module > click Drivers. The driver information pane is displayed. The drivers assigned to the dispatcher are listed on the General info tab (![]() ). Select the required driver to view driver-specific information: current location, asset details, and current activity.
). Select the required driver to view driver-specific information: current location, asset details, and current activity.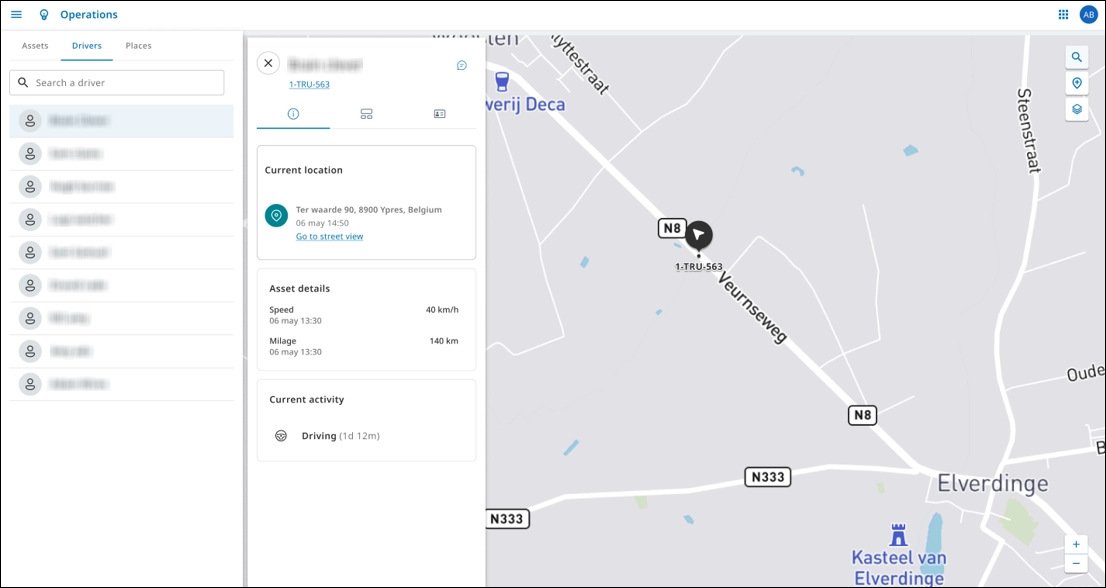
For more information about each section, see View Asset History.
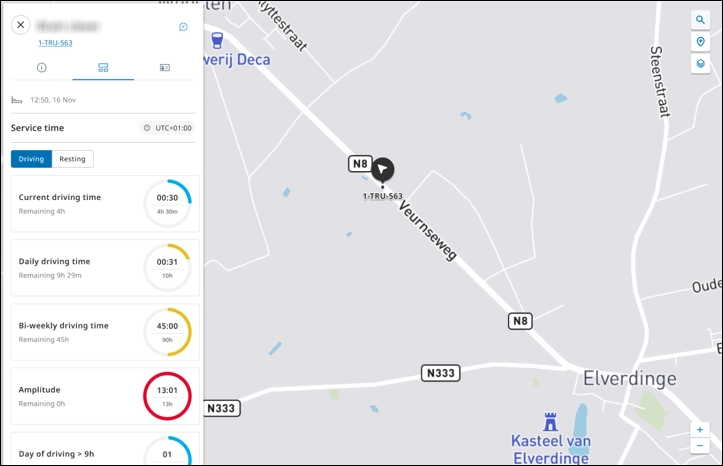
View Service Time #
A dispatcher can monitor the current driving and resting times to plan and schedule a trip for a driver based on availability.
- In the Map module > click Drivers, and then select the driver for which you want to view the service time information. The driver information pane is displayed.
- Click Remaining (
 ) to view the service time information. The Service time section is displayed indicating driving time-related metrics:
 - Current driving time
- Daily driving time
- Amplitude
- Days of driving > 9h
- Days of consecutive driving
- Weekly driving time
- Bi-weekly driving time
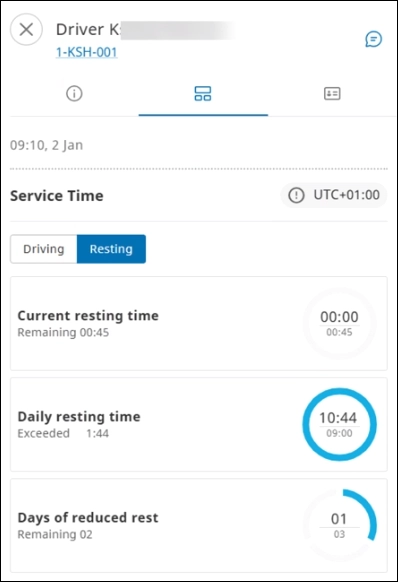
- Current resting time
- Daily resting time
- Days of reduced rest
- Weekly resting time
- Weekly resting time -1
- Weekly resting time -2
- Weekly resting time -3
- Weekly resting time -4

To view information on the driver’s resting time, click the Resting tab to obtain an overview on the resting time-related metrics:
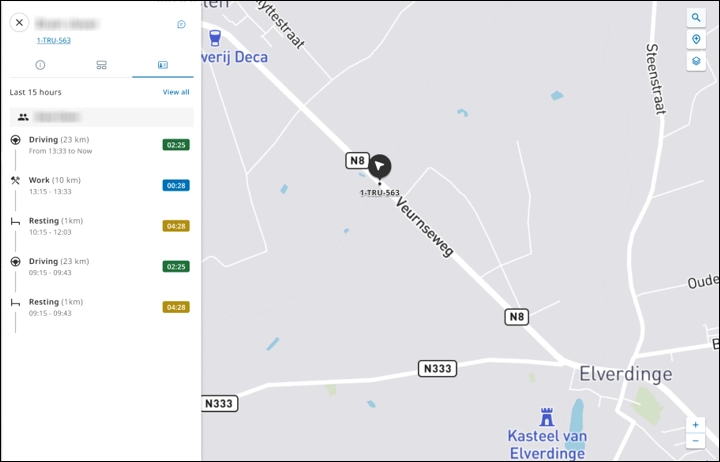
View Tachograph Information #
A dispatcher can view a driver’s activity status recorded by a tachograph irrespective of whether the tachograph is connected.
In the Map module > click Tacho (![]() ). The activities recorded by the tachograph during the last 24 hours are listed.
). The activities recorded by the tachograph during the last 24 hours are listed.
Click View all to monitor all the activities recorded by the tachograph during the last 24 hours.
Manage Places #
Create a Place #
You can use the Create a place function to add important places to the track and trace module.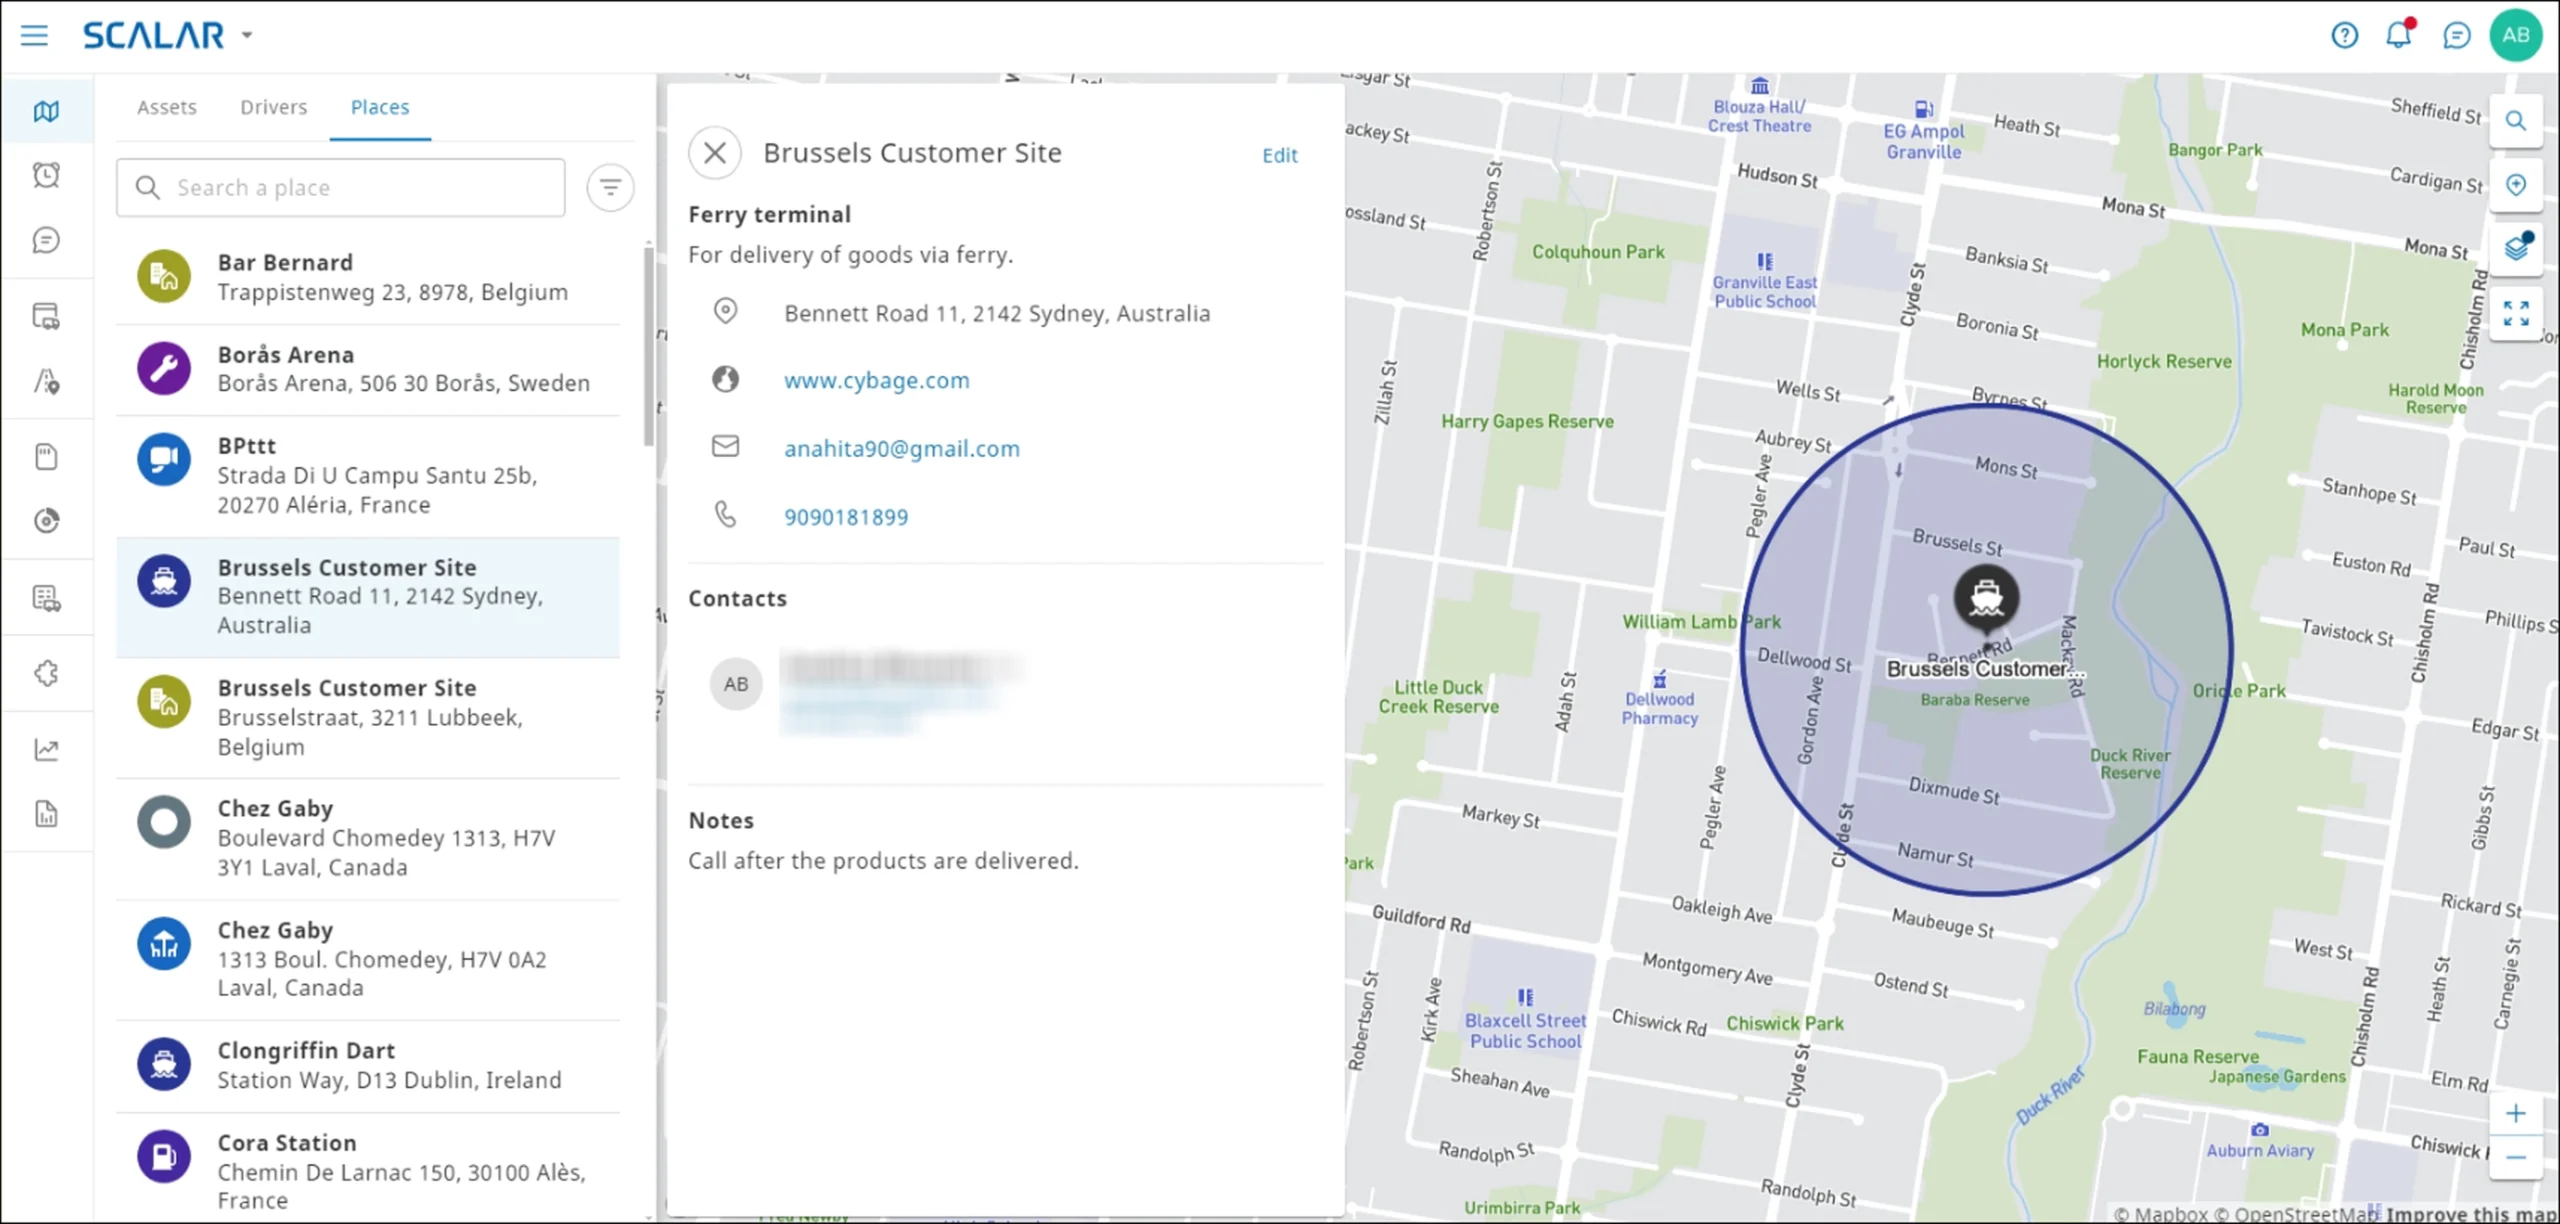
- In the Map module > click Create a place
 .
. - Move Select
 and click the required location on the map. The Add place dialog is displayed.
 - Enter a name in the Name box, select one of the predefined site types from the Type list, and then click Save. The place details page is displayed.
- Click Satellite
 to view the map in satellite view.
 - Use Scale
 to zoom in and zoom out.
 - Enter details in the Place details, Geofencing, Contact, Notes, and Access
sections. - Click Save. The new place is added to the SCALAR platform.
Click Create a place ![]() again to cancel the action. You can also press the Esc key.
again to cancel the action. You can also press the Esc key.

| Place type | Icon | Description |
| Ferry terminal | Designated location for arrival, departure, and load boarding for ferries | |
| Black spot/dangerous area | High risk prone area | |
| Customer site | Customer specified location for service provider | |
| Driver home address | Home address of the designated driver | |
| Industrial zone | Industrial development area | |
| Maintenance/service point | Service or garage centers for vehicles | |
| Open parking area | Uncovered parking areas near the site or for halts | |
| Other | Customized sites | |
| Petrol station | Petrol stations for the vehicles | |
| Rest area | Rest areas for drivers | |
| Secure parking | Parking with security aminity |
| Place type | Icon | Description |
| Ferry terminal | Designated location for arrival, departure, and load boarding for ferries | |
| Black spot/dangerous area | High risk prone area | |
| Customer site | Customer specified location for service provider | |
| Driver home address | Home address of the designated driver | |
| Industrial zone | Industrial development area | |
| Maintenance/service point | Service or garage centers for vehicles | |
| Open parking area | Uncovered parking areas near the site or for halts | |
| Other | Customized sites | |
| Gas station | Gas stations for the vehicles | |
| Rest area | Rest areas for drivers | |
| Secure parking | Parking with security aminity |
On the map view, you can:

| Section | Description |
| Place details | Information can be modified in the Location, Name, Type, and Description fields. |
| Geofencing | The area radius or surface can be modified using circular or polygon geofencing shapes. Alarms can be configured to set trigger parameters. |
| Contact | The contact information of drivers and contact persons can be added. |
| Notes | An optional note for the driver can be added. |
| Access | Access permission for a site can be assigned to all users or specific users and teams. |
Configure Place Details #
The location, name, and description sections for a site are filled-in, though you can modify these details in the Location, Description, Geofencing, Alarm configuration, Contact, Notes, and Access sections.
Location #
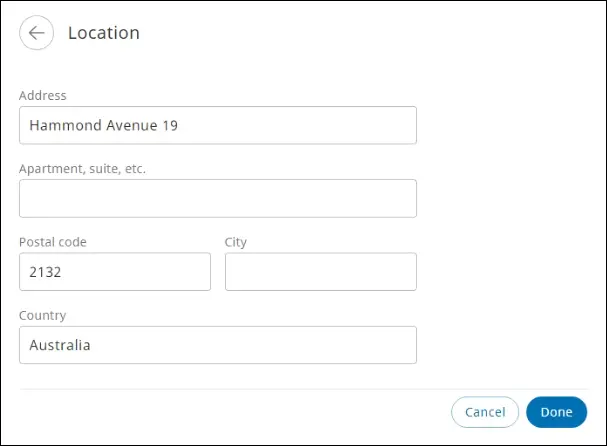
When you create a place, the address is automatically filled in. You can adjust the address if needed, but the pin on the map will remain at the same location.
- In the Place details section > click Location. The Location page is displayed
- Modify the required information, and then click Done.

Description #
You can add an optional description to the place.
Geofencing #
You can modify the area and alarm details.
Edit Area #
You can modify the surface or area radius of a geozone.
In the Geofencing section >click Area and alarm. The Geofence page is displayed.
Circular #
A default circular Geofence area with a radius of 300 m is set when you create a place.
On the map, press and drag the geofence circle, or adjust the radius manually in the Set radius box, and then click Done.
Circular geozones can have a maximum radius of 5500m.
Polygon #
You can select a Polygon geofence shape to create a differently shaped area.
- From the Geofence area section, select Polygon, and then click the required points on the map to create the desired shape.
- Click the first point again to close the polygon shape.
- Click Done. The polygon geofencing is created.

Polygon geozones can have a maximum surface of 10 km².
Alarm configuration #
You can configure an alarm when an asset enters or leaves a place.
- On the Geofence page > and then click Alarm configuration. The Alarm page is displayed.
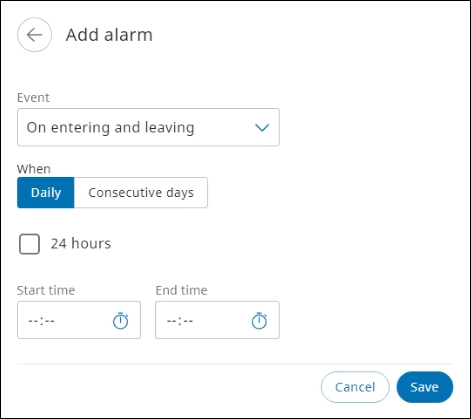
- Click Add Alarm. The Add alarm page is displayed.
- Enter the required information in the available fields, and then click Save. The new alarm is added.
- You cannot save an alarm if you do not select the time range.
- If you select the 24 hours checkbox, the Start time and End time boxes are disabled. For more information, see how to add multiple alarms.
Contact #
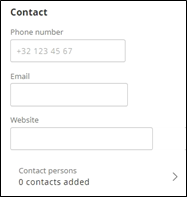
You can add contact information of the driver and specific contact persons associated with the place.
To add the contact details of a driver, in the Contact section, enter the required information in the Phone number, Email, and Website boxes.
Add Contact Person #
- Click Contact persons. The Contact persons page is displayed.
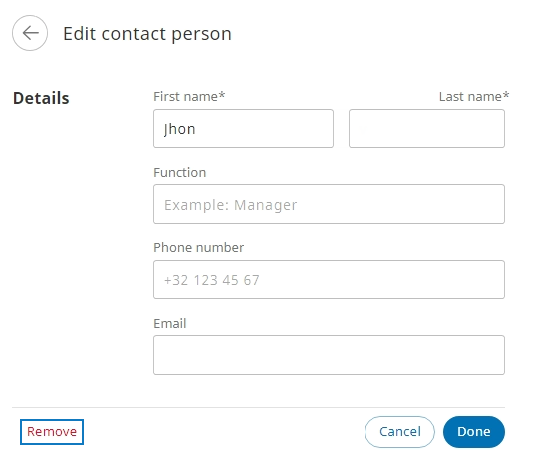
- Click Add new contact person. The Add a contact person page is displayed.
- Enter the required information in the boxes, and then click Done. The contact person’s details are saved.

- The fields marked with * are mandatory.
- To add a new contact, on the Contact persons page, click Add a contact person. You can add a maximum of 10 contacts persons.
Remove a Contact #
If a contact record is not required anymore, you can remove it to keep records up-to-date.
- In the Contact section > click Contact persons. The Contact persons page is displayed.
- Select the required contact from the list. The Edit contact person page is displayed.
- Click Remove . The contact is removed from the list.
Notes #
You can add specific instructions if needed.
In the Notes section, enter the required message.
Access #
You can define who will be able to see your place on the map. A place is automatically assigned to the user that creates it. Therefore, you see one user assigned.

Assign access #
- In the Access section >click Assigned teams and users. The Assigned teams and users page is displayed.
- Select one of the options:
- All Users have access: organization-wide access
- Only specific users and/or teams have access, and then enter the name or email address of the user or team name. The user or team name is displayed in the Assigned teams and users section.
- Click Done. The access for a specific site is assigned.
- To search a user or team, you can enter the name of the user or email address or the name of the team. Enter at least three characters to start a search operation.
- The changes made can take up to 5 minutes to reflect in the app.
Remove Assigned Access #
If a user or team is not required to monitor a site anymore, you can remove access permission.
- In the Access section >click Assigned teams and users. The Assigned teams and users page is displayed.
- From the Assigned teams and users list, go to the required user
,and click Close . The assigned user or team access for the specific site is removed.

Edit a Place #
You can modify the location, area, contact information and access details to update the information related to a site.
- In the Map module > click the Places tab, and then select the required place from the list. The place information pane is displayed.
- Click Edit. The place details page is displayed.
- Modify details in the Place details, Geofencing, Contact, Notes, and Access sections.
- Click Save. The place is modified in the SCALAR platform.
Remove a Place #
Remove a site from the track and trace records permanently if not required anymore.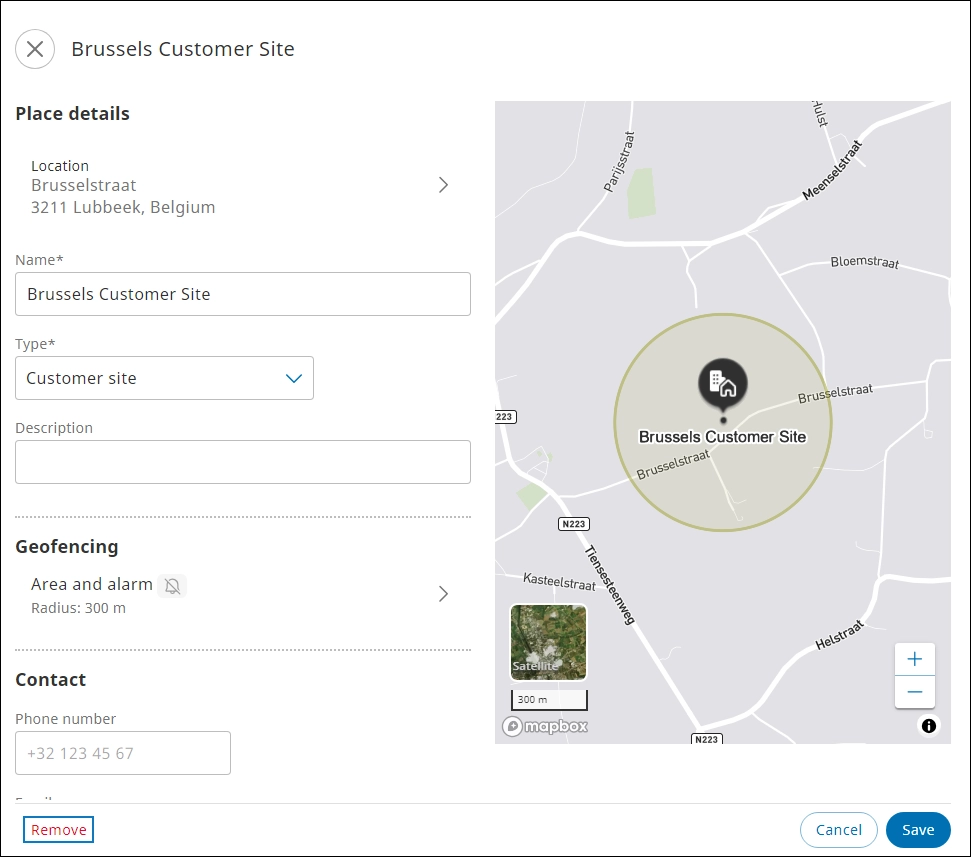
- In the Map module> click the Places tab, and then select the required place from the list. The place information pane is displayed.
- Click Edit. The place details page is displayed.
- Click Remove. The Remove place dialog is displayed.
- To confirm the action, click Remove. The place is removed permanently from the SCALAR platform.


