Group management is an optional functionality to efficiently organize company resources (assets, places, and drivers) into specific resource groups (asset, place, and driver groups).
Groups and subgroups (up to 10 levels) can be created by administrators only. An administrator can create (sub)groups and assign resources to the (sub)groups to organize the organization’s workforce in SCALAR:
- Use groups to organize your resources:
- Create asset groups/subgroups and assign your assets
- Create place groups/subgroups and assign your places
- Create driver groups/subgroups and assign your drivers
- Assign asset/place/driver groups to a team
- Assign teams to users
- The users can now access the assets, places, and drivers in the resource groups that are part of their assigned team.

Administrator actions initiated in the Group management module are tracked in the Audit Logs. The data retention period is 180 days.
IMPORTANT
- A resource can only be added to its specific resource group type: e.g. a place is added to place (sub)groups.
- A resource can be added to multiple resource groups: e.g. a place can be added to a parent place group and a place subgroup.
- Access to a parent group automatically assigns access to its subgroups.
- Restrictions:
- Max. 250 teams can be created in an organization
- Max. 25 teams can be assigned to a user
- Max. 100 groups and subgroups can be assigned to a team
- Max. 2000 resource groups and subgroups of any group type (asset, place, and driver groups) can be created in an organization
- Max. 5000 resources can be assigned to any resource group or subgroup
- Hence, a user can follow a maximum of 25 teams x 100 groups x 5000 of each resource type (assets, places, drivers).
Create group #
This section outlines group creation along with its defined validations.
- In the Admin module > click Groups
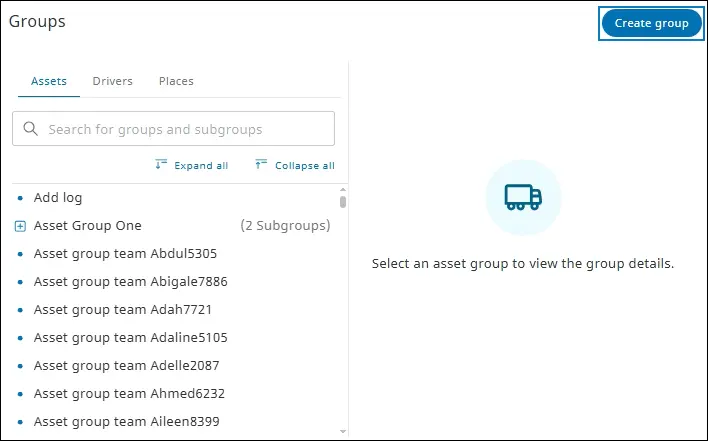
. The Groups page is displayed listing the groups and subgroups created.
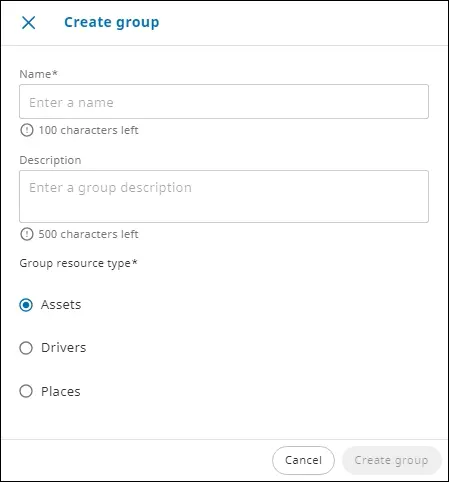
- Click Create group. The Create group dialog is displayed.
- In the Name box, enter a name for the group, and in the Description box, enter additional information that can help identify the group and purpose of formation, for example, a group can be formed based on a region, such as Brussels.
- In the Group resource type section, select the resource type for which you want to create a group, and then click Create group. An acknowledgment message is displayed confirming creation of a group. The Group details section is displayed.
The name of a group and subgroup must be uniquely defined by an organization. For example, if Level 1 is assigned as the group or subgroup name within an organization, this name cannot be reused in the same organization.
By default, the Assets option is selected as the resource type. You can select the Drivers or Places option to create a group for drivers or places respectively from the same dialog.
Edit Group details #
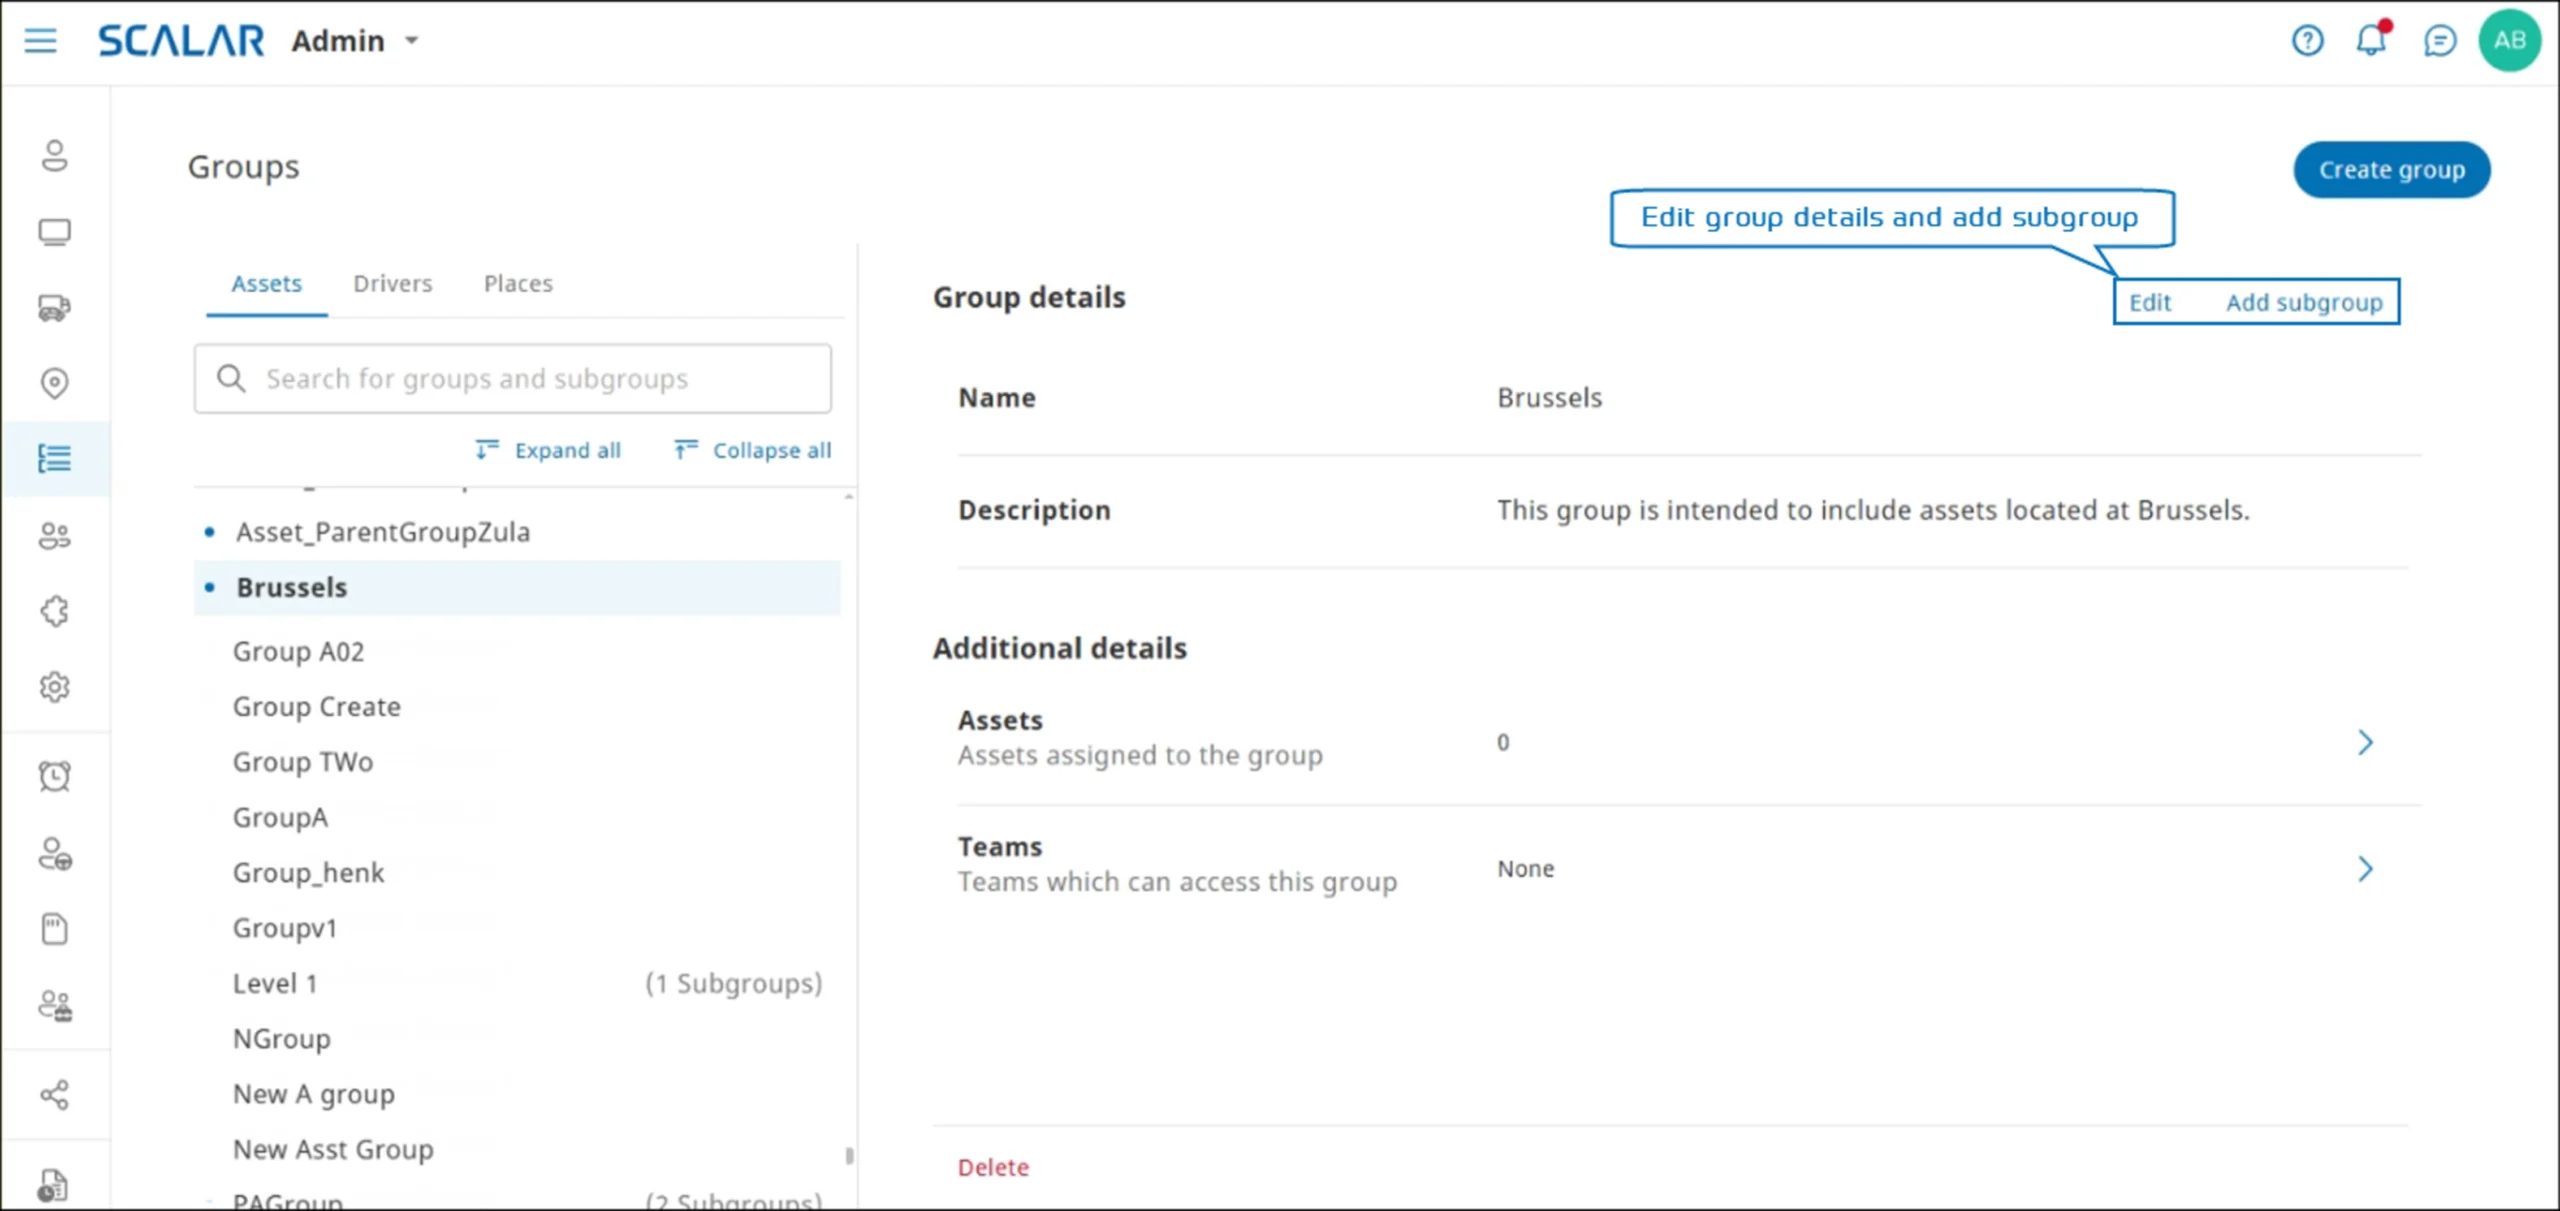
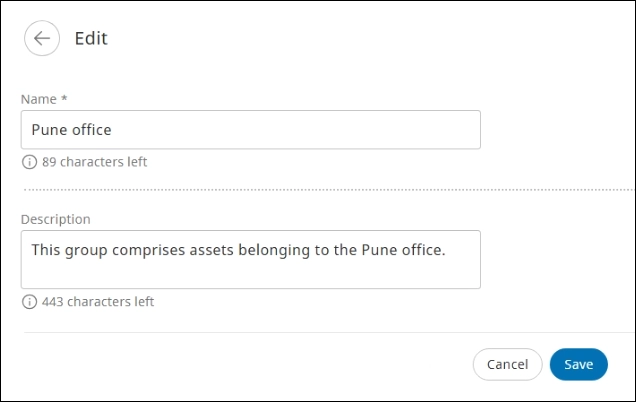
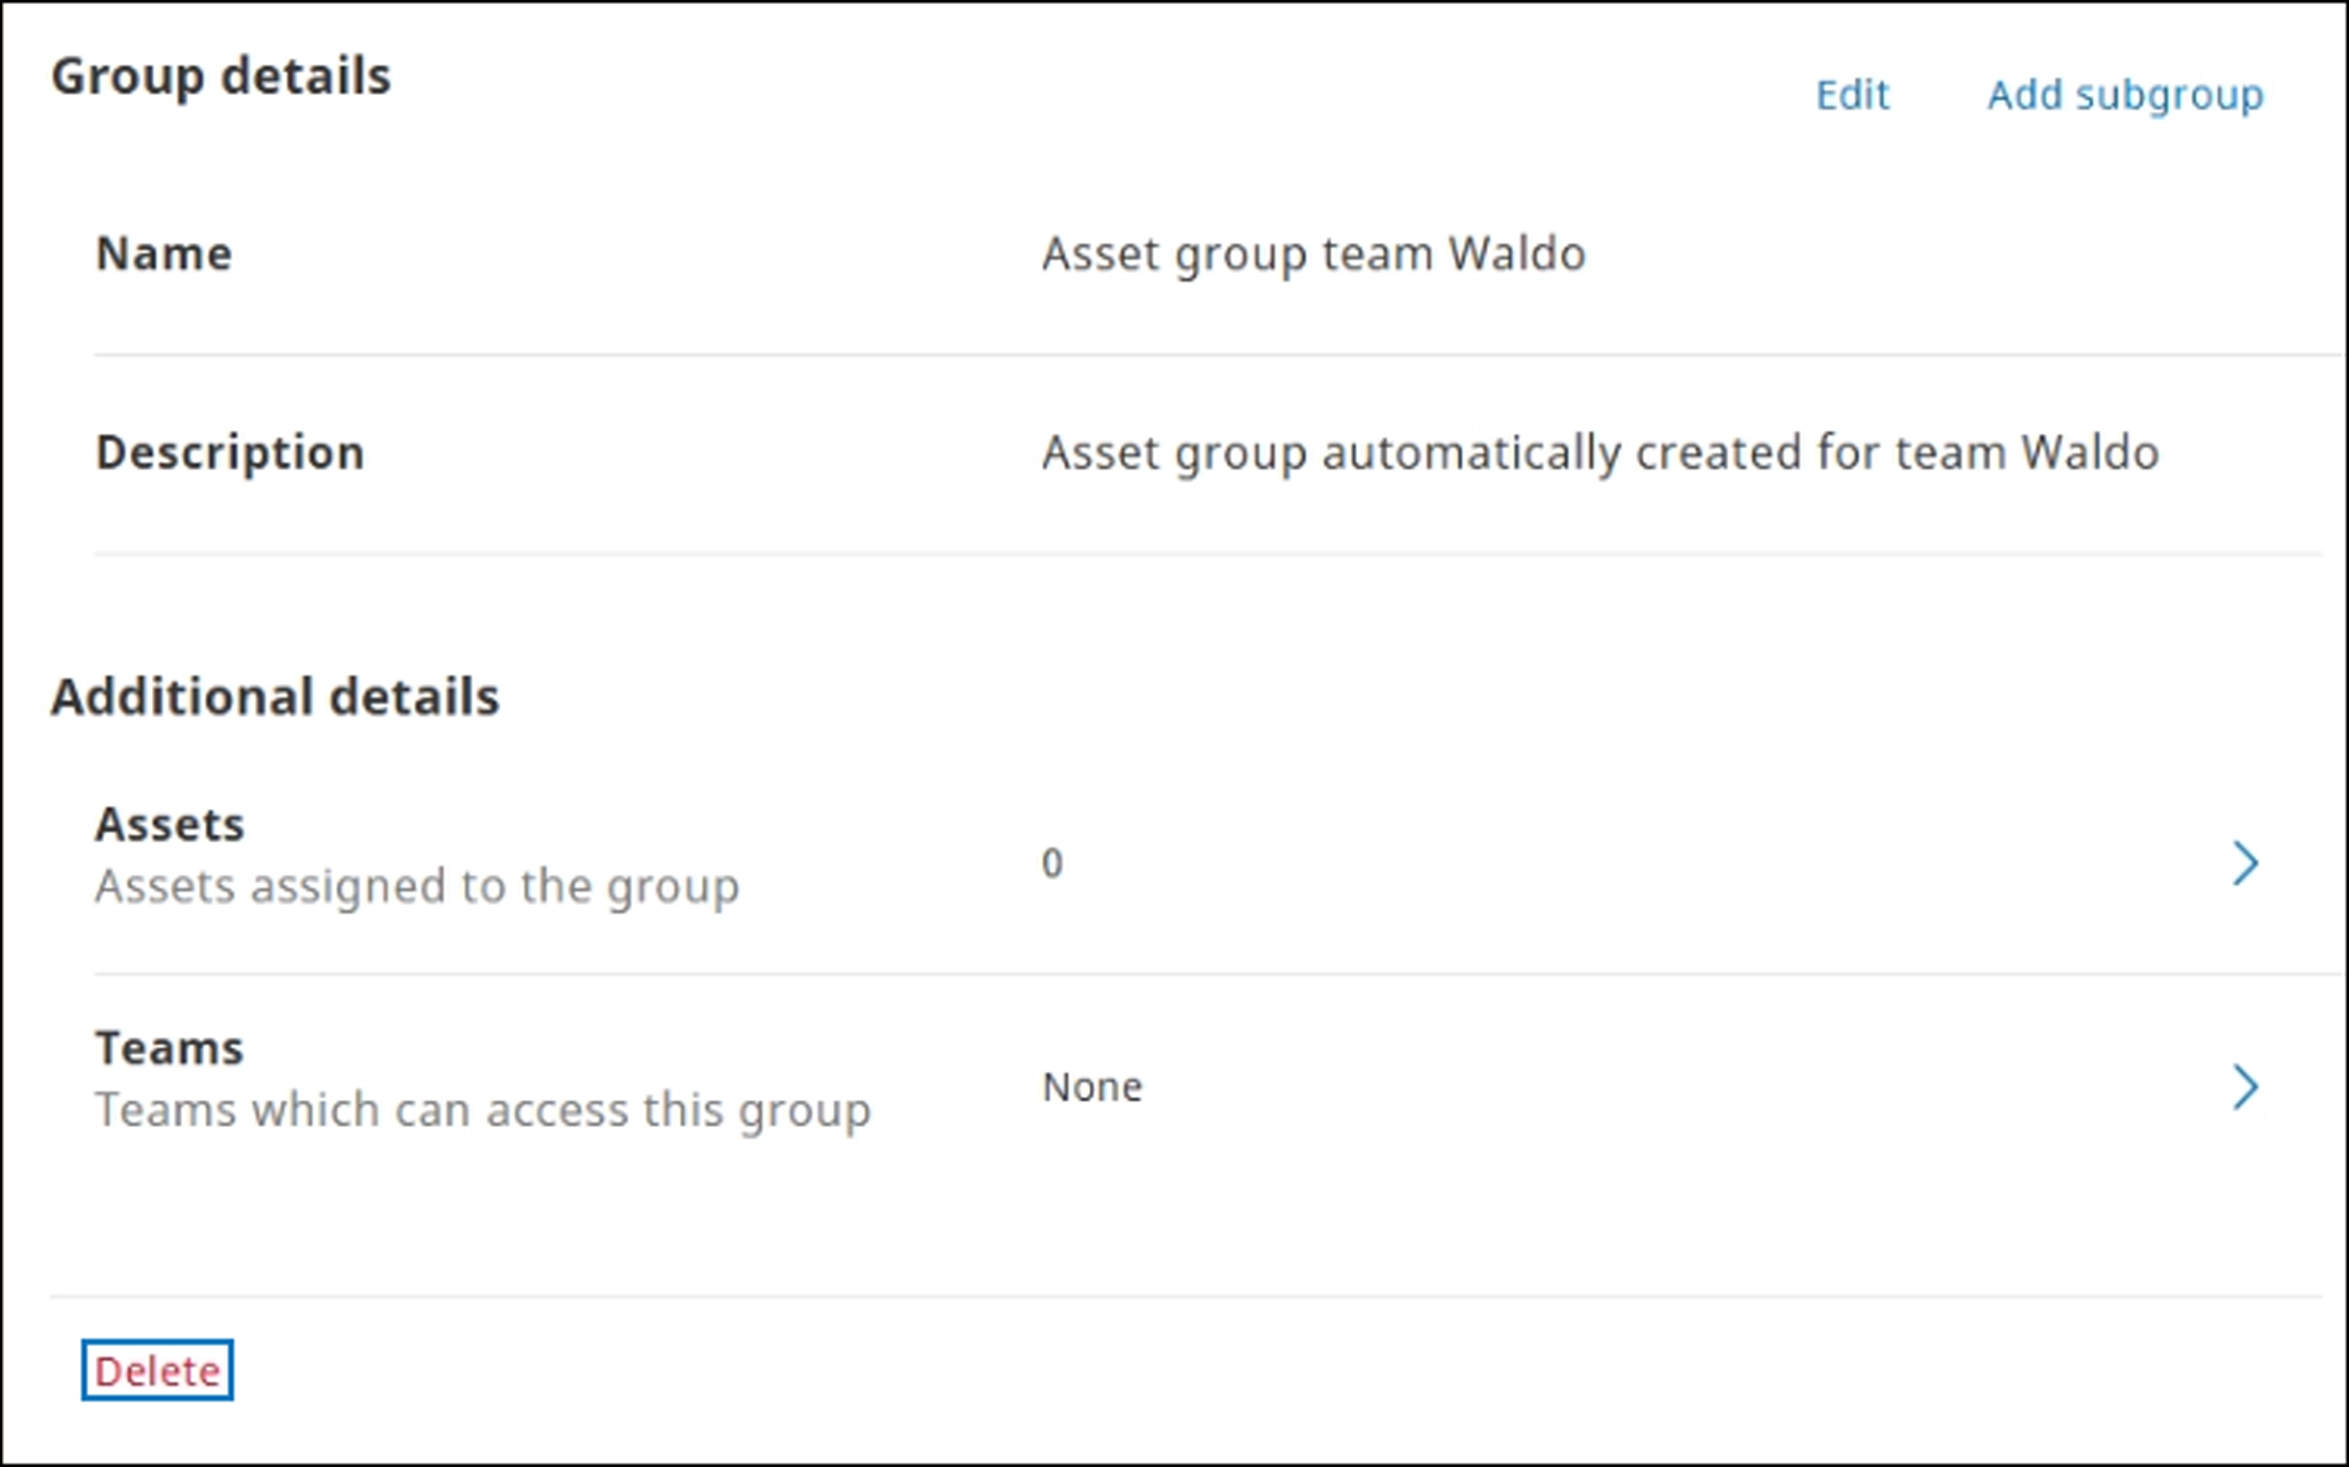
From the Group details section, you can edit group details, such as name and description.
- In the Admin module > click Groups
. The Groups page is displayed.
- Select the required group from the resource type list: Assets, Drivers, or Places tab. The Group details section is displayed.
- Click Edit. The Edit page is displayed.
- Modify the required information in the Name and Description boxes, and then click Save. The information is updated.
Add subgroup #
You can add subgroups within a group. The group hierarchy can extend up to 10 levels.
- In the Admin module > click Groups
. The Groups page is displayed.
- Select the required group from the resource type list: Assets, Drivers, or Places tab. The Group details section is displayed.
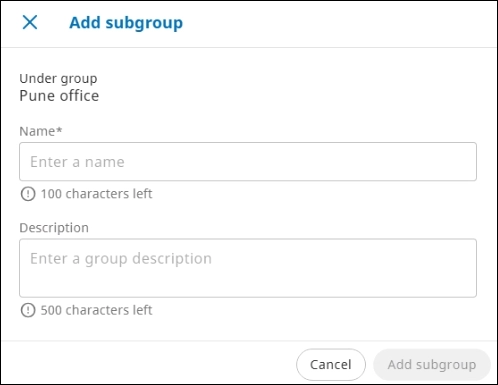
- Click Add subgroup. The Add subgroup dialog is displayed.
- In the Name box, enter a name for the group, in the Description box, enter additional information that can help identify the subgroup and purpose of group formation, and then click Add subgroup. The subgroup is created under the selected group.
Delete Group #
You can delete a group from the Groups page if it is no longer required. Only those groups and subgroups that are not assigned to any resources can be deleted.
Groups and subgroups must be deleted in a hierarchical order, starting from the lowest level. For example, if a parent group (Level 1) contains a subgroup (Level 2), which in turn has a subgroup (Level 3), you must first delete Level 3, then Level 2, before deleting Level 1.
- In the Admin module > click Groups
. The Groups page is displayed.
- Select the required group from the resource type list: Assets, Drivers, or Places tab. The Group details section is displayed.
- Click Delete. The Delete group dialog is displayed.
- Click Delete to confirm the action. The group is deleted.
View resource groups #
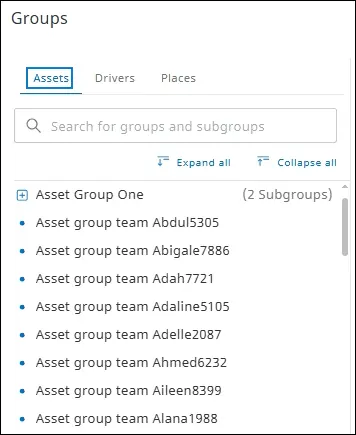
On the Groups page, you can view groups and subgroups created for assets, drivers, and places.
- In the Admin module > click Groups
. The Groups page is displayed containing the following tabs: Assets, Drivers, and Places.
- Click the required resource-specific tab. In this example, we click the Assets tab. The asset groups are listed.
- To view groups created for drivers and places, click the Drivers and Places tabs respectively.
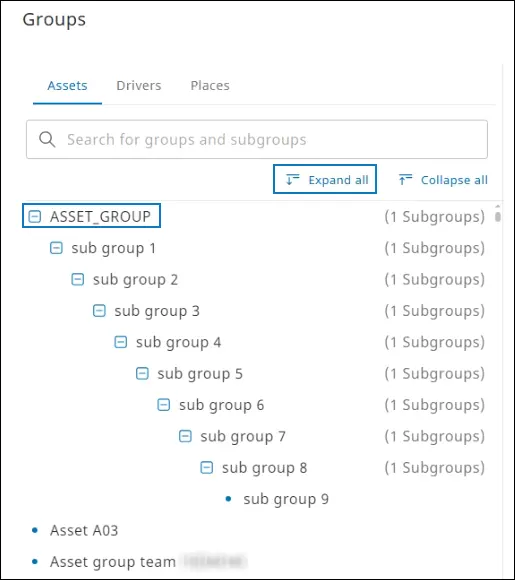
- To view all the subgroups created under a group, click Expand all for the selected group. All the subgroups within the group are listed. In this example, the Asset_Group group is expanded to reveal all the subgroups.
- Click Collapse all to minimise the groups.
Search group and subgroup #
On the Groups page, you can search for groups and subgroups by using the Search feature.
- In the Admin module > click Groups
. The Groups page is displayed.
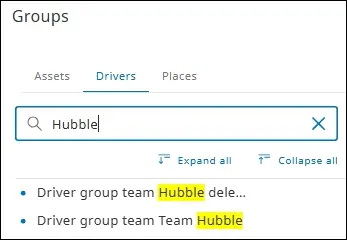
- Click the required resource-specific tab: Assets, Drivers, or Places. In the Search for group and subgroup box, enter the name of the required group or subgroup. The records matching the search criteria are displayed.
- On the Assets tab, you can search based on fleet name or category.
- On the Drivers tab, you can search based on driver name or status.
- On the Places tab, you can search based on place name or type.
Assign resources to a group #
You can assign resources, such as assets, drivers, and places to a group.
- In the Admin module > click Groups
. The Groups page is displayed.
- Click the required resource-specific tab: Assets, Drivers, or Places. In this example, we will be assigning an asset to a group.
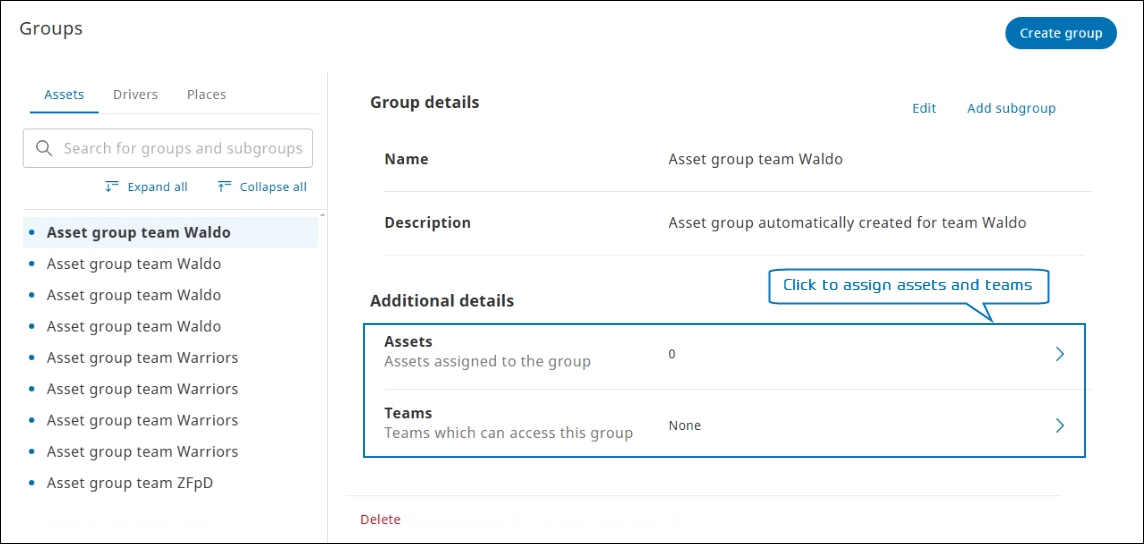
- Select the required group from the resource type list. The Group details section is displayed.
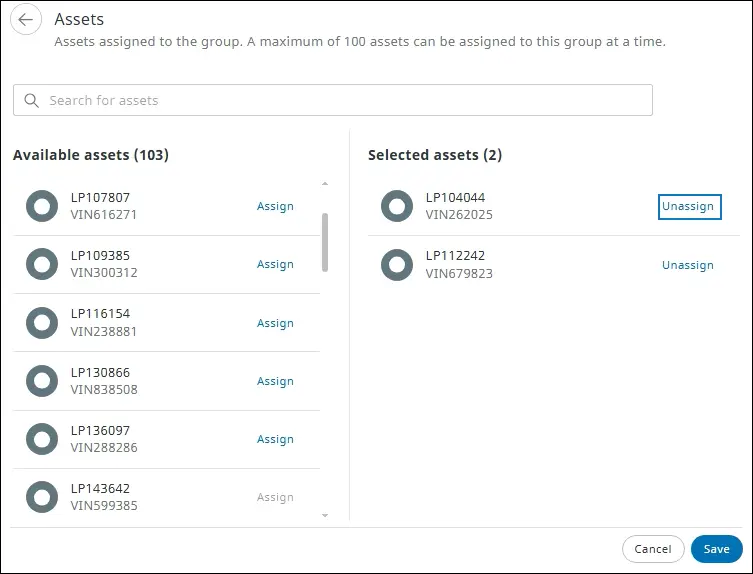
- In the Additional details section, click Assets. The Assets page is displayed.
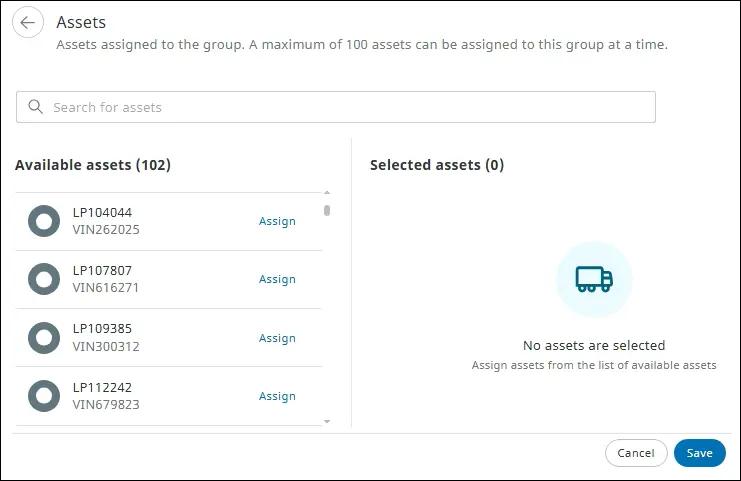
- The assets are listed in the Available assets list. To assign an asset to the group, select the required assets from the Available assets list. Alternatively, in the Search for assets box, enter the name of the required asset, and then press Enter.
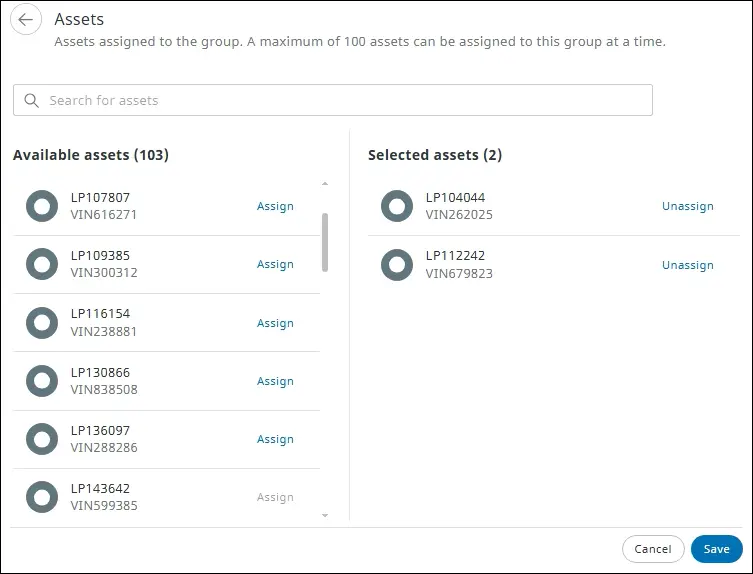
- Click Assign next to the asset name. The asset is listed in the Selected assets lists.
- Click Save. The asset is assigned to the group.
Maximum 100 assets can be assigned to a group at a time.
Unassign resources from a group #
You can unassign resources such as assets, drivers, and places from a group if they are no longer required to be followed. In this example, we are unassigning an asset from a group.
- On the Assets page, in the Selected assets section, click Unassign next to the asset name. The asset is unassigned. Click Save to permanently unassign the asset from the group.
Assign teams that can access resource group #
You can assign teams who are required to follow assets, drivers, or places to access the required resource group.
- In the Admin module > click Groups
. The Groups page is displayed.
- Click the required resource-specific tab: Assets, Drivers, or Places. In this example, we will be assigning an asset group to the team.
- On the resource-specific tab, select the required group from the resource type list. The Group details section is displayed.
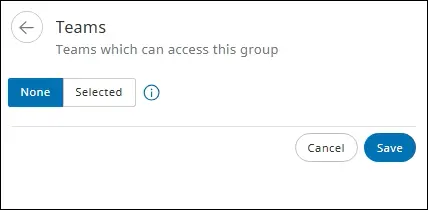
- In the Additional details section, click Teams. The Teams page is displayed.
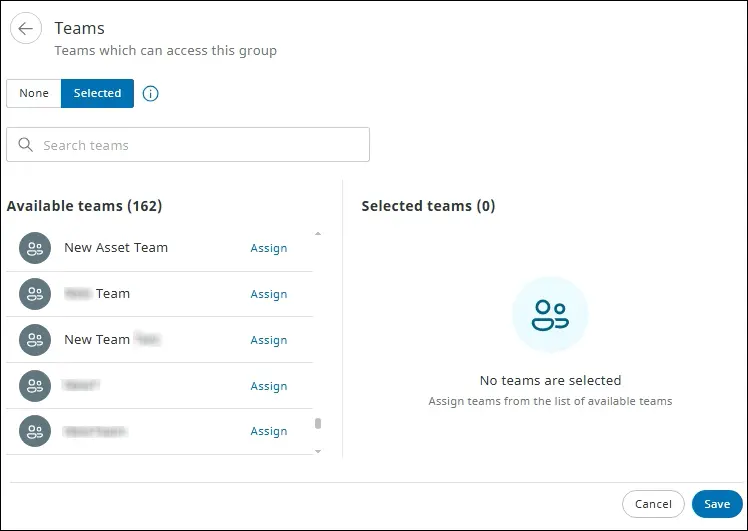
- Click Selected to select the teams that can access this group. The Teams page is displayed.
- The available teams are listed in the Available teams list. Select the team to assign to the group.
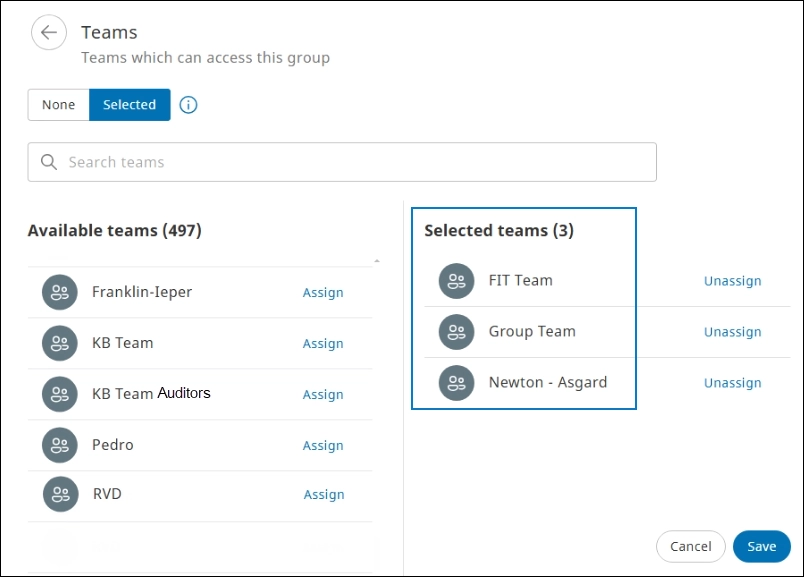
- Next to the team name, click Assign. The team is listed in the Selected teams lists.
- Click Save. The selected team will now be able to access the group.
To locate a specific team, enter the required team name in the Search teams box.
Unassign team from accessing a group #
You can unassign teams from accessing a group if they are no longer required to follow assets, drivers, or places.
- On the Teams page, in the Selected teams section, next to the team name, click Unassign. The team is unassigned. Click Save to permanently unassign the team from accessing the group.
