

Place #
Places are areas of interest created and followed by transport companies (dispatchers) from the Map view. From the Map module, you can manage places, geofences, and alarms that are triggered when an asset enters or leaves a site.
Place Group #
Related places can be organized into place groups, which can be followed by the assigned users from the Map view.
Only an administrator can create and edit place groups and subgroups.
In the Map module, on the Places tab, transport companies (dispatchers) can manage places—create and configure a place, create a geofence area, add contact information, add alarm configurations to track assets and drivers, and assign and unassign users and place groups from a place.
Create Place #
You can use the Create a place function to add important places to the track and trace module.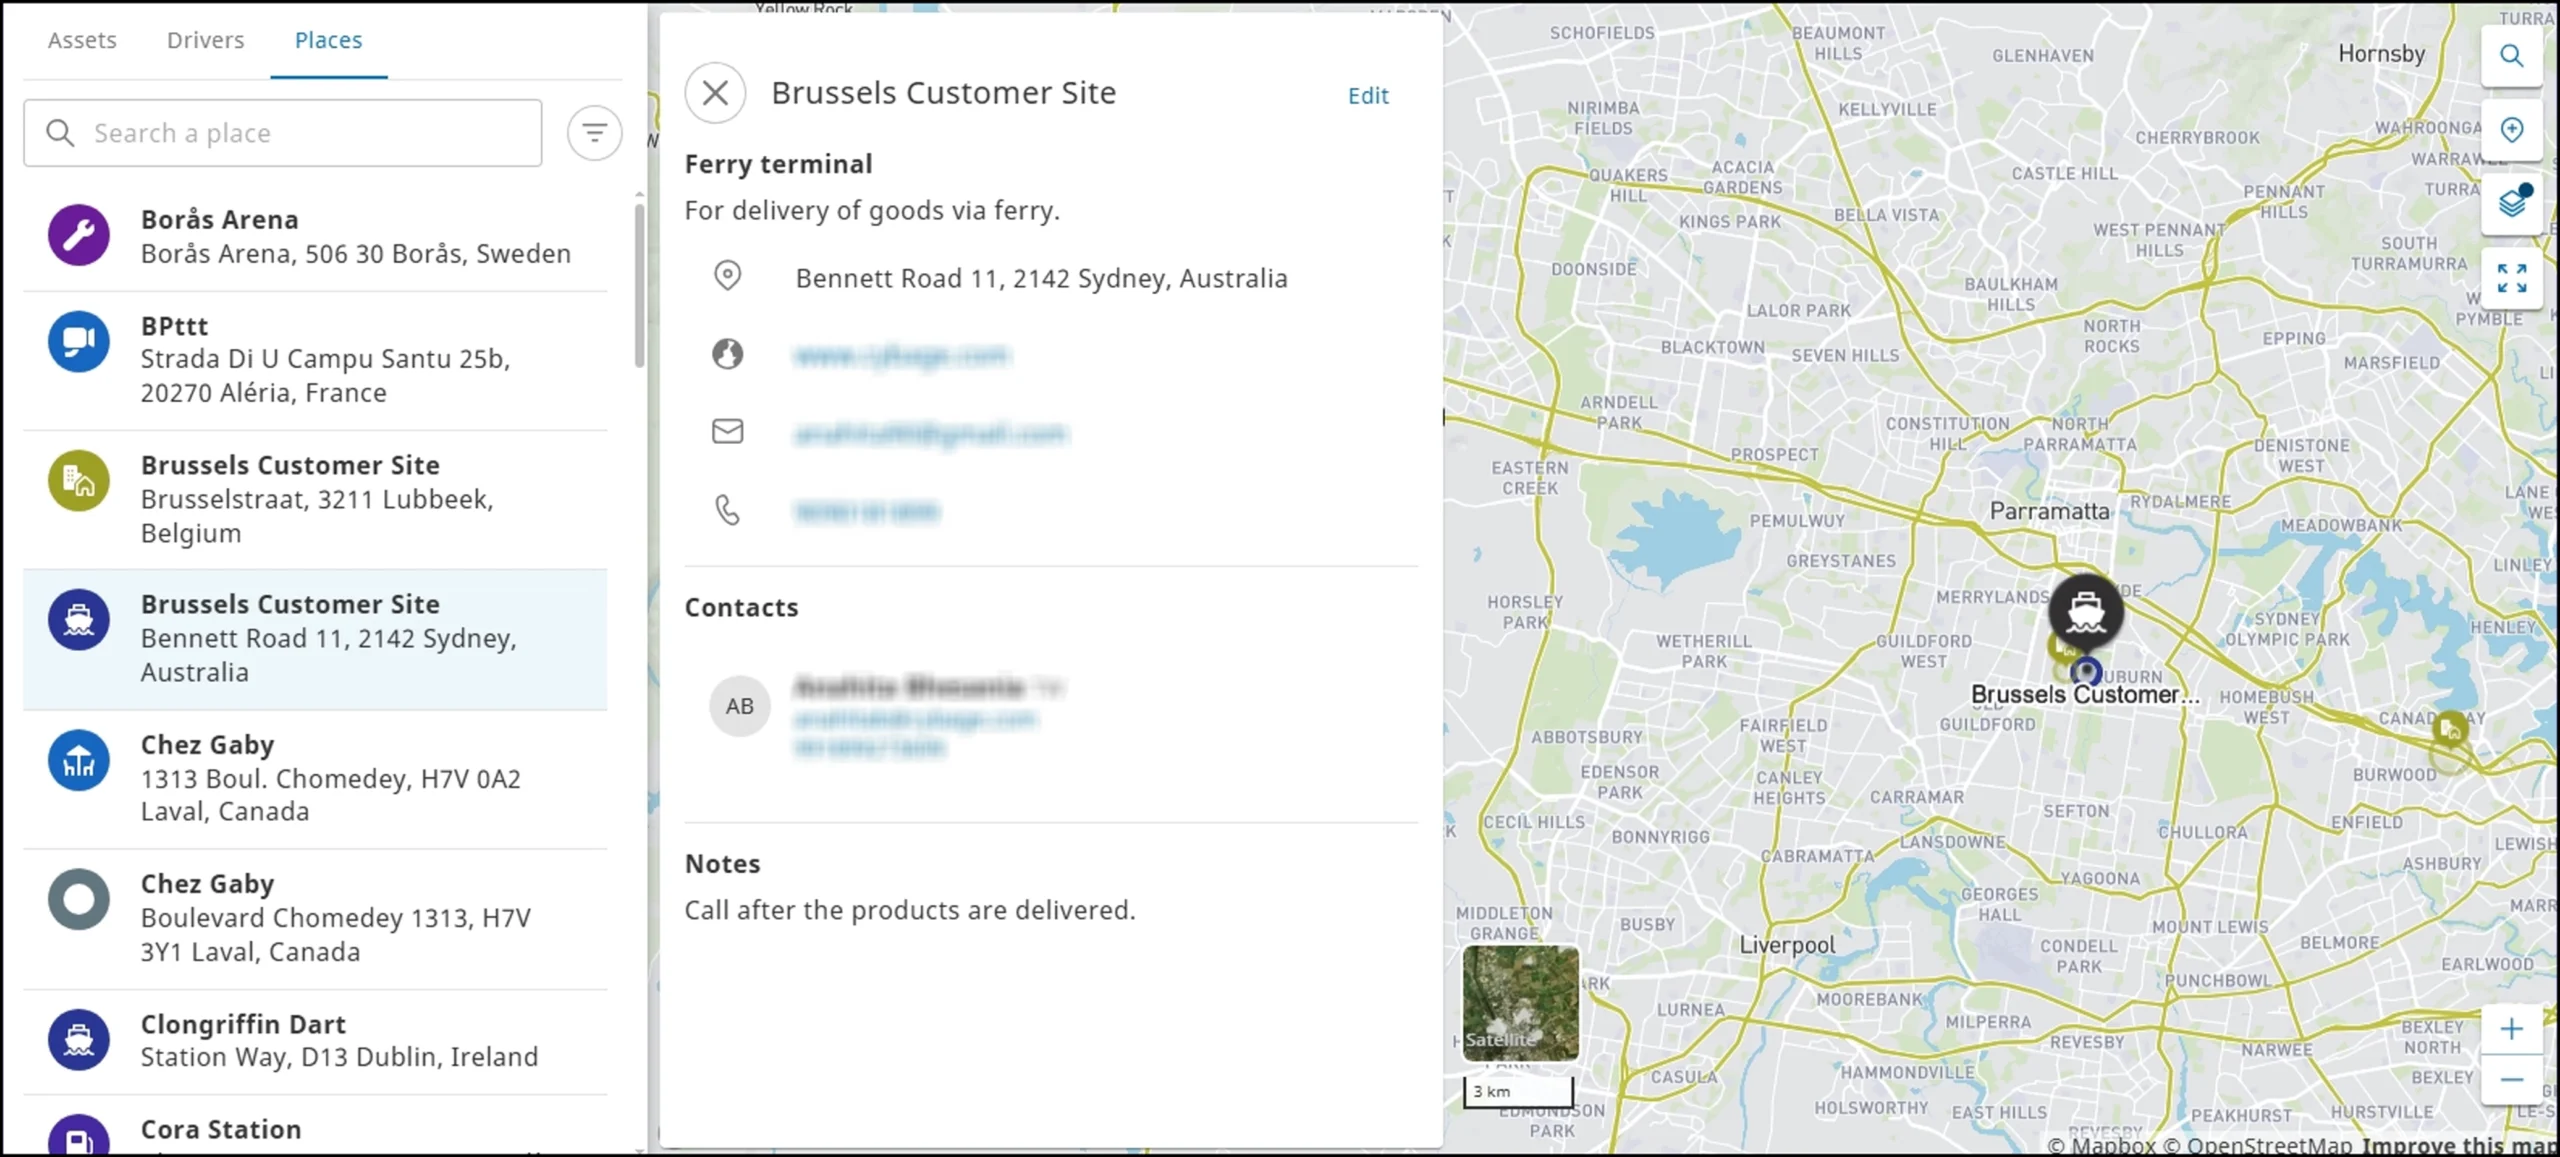
- In the Map module > click Create a place
 .
. - Move Select
 and click the required location on the map. The Add place dialog is displayed.
 - Enter a name in the Name box, select one of the predefined site types from the Type list, and then click Save. The place details page is displayed.
- Click Satellite
 to view the map in satellite view.
 - Use Scale
 to zoom in and zoom out.
 - Enter details in the Place details, Geofencing, Contact, Notes, and Access sections.
- Click Save. The new place is added to the SCALAR platform.
Click Create a place ![]() again to cancel the action. You can also press the Esc key.
again to cancel the action. You can also press the Esc key.

| Place type | Icon | Description |
| Ferry terminal | Designated location for arrival, departure, and load boarding for ferries | |
| Black spot/dangerous area | High-risk-prone area | |
| Customer site | Customer specified location for service provider | |
| Driver home address | Home address of the designated driver | |
| Industrial zone | Industrial development area | |
| Maintenance/service point | Service or garage centers for vehicles | |
| Open parking area | Uncovered parking areas near the site or for halts | |
| Other | Customized sites | |
| Gas station | Gas stations for the vehicles | |
| Rest area | Rest areas for drivers | |
| Secure parking | Parking with security aminity |
On the map view, you can:

| Section | Description |
| Place details | Information can be modified in the Location, Name, Type, and Description fields. |
| Geofencing | The area radius or surface can be modified using circular or polygon geofencing shapes. Alarms can be configured to set trigger parameters. |
| Contact | The contact information of drivers and contact persons can be added. |
| Notes | An optional note for the driver can be added. |
| Access | Access permission for a site can be assigned to all users or specific users and teams. |
Configure Place Details #
The location, name, and description sections for a site are filled in automatically, but you can modify the details.
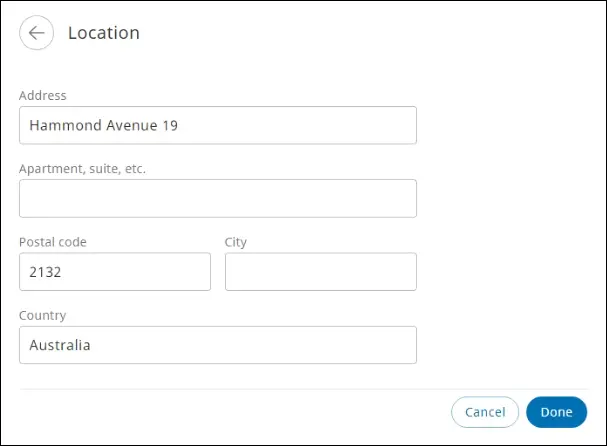
Location #
When you create a place, the address is automatically filled in. You can adjust the address if needed, but the pin on the map will remain at the same location.
- In the Place details section > click Location. The Location page is displayed.
- Modify the required information, and then click Done.

Description: You can add an optional description for the place.
Geofencing (optional) #
You can modify the area and alarm details.
Edit Area
You can modify the surface or radius of the area.
In the Geofencing section, click Area and alarm. The Geofence page is displayed.
Circular
Click Circle to create a circular geofence area and set the radius for the place.
On the map, press and drag the geofence circle, or adjust the radius manually in the Set radius box, and then click Save.
Circular geozones can have a maximum radius of 5500m.
Polygon
You can select a Polygon geofence shape to create a differently shaped area.
- From the Geofence area section, select Polygon, and click the required points on the map to create the desired shape.
- Click the first point again to close the polygon shape.
- Click Save. The polygon geofencing is created.

Polygon geozones can have a maximum surface of 10 km².
Add Alarm #
You can configure an alarm to be triggered when an asset enters or leaves a place.
- On the Geofence page, click Alarm configuration. The Alarm page is displayed.
- Click Add Alarm. The Add alarm page is displayed.
- Enter the required information in the available fields, and then click Save. The new alarm is added.
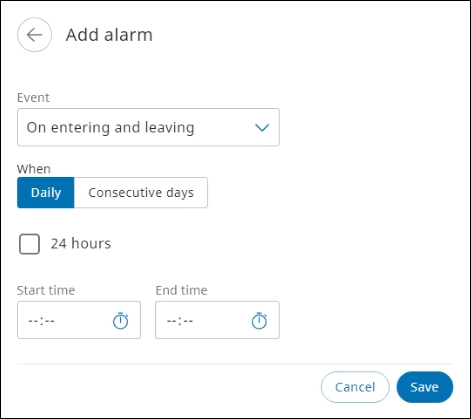
- You cannot save an alarm if you do not select the time range.
- If you select the 24 hours checkbox, the Start time and End time boxes are disabled.
- You can set multiple alarms in the alarm configuration.

Contact #
You can add contact information and specific contact persons associated with the place.
To add the contact details, in the Contact section, enter the required information in the Phone number, Email, and Website boxes.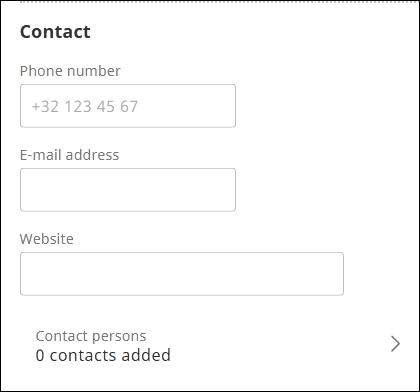
Add Contact Person #
- Click Contact persons. The Contact persons page is displayed.
- Click Add new contact person. The Add a contact person page is displayed.

- Enter the required information in the boxes, and then click Done. The contact person’s details are saved.
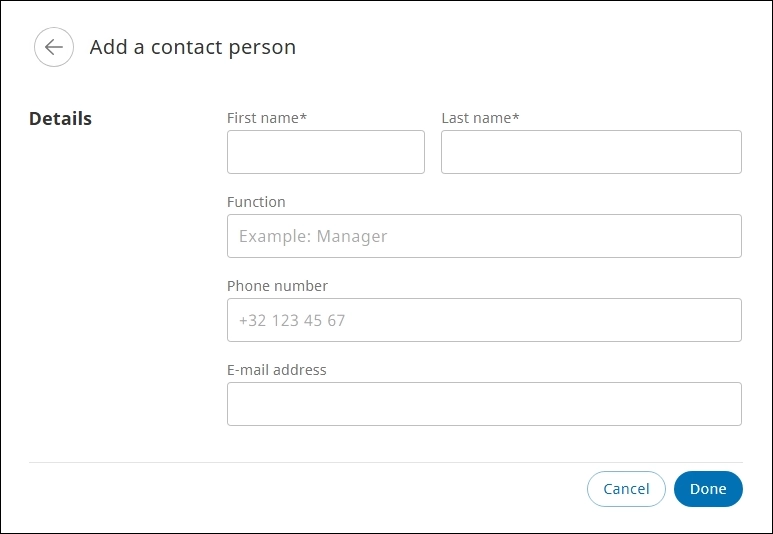
- The fields marked with * are mandatory.
- You can add a maximum of 10 contact persons.
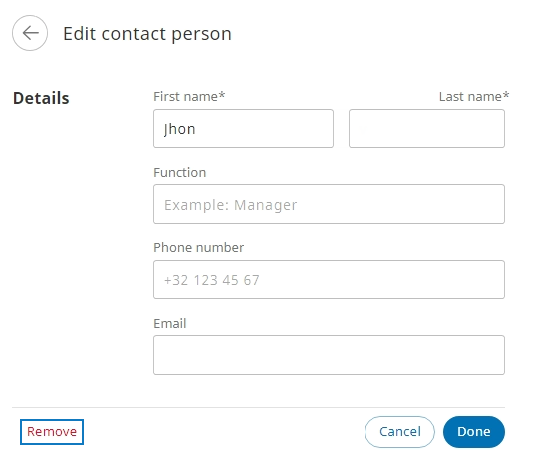
Remove Contact #
If a contact record is not required anymore, you can remove it to keep records up-to-date.
- In the Contact section > click Contact persons. The Contact persons page is displayed.
- Select the required contact from the list. The Edit contact person page is displayed.

- Click Remove . The contact is removed from the list.
Notes #
You can add specific instructions if needed.
In the Notes section, enter the required message.
Access #
You can define who has access to the place on the map. A place is automatically assigned to the user that creates it. Therefore, you see one user assigned upon creation.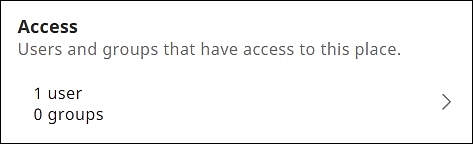
Assign access #
- In the Access section, click the Users and groups section. The Access page is displayed.

- Select one of the tabs:
- To restrict access to all places, click None.
- To assign access to this place to all users, click Everyone.
- To assign users and place groups to this place, click Selected. The Available users are listed on the Users tab. For more information on how to assign users and place groups to a place, see the next section.
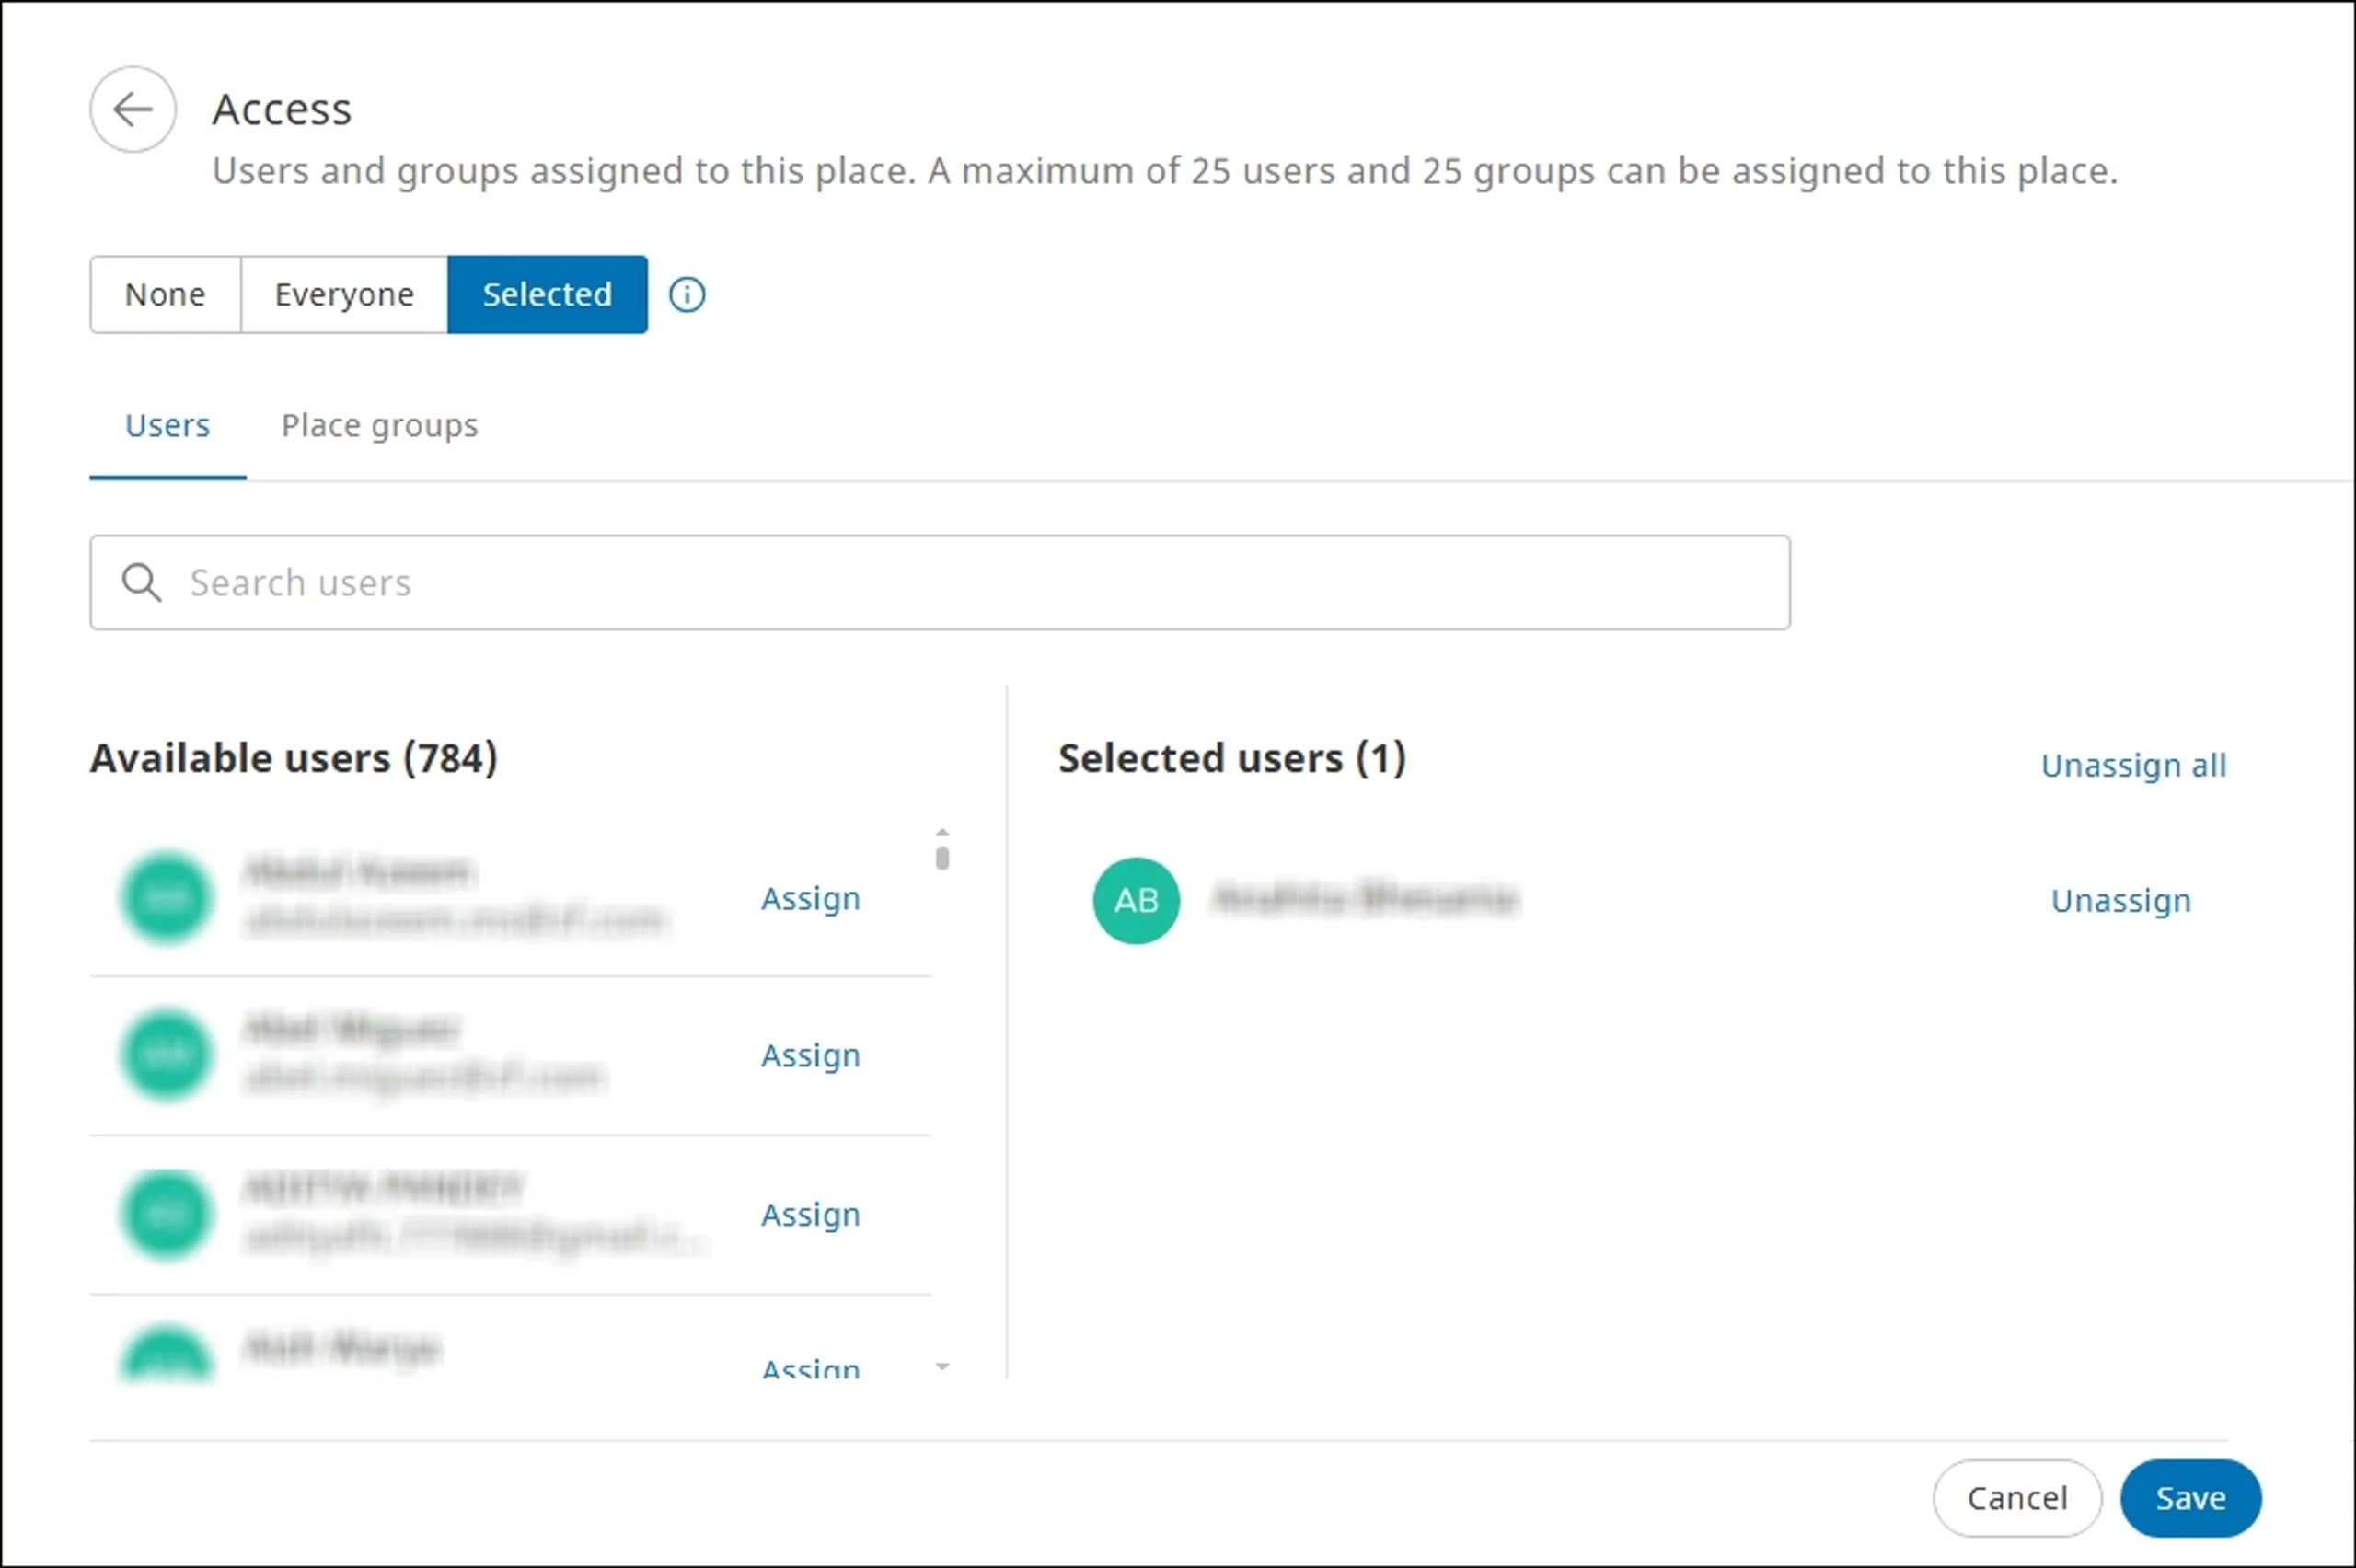
Assign users to a place #
- On the Access page, click the Users tab. The users are listed in the Available users list.
- To assign users to a place, select the required users from the Available users list.
- Click Assign next to the user name. The user is listed in the Selected users list.
- Click Save. The user is assigned to the place.
Alternatively, in the Search users box, enter the name of the required user, and then press Enter.
Assign place groups to the place #
- On the Access page, click the Place groups tab. The place groups are listed in the Available place groups list.
- To assign a place group to a place, select the required place group from the Available place group list.
- Click Assign next to the place group name. The place group is listed in the Selected place groups list.

- Click Save. The place group is assigned to the place.
Alternatively, in the Search for place groups box, enter the name of the required place group, and then press Enter.
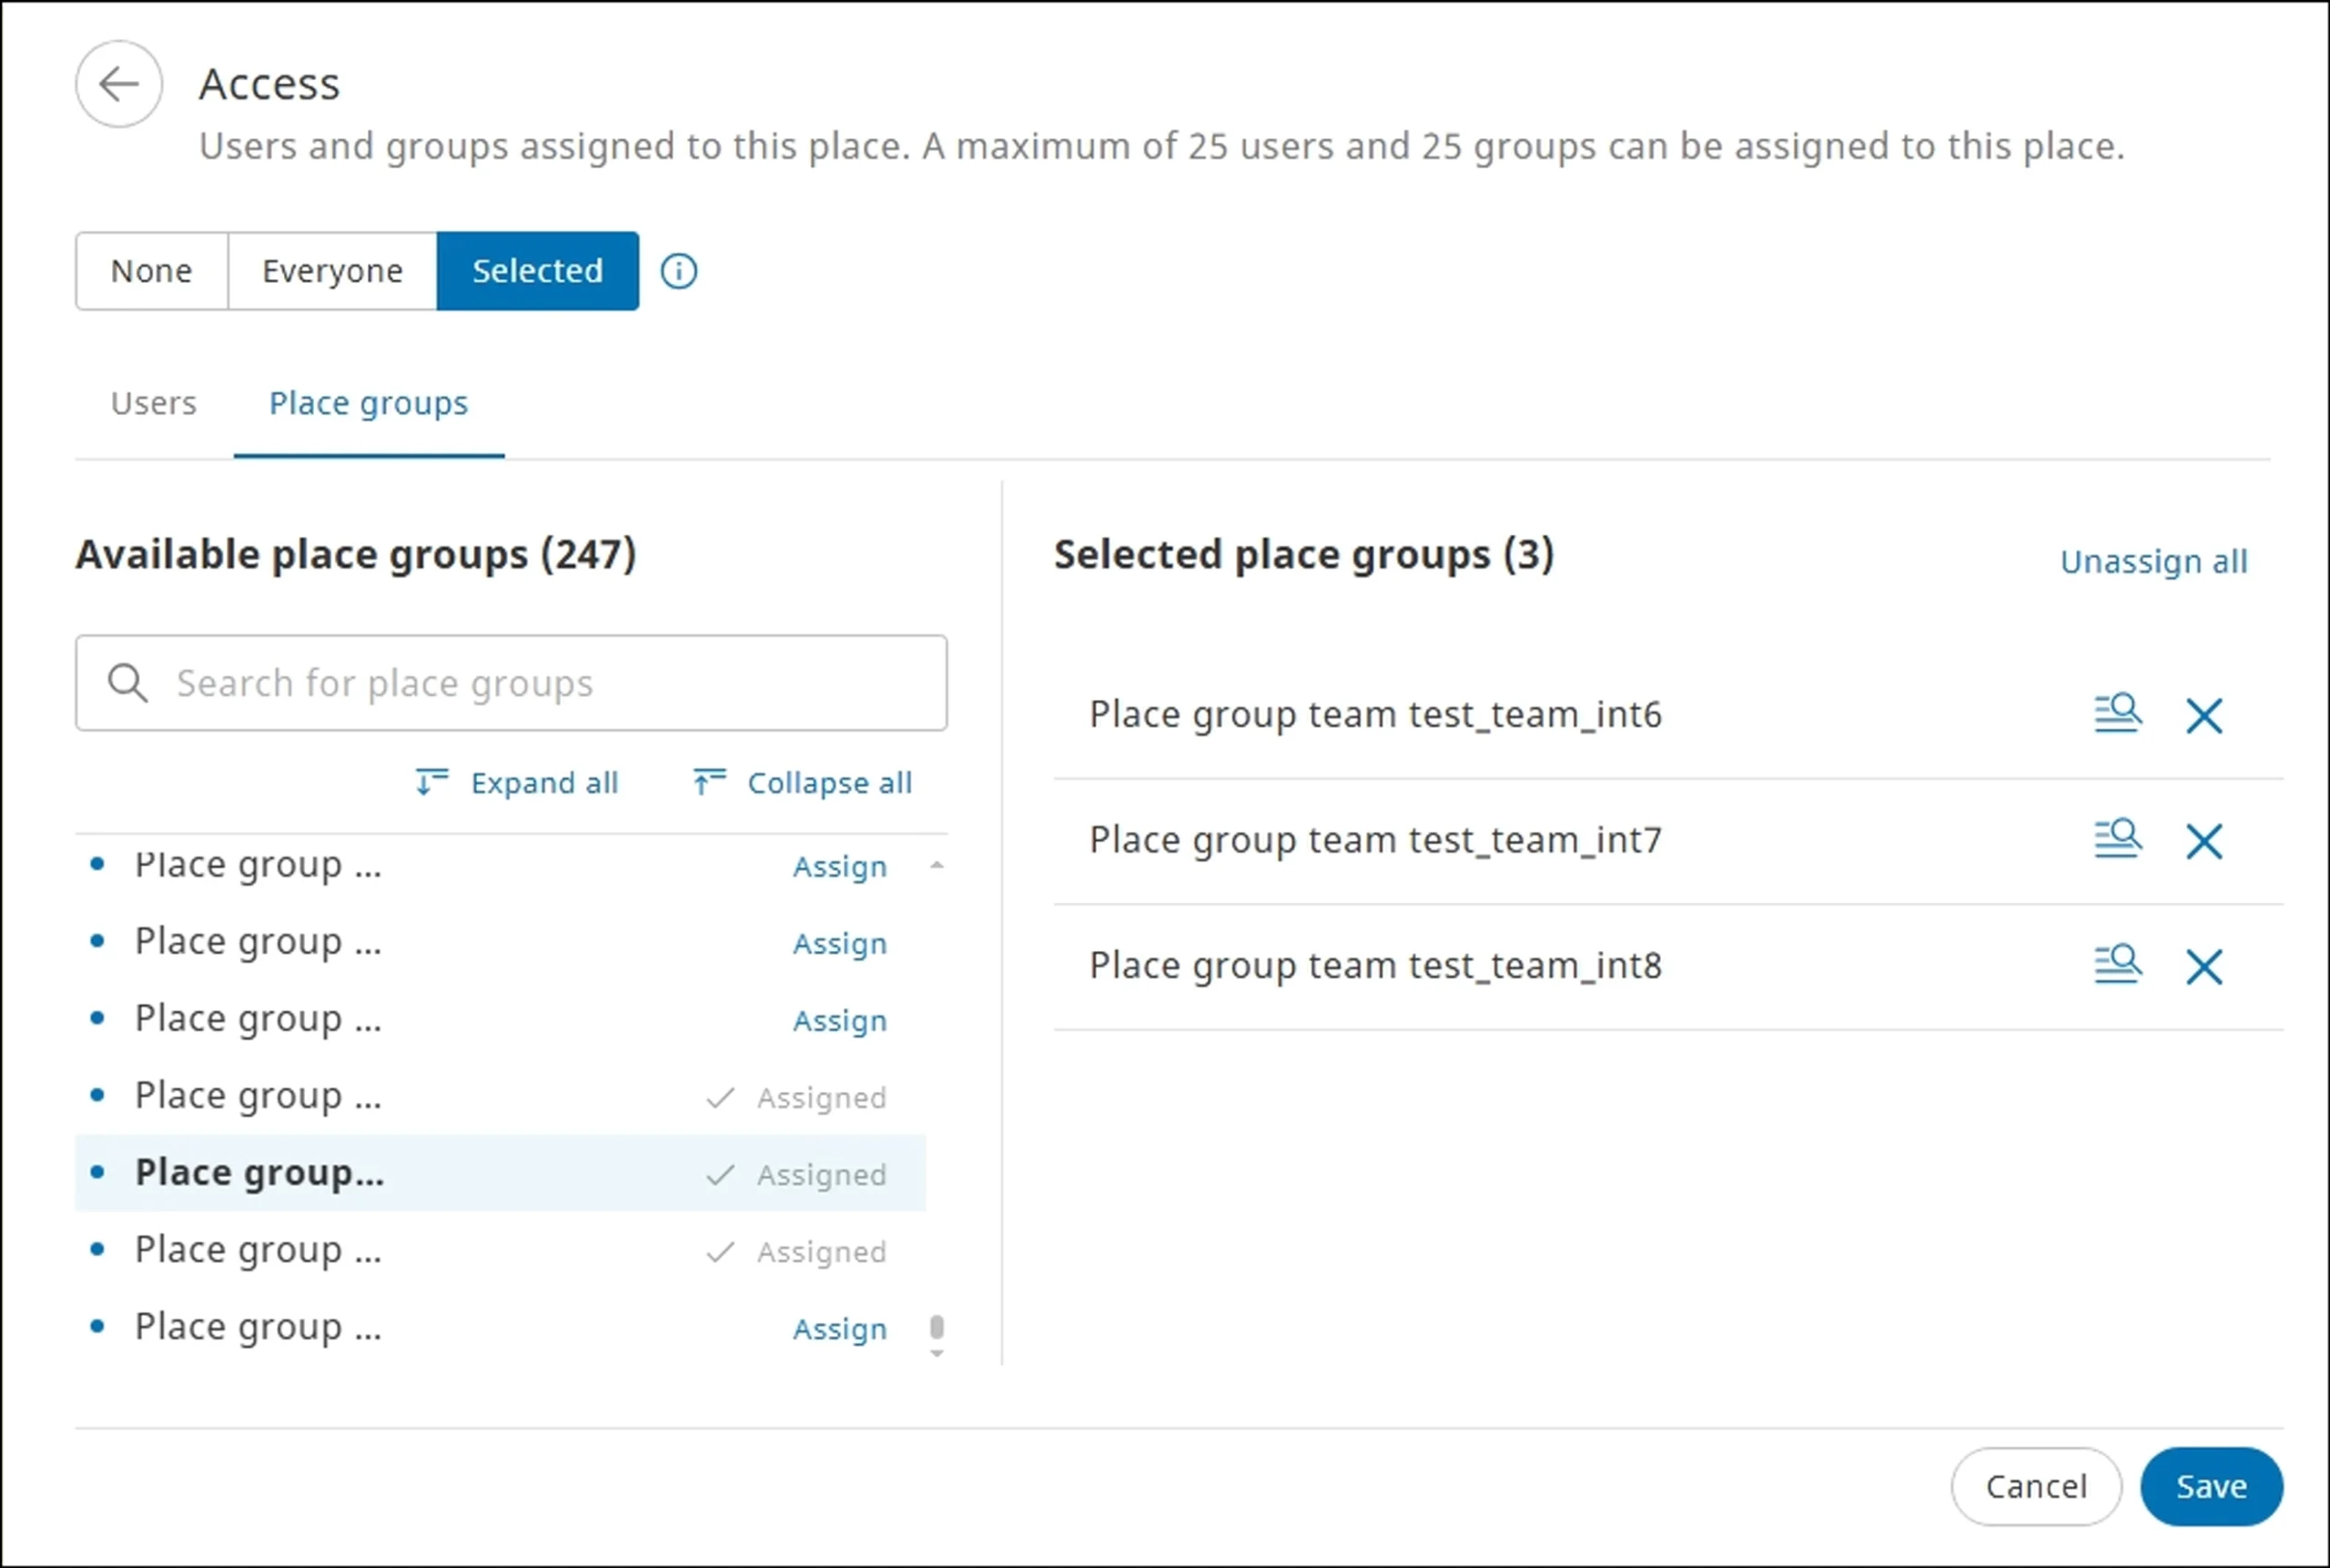
- To trace the hierarchy from where the place group or a place subgroup is assigned, in the Selected place groups section, click the Locate icon next to the place group name. in the Available place groups section, the place group or subgroup is highlighted to denote its origin.
- A maximum of 25 place groups can be assigned to a place.
 icon next to the place group name. in the Available place groups section, the place group or subgroup is highlighted to denote its origin.
Remove Assigned Access #
If a user or team is not required to monitor a site anymore, you can remove access permission.
Unassign user #
- In the Access section >click the users and groups section. The Access page is displayed.
- In the Selected users section, click Unassign next to the user name. The user is unassigned. Click Save to permanently unassign the place group from the place.
Click Unassign all to unassign all the users from the place.
Unassign place group #
- In the Access section >click the users and groups section. The Access page is displayed.
- In the Selected place groups section, click the Unassign icon next to the place group name. The place group is unassigned. Click Save to permanently unassign the place group from the place.
 icon next to the place group name. The place group is unassigned. Click Save to permanently unassign the place group from the place.
Click Unassign all to unassign all the place groups from the place.
Edit a Place #
You can modify the location, area, contact information and access details to update the information related to a site.
- In the Map module, click the Places tab, and select the required place from the list. The place information pane is displayed.
- Click Edit. The place details page is displayed.
- Modify details in the Place details, Geofencing, Contact, Notes, and Access sections.
- Click Save. The place is modified in the SCALAR platform.
Remove a Place #
Remove a site from the track and trace records permanently if not required anymore.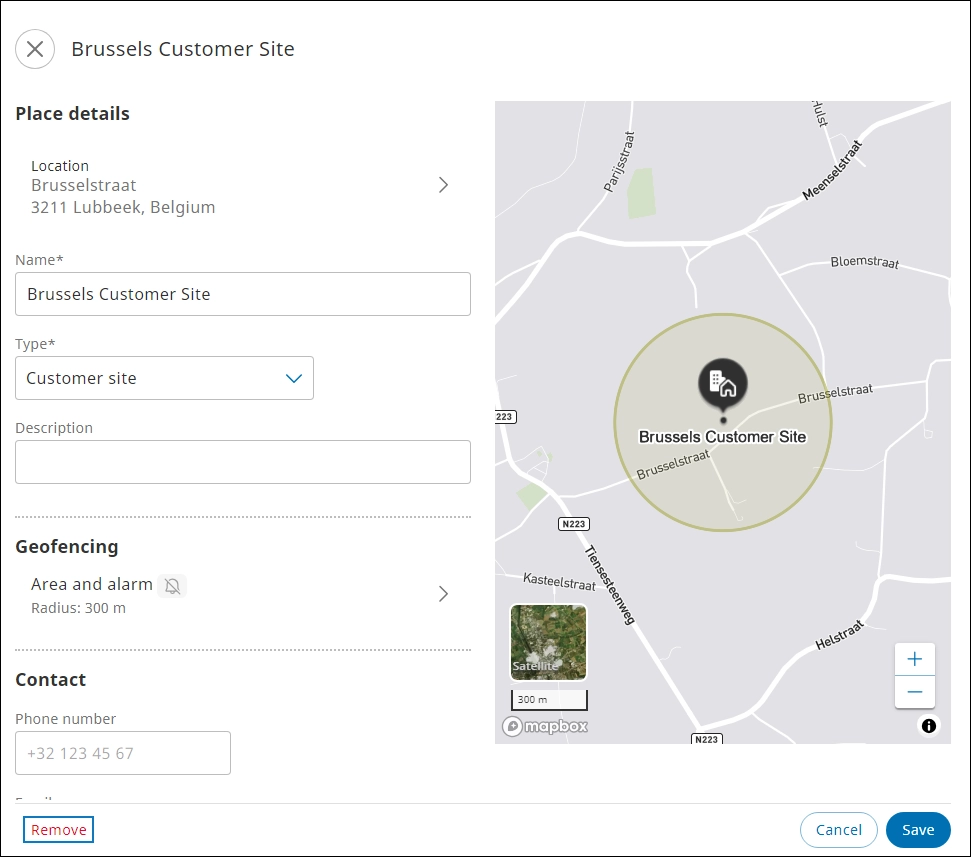
- In the Map module> click the Places tab, and then select the required place from the list. The place information pane is displayed.
- Click Edit. The place details page is displayed.
- Click Remove. The Remove place dialog is displayed.
- To confirm the action, click Remove. The place is removed permanently from the SCALAR platform.


