

The Reports module enables users to create, schedule, export, and download reports.

The Reports log generated for one-time and scheduled reports is retained on the platform for 30 days.
Create a Report #
You can create a one-time report or schedule reports on drivers or assets at set intervals.
You can generate reports for historical data but not for the current date.
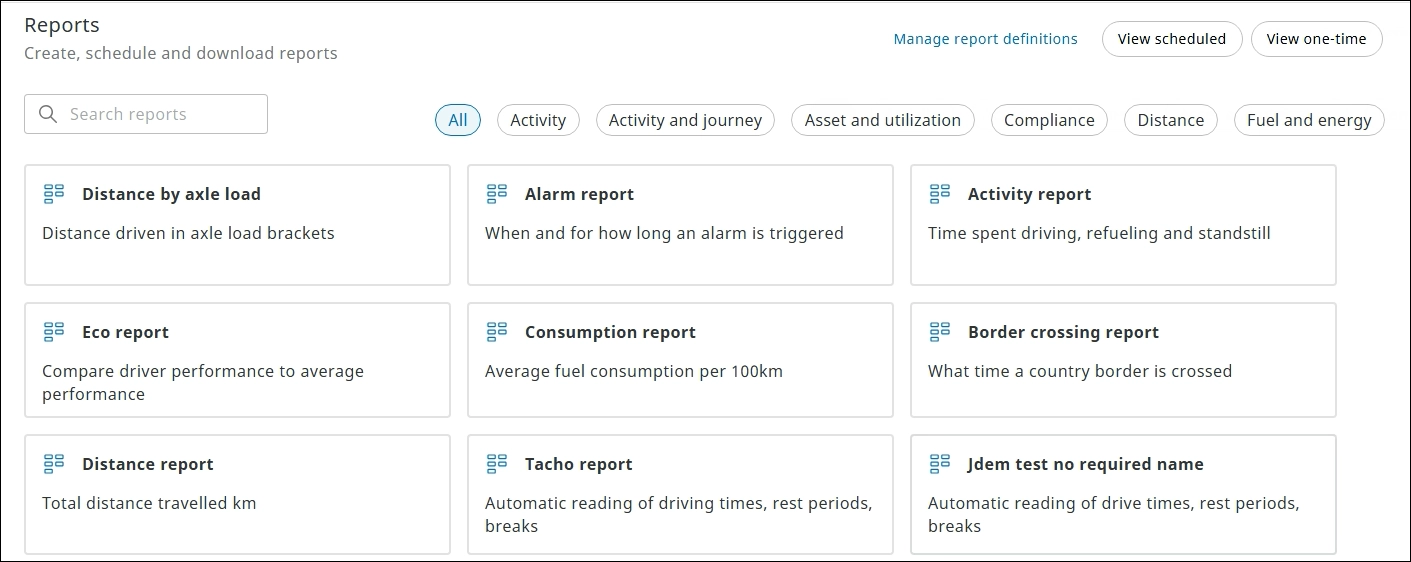
- From the left navigation pane, click Reports
 . The Reports page is displayed.
- Click the required report category to view the available report templates. In this example, the Compliance report category is selected.

- Click the required template. The report template is displayed.

- Do one of the following:
- Select One time to generate a one-time (ad hoc) report
- Select Schedule to set the schedule for periodic report generation
For more information, see Schedule a report and Create one-time.
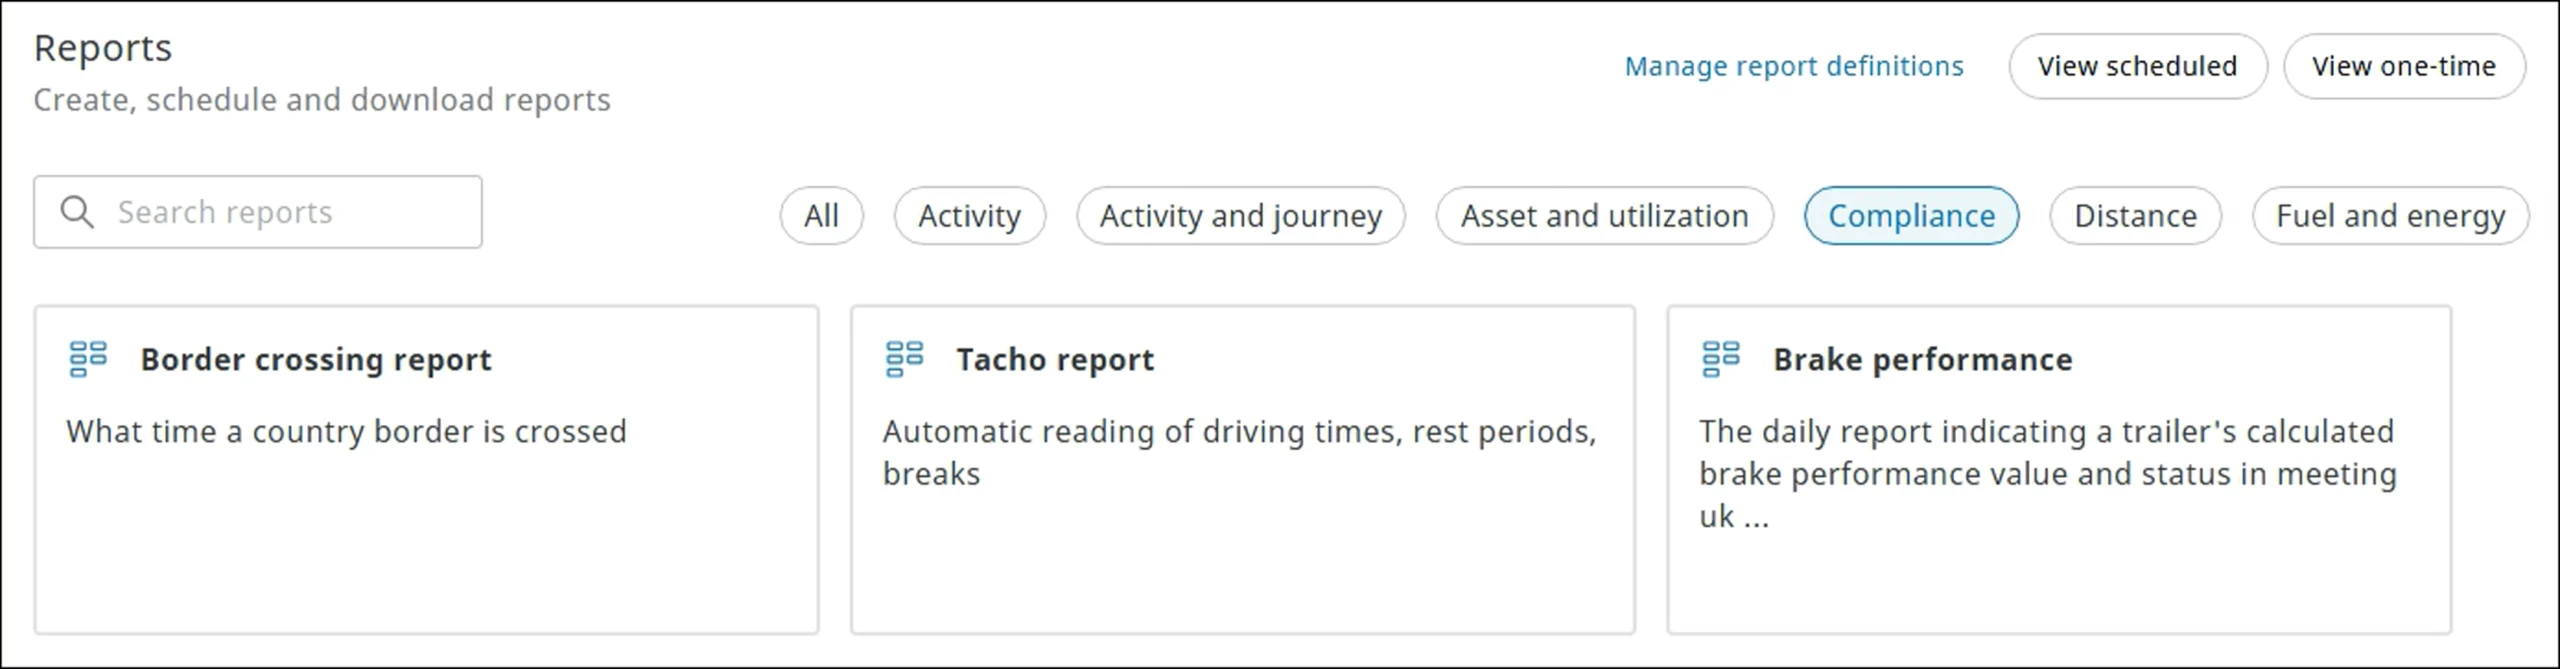
This is an optional step. The report categories are visual filters or tags to narrow search operations. You can select the required report template on the Reports page without having to select a report category.
Report Categories #
You can generate a scheduled or one-time report based on the available templates created under each report category.
For each report category, you can access various report templates: standard and custom reports are made available for your organization. For more information, see Build custom reports.
- All
- Activity
- Activity and journey
- Asset and utilization
- Compliance
- Distance
- Fuel and energy
Schedule a report #
You can schedule recurring reports at specific intervals to automate the report generation process.
- On the report category page, select the required card. The report template page is displayed.
- Enter the required information in What is the report about, Send options, and Specific report options sections.
- Click Schedule <report name> report. The schedule report is created and displayed on the Scheduled reports page.
What is the report about #
In the Report options section, you can enter general information about the report.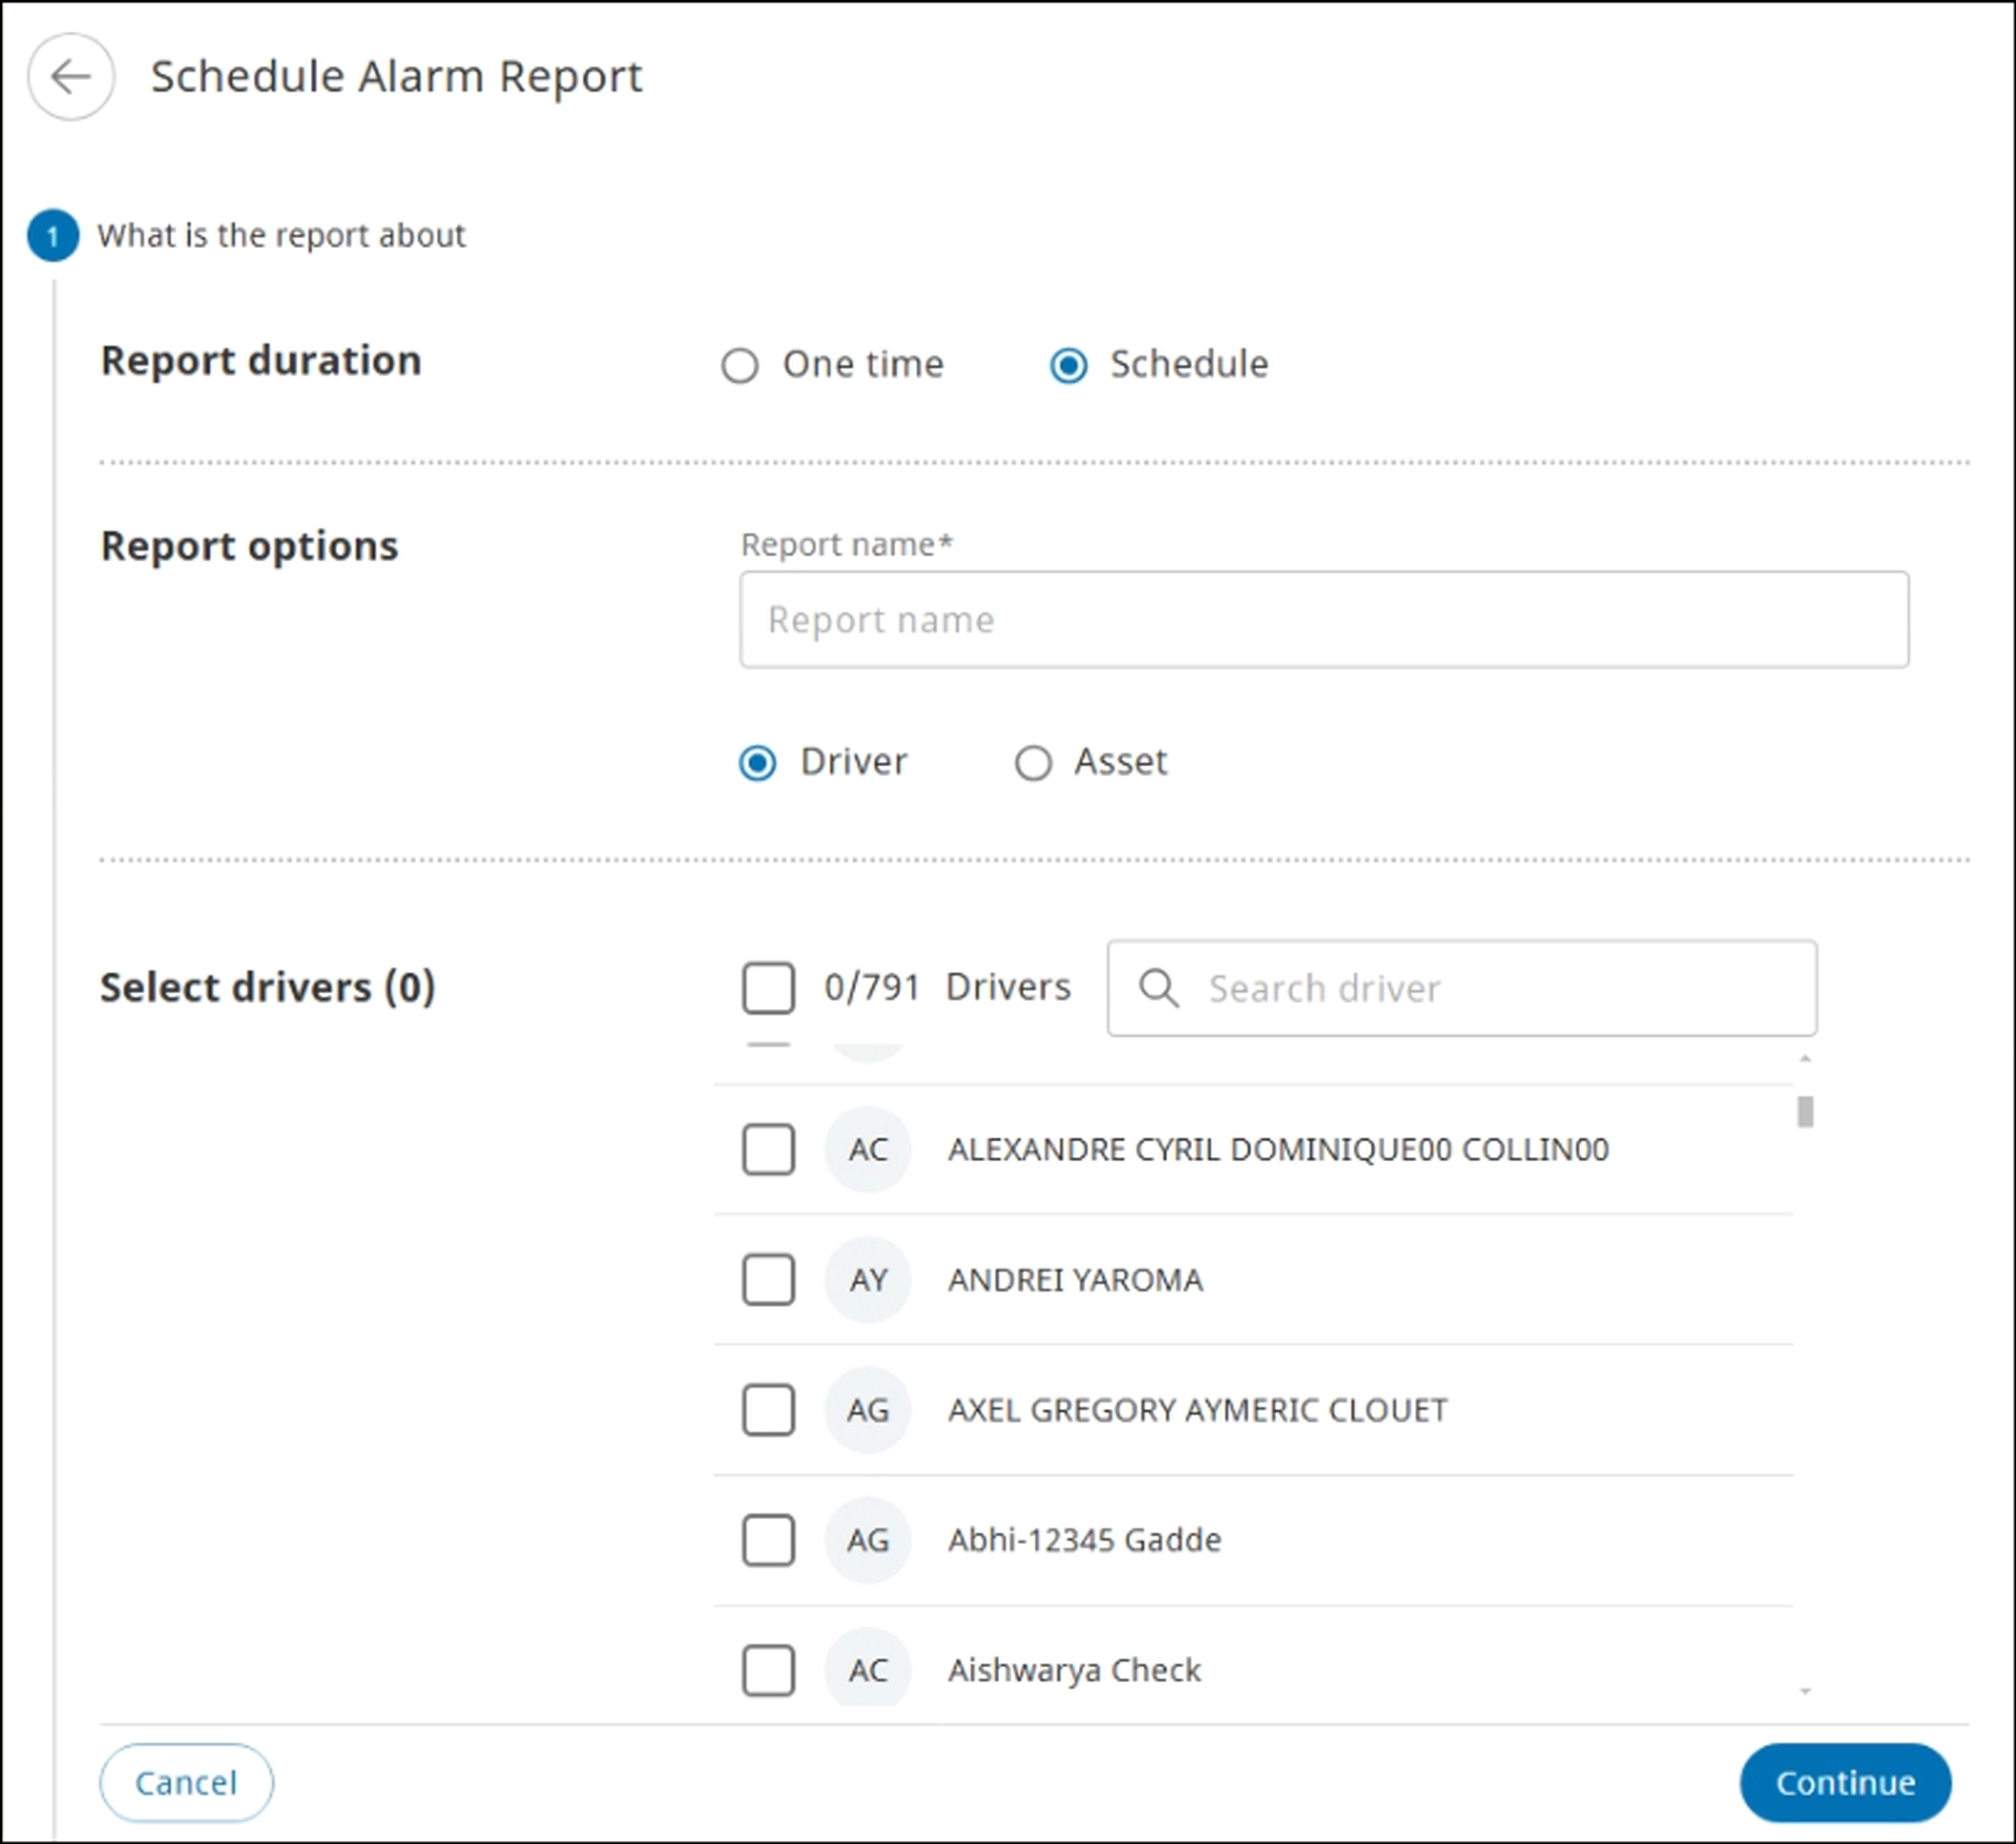
- in the Report duration section, select Schedule.
- In the Report options section, enter a name in the Report name box, and then select the Driver or Asset option, depending on whether you require a driver-specific or asset-specific report to be generated.
- In the Select drivers section, select the required drivers from the list, and then click Continue. The Time period section becomes available.
- If you select Asset in the Report options section, the Select drivers section name changes to Select assets
 .
. - Use the Search driver box to locate or find a specific driver. Enter at least three characters to initiate a search operation.
- You can select multiple drivers or assets from the list. To select all drivers or assets, select the Assets/Drivers
 checkbox.
 - Click Remove
 to clear all the selected names.
Send Options #
In the Send options section, you can specify the e-mail recipients, subject line, and compose the message. You can set the frequency for report generation: daily, weekly, and monthly. 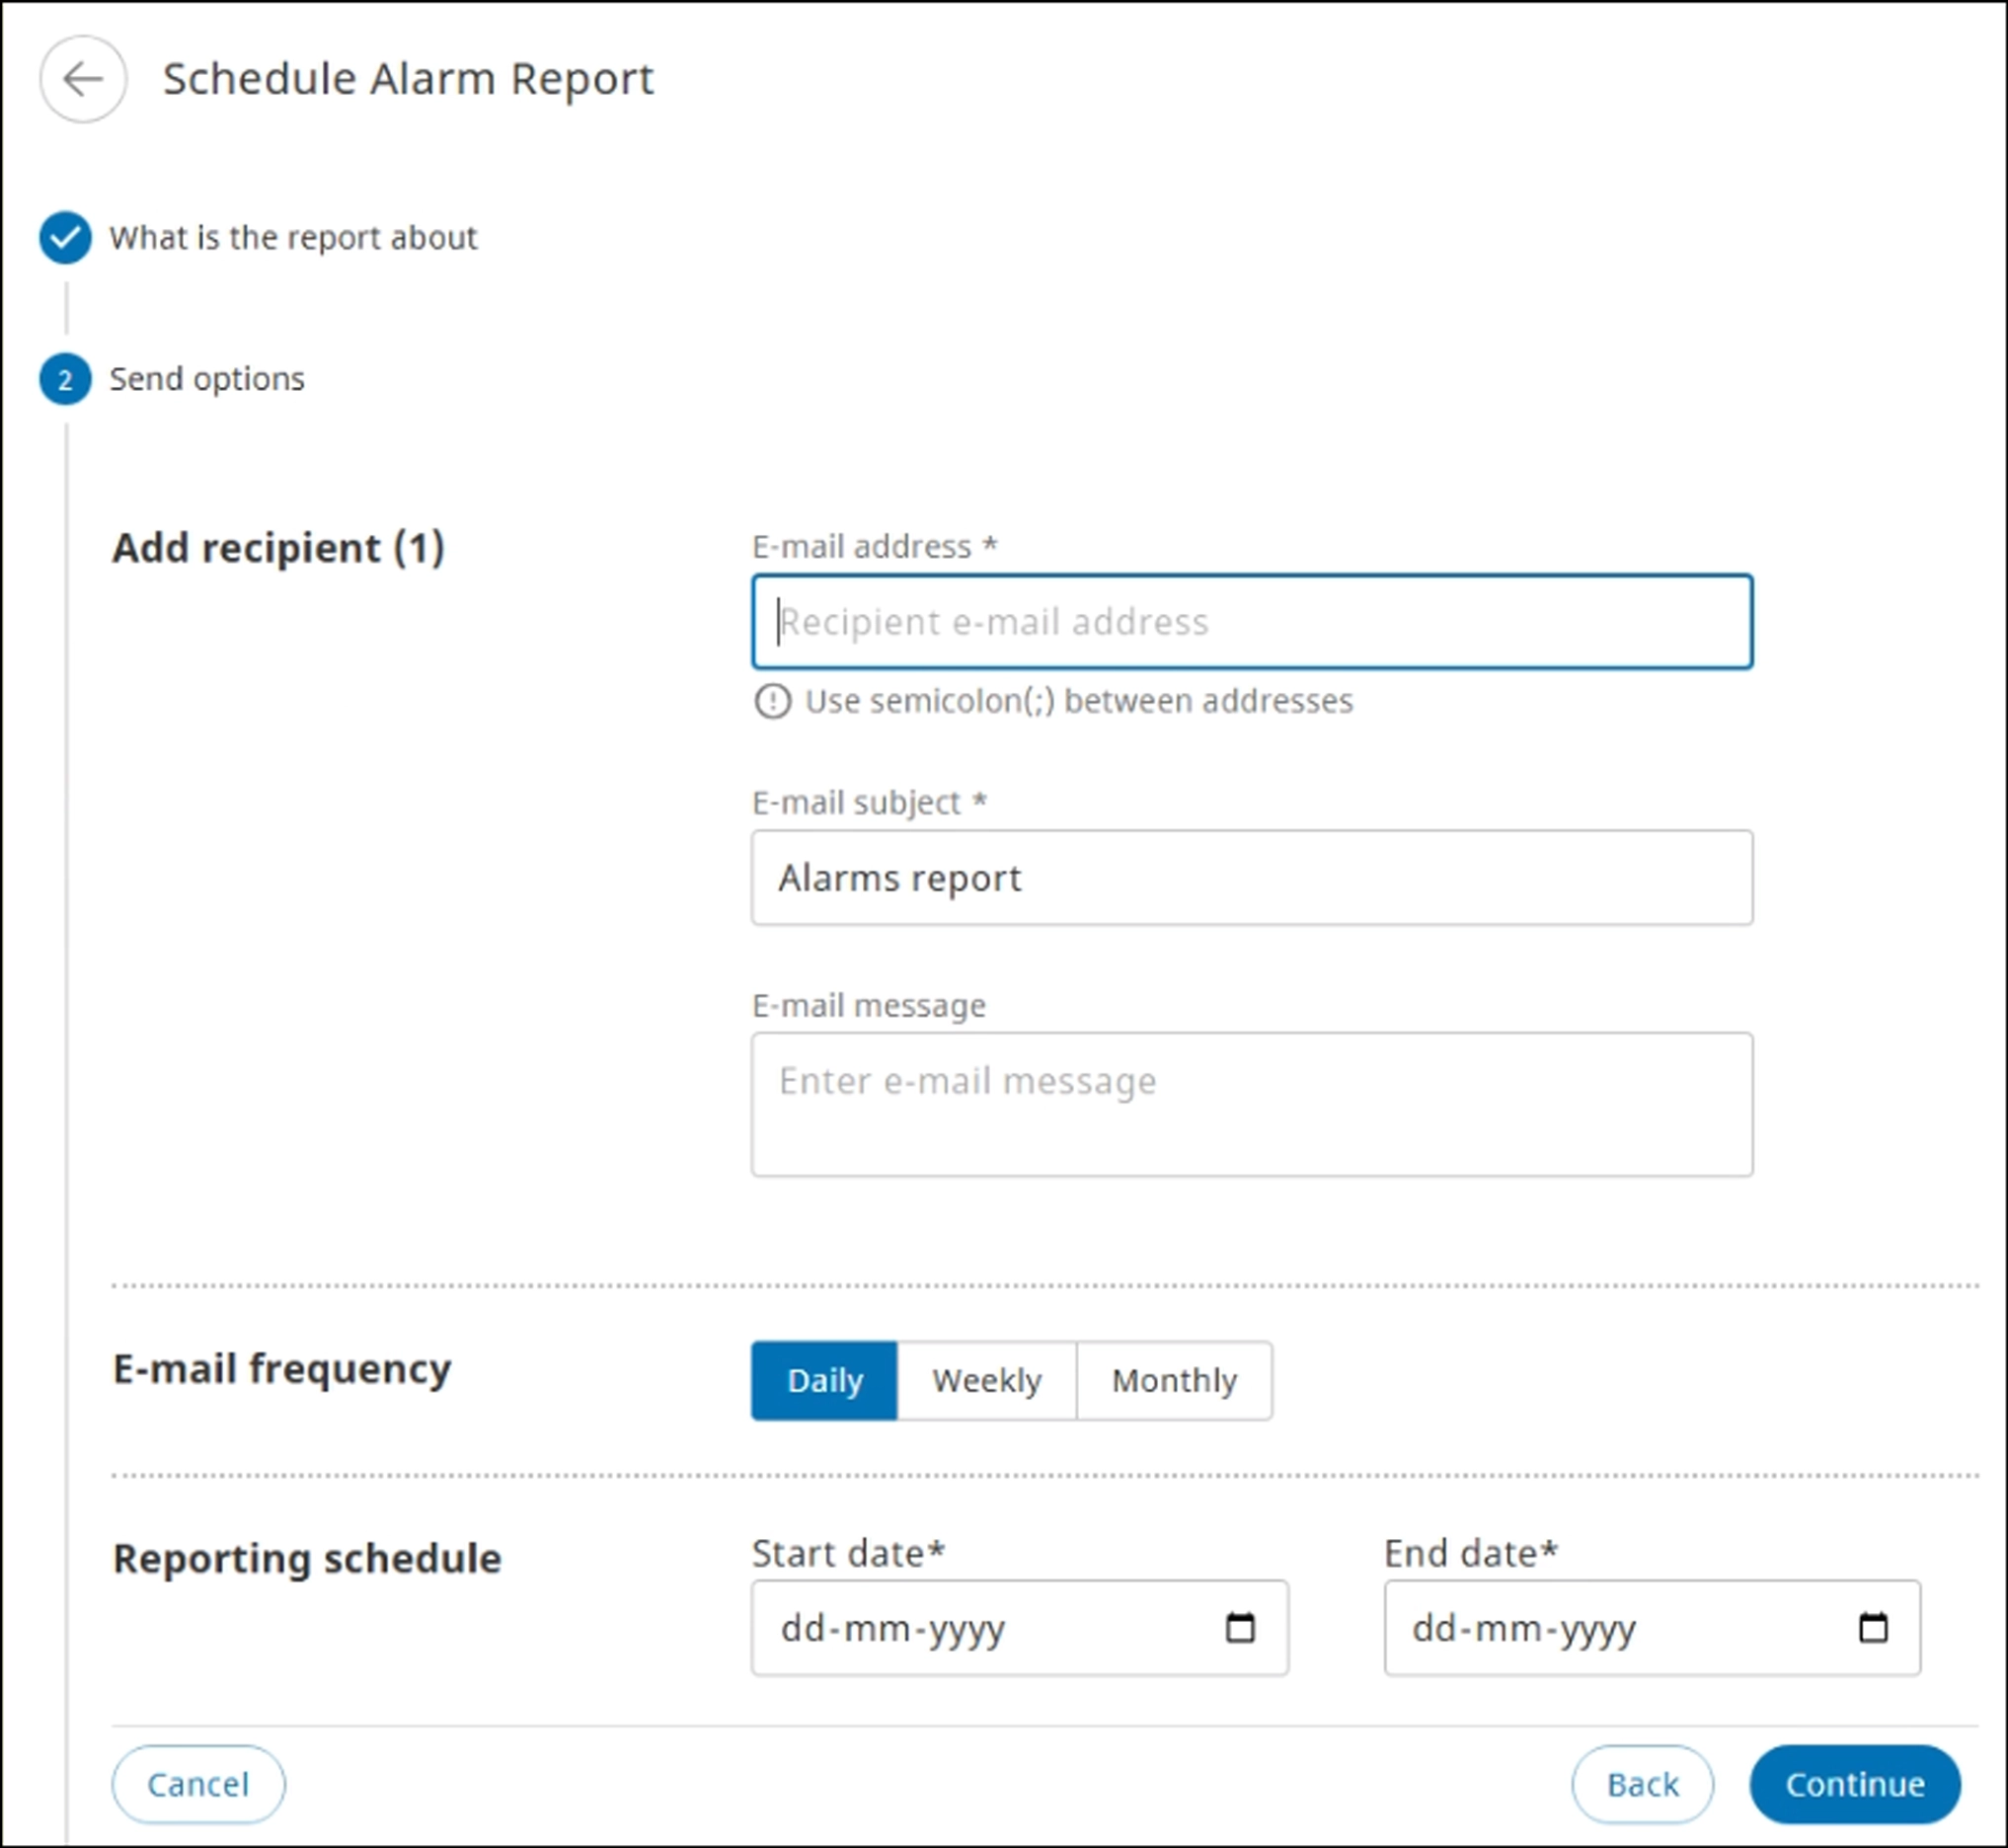
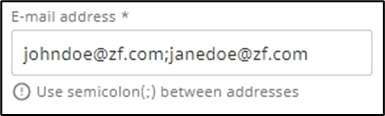
- In the Add recipient section, enter the required information in the E-mail address, E-mail subject, and E-mail message boxes.

NOTE:- E-mail address and E-mail subject are mandatory fields. The information is automatically filled in the E-mail subject box after you enter the report name in the Report options section.
- To add multiple e-mail addresses, in the E-mail address box, enter a semicolon (;) in between e-mail addresses.

- In the E-mail frequency section, select the Daily, Weekly, or Monthly tab based on the preferred interval for generating reports.
- In the Reporting schedule section, select the date range, and then click Continue. The specific Report options section becomes available.
When selecting the date range, the start date must be later than the current date.
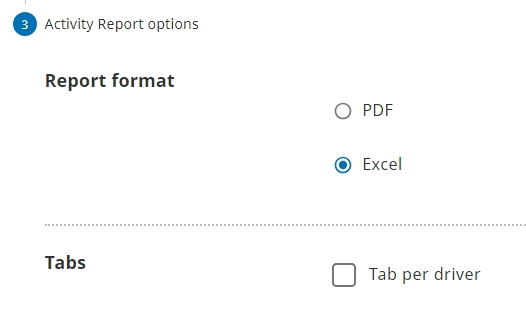
Specific Report Options #
Set additional report-specific options: select the report format type and specify pagination (new tab per driver or asset (specific to Excel format)).
Available report options depend on the selected report.
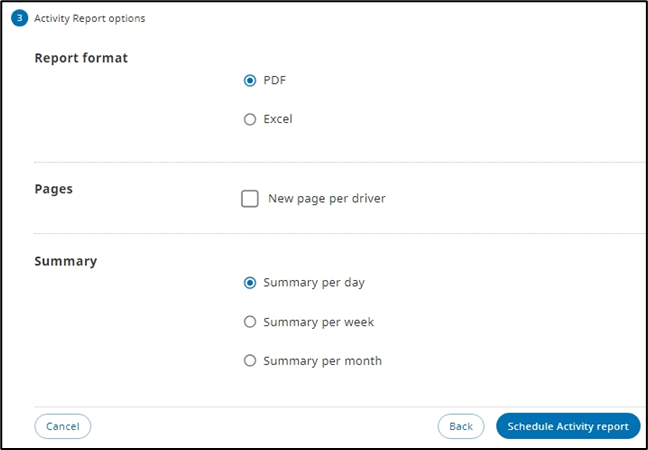
- In the Report format section, select the PDF or Excel option.
- For the XLSX format, select the optional Tab per driver checkbox to render the information for each driver or asset on a new page.
NOTE:If you select the Excel format, only the Tabs section is displayed. Click the Tab per driver checkbox to render information of each driver or asset on a new tab.

- Click Schedule <report name>. The report generation is initiated and displayed on the Scheduled reports page.
Create One-Time Reports #
You can generate one-time reports on an as-needed basis. In this example, the Once-off Alarm Report is selected. 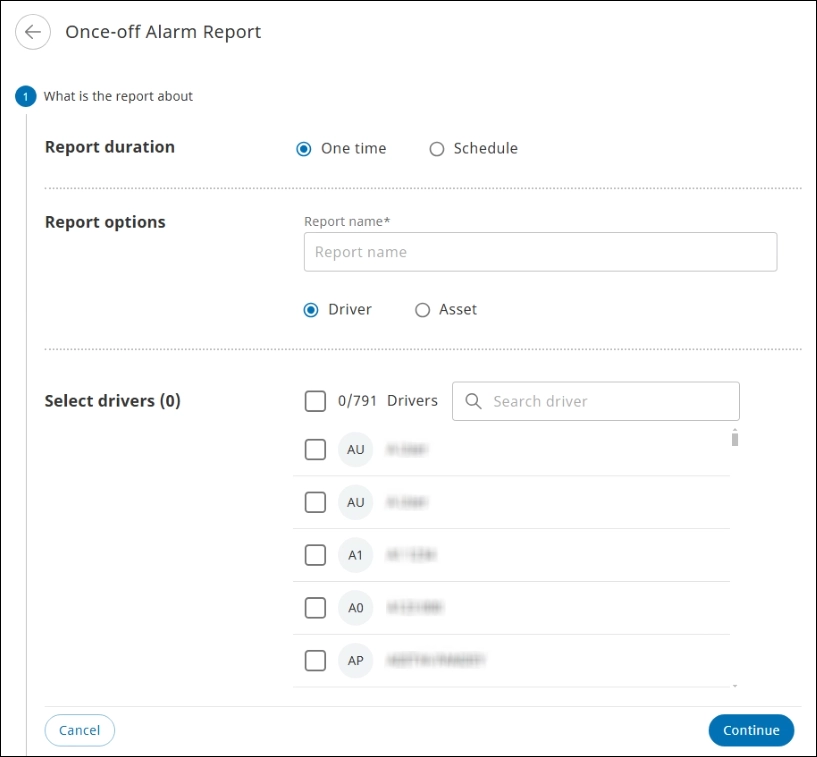
- Enter required information in the What is the report about, Time period, and Specific Report options sections.
- Click Create <report name> report. The once-off report is created and displayed on the One-time reports page.
- After a one-time report is generated, the status changes from In Progress to Completed on the One-time reports page.
- If the generation process fails, click Retry to re-initiate the process.
Time period #
Select the required reporting period. In a once-off report, you can optionally add an e-mail recipient.
Reporting period #
In the Reporting period section, select an option from the list.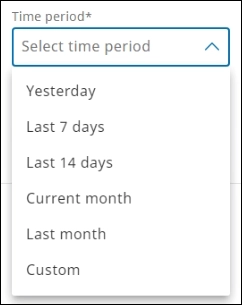
Select Custom to configure a specific date range. There is no maximum period limit for date selection.
Add e-mail recipient #
- In the Reporting period section > select the optional Add e-mail recipient checkbox. The e-mail-related boxes become available.
- In the E-mail address and E-mail subject boxes, enter the e-mail address of the recipients and subject line respectively.
- In the E-mail message box, enter the required message, and then click Continue. The e-mail recipient details are saved and the specific Report options section becomes available. For more information, see important notes for adding e-mail recipient information.
Edit a Report #
You can modify the scheduled report sections, such as recipient e-mail information and end date. One-time reports cannot be edited.
- From the left navigation pane, click Reports
 . The Reports page is displayed.
 - Click View scheduled. The Scheduled reports page is displayed.
- From the list, select the report to be edited. The specific edit report page is displayed.
- Modify information in the Recipient and Start and stop sending e-mail sections, and then click Save. The scheduled report information is modified.

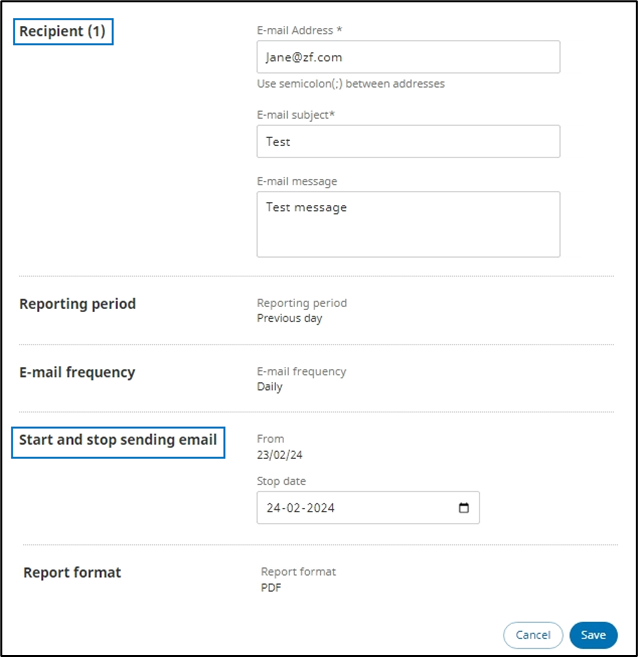
The start date and all the other sections on the edit report page cannot be modified.
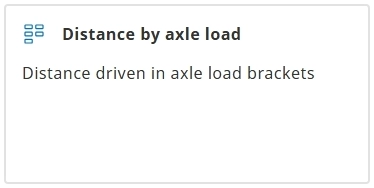
Generate Distance by axle load report #
You can generate the Distance by axle load report from the Reports page.
The Distance by axle load report indicates whether the assets are being used efficiently based on the amount of load carried over the entire distance. It provides an overview of an asset: how much cargo was loaded over how many kilometers. The objective is for an asset to be loaded with optimal cargo: more cargo loaded denotes higher efficiency in terms of ROI on the asset.
Overloading must be avoided because it has a negative impact on an asset and also poses a risk. Note that a fine can be imposed if the asset is found to be overloaded.
- On the Reports page, click the Distance by axle load tile.
- Click + next to the required asset for which a report is required to be generated. In this example, two assets are selected.
- Click Add. The report is generated for the selected assets.
In this example, the asset has covered 1357 kilometers when the asset was loaded between 5 and 10 tons.
The Add assets dialog is displayed. The assets available are listed. 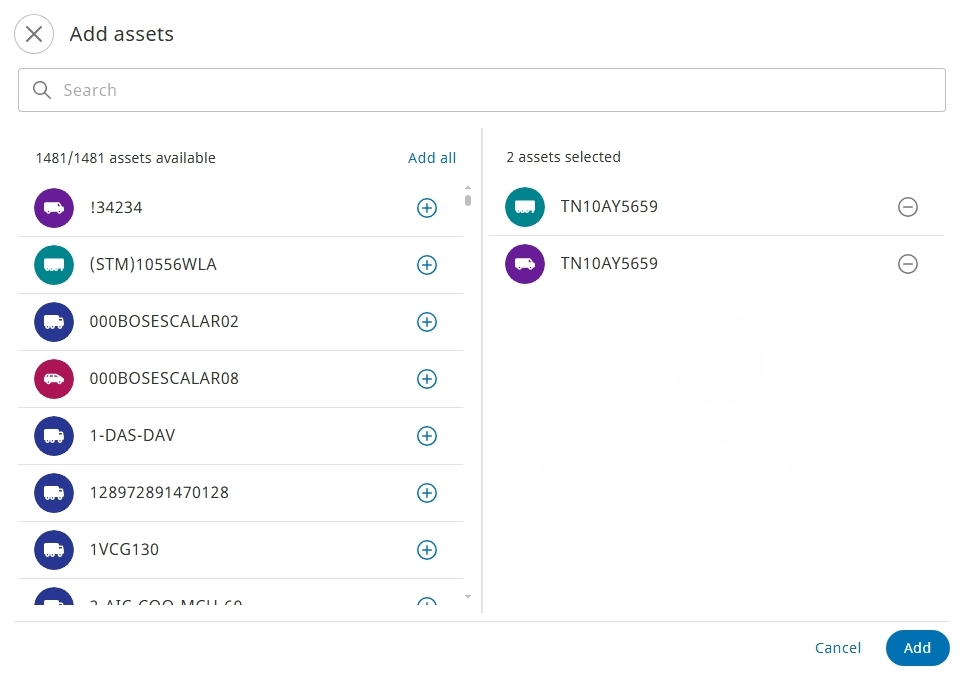
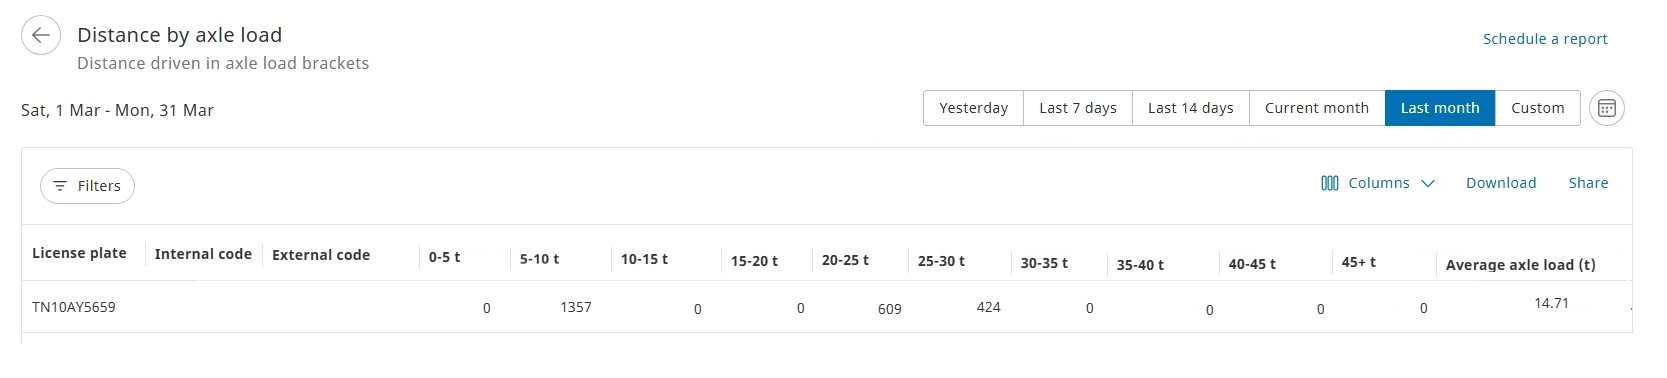
Available columns
Column |
Description |
License plate |
Unique vehicle registration number |
Internal code |
Internal asset code that uniquely identifies an asset |
External code |
External asset code that uniquely identifies an asset |
0-5 t up to 40-45 t |
Total distance driven when the asset was loaded in brackets of five tons each: between 0 and 5 tons, 5 and 10 tons, and so on until 40-45 tons. |
45+ t |
Amount of distance driven where the asset was loaded above 45 tons |
Average axle load (t) |
Average axle load in tons recorded during the entire period |
This report can be generated only if the asset has a working odometer and a weight sensor.
Generate Door stop report #
The Door Stop report provides information about the asset’s condition during a standstill when its door is opened, which include the following:
- Data on temperature before and after the door was opened
- Axle load before and after the door was opened
- Maximum temperature reached
- Duration for which the door was open
- Variation in axle load between opening and closing
This information is crucial for the customer to monitor the conditions of temperature-sensitive goods, ensuring that the temperature is maintained in the specified range and that they are stored under optimal conditions to prevent spoilage or damage. It also aids in tracking the duration of door openings to identify potential security breaches or unauthorized access. The data provides valuable insights into the operational aspects of the assets, helping to optimize loading and unloading processes and improve overall efficiency.
Column |
Explanation |
Asset type |
Type of asset, such as truck, trailer, and van |
Name |
Display name of the asset |
License plate |
Unique vehicle registration number |
Code |
Asset code that forms the first identifier of an asset |
Fleet ID |
Fleet ID of the asset, which forms the second identifier of an asset |
Stop location |
Location of the asset during the standstill activity |
Stop date |
Date stamp of when the standstill activity started |
Stop time |
Time stamp of when the standstill activity started |
Door open date |
Date stamp of when the door was opened during the standstill activity |
Door open time |
Time stamp of when the door was opened during the standstill activity |
Door open axle load |
Last known axle load when the door was opened |
Door open temperature |
Last known temperature when the door was opened |
Door closed date |
Date stamp of when the door was closed during the standstill activity |
Door closed time |
Time stamp of when the door was closed during the standstill activity |
Door closed axle load |
First axle load after the door was closed |
Door closed temperature |
First temperature after the door was closed |
Max temperature |
Maximum temperature when the door was open |
Door open duration (seconds) |
Time spent with the door open, formatted in seconds |
Door open duration (HH:mm:ss) |
Time spent with the door open, formatted in HH:mm:ss |
Door open axle load variation |
Change in axle load between the opening and closing of the door |
View Reports #
After reports are created, you can use the View one-time and View scheduled tabs to view the reports.![]()
From the left navigation pane, click Reports ![]() . The Reports page is displayed.
. The Reports page is displayed.
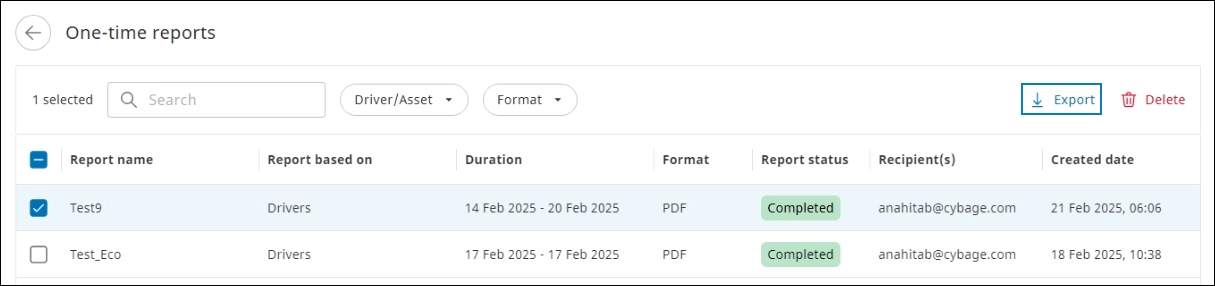
View one-time #
One-time reports are generated to view drivers or assets data on an as-needed basis.
On the Reports page > click View one-time. The One-time reports page is displayed and the reports generated are listed.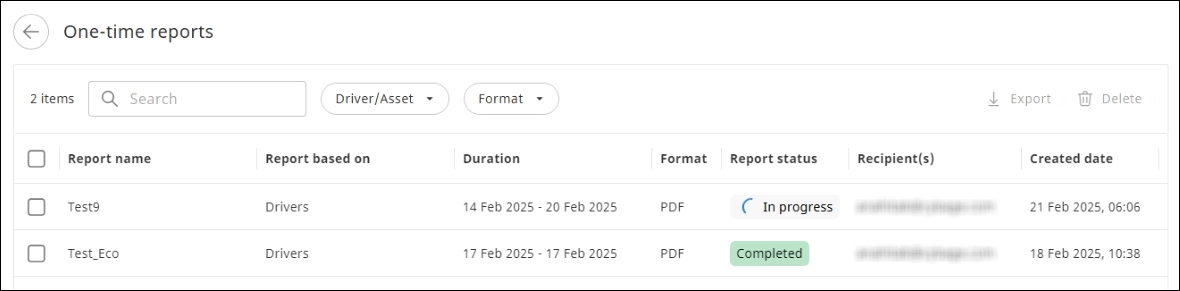
View scheduled #
After a report is scheduled, it is automatically generated at a set interval.
On the Reports page > click View scheduled. The Scheduled reports page is displayed and the reports generated are listed.
Available columns
| Fields | Description |
| Report name | Name of the report. NOTE: After a report is created, the name cannot be modified. |
| Report based on | Reports generated for drivers or assets |
| E-mail frequency | Reports received over e-mail daily, weekly, or monthly |
| Start date | Start date for report generation |
| End date | End date for report generation |
| Report status | Status of the report: active or inactive |
| Recipient(s) | E-mail address of the recipient to whom the report will be e-mailed |
| Created date | Date stamp of when the report was or will be generated |
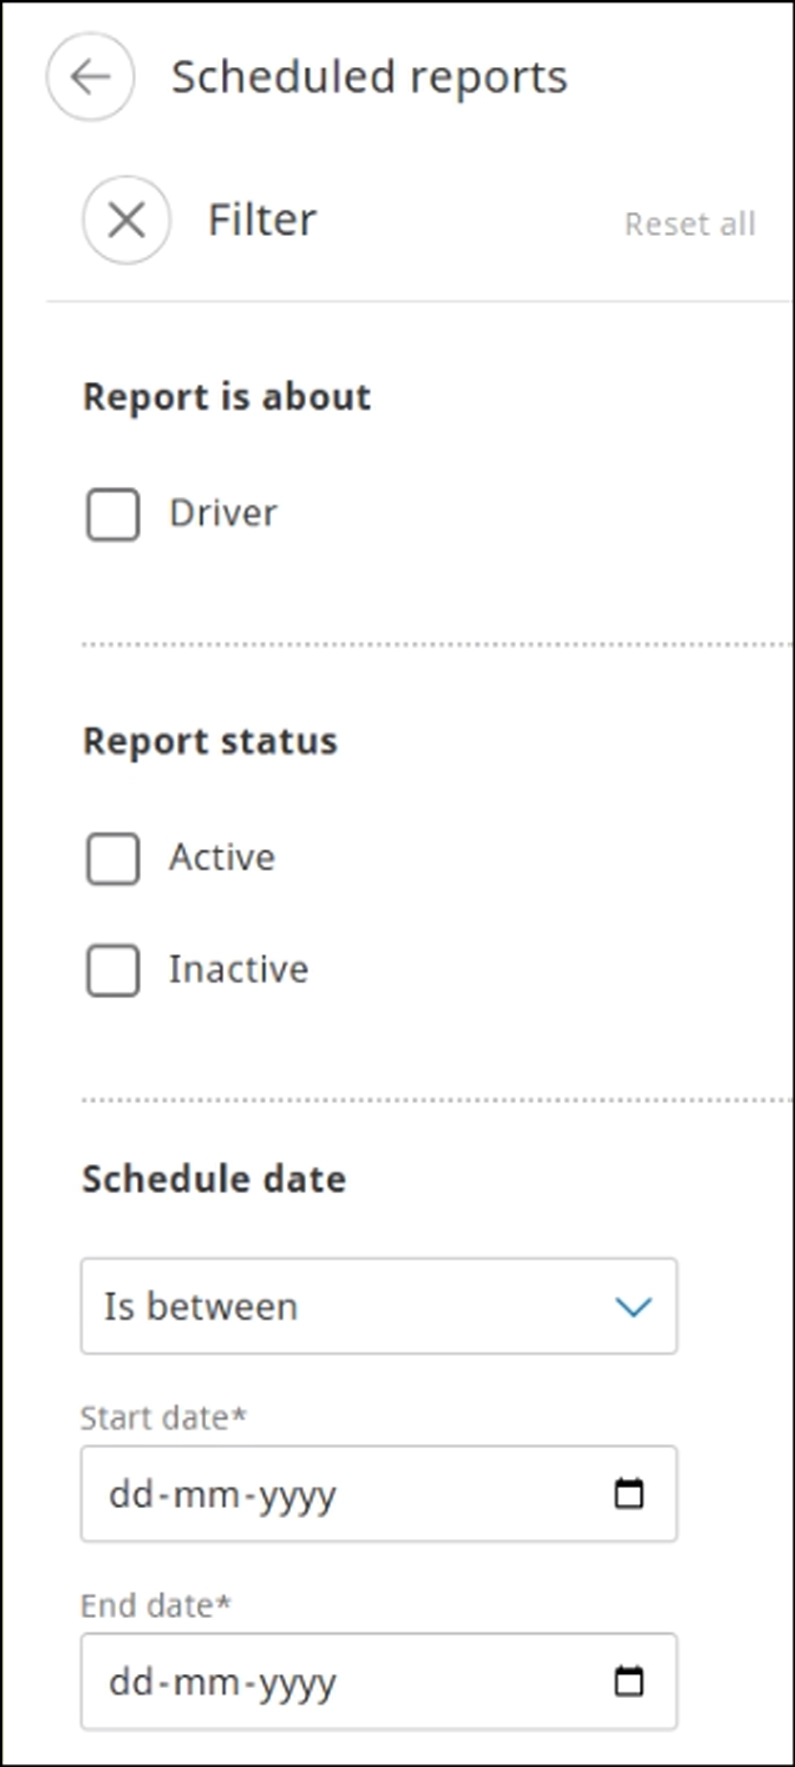
Filter Scheduled Reports #
Filter the reports as required based on the templates available.
- On the left navigation pane, click Reports . The Reports page is displayed.
- Click the View scheduled tab, and then click Filters. The Filter pane is displayed.

- Select the required options. The results matching the selection criteria are displayed on the Reports page.
NOTE: To clear all the filters applied, click Reset all.
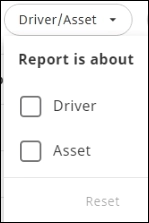
Filter One-time Reports #
You can filter one-time reports based on driver or asset or format (PDF or Excel).
- On the left navigation pane, click Reports . The Reports page is displayed.
- Click the View one-time tab. The One-time reports page is displayed.
- To view asset or driver-specific reports, click Driver/Asset, and then select the required checkbox to apply the filter criteria.

- To view reports based on the format, click Format, and then select the required checkbox to apply the filter criteria.


Search a Report #
You can search a specific one-time or scheduled report.
- From the left navigation pane > click Reports . The Reports page is displayed.
- Click the View Scheduled or View One-time tab. The reports page for the selected tab is displayed.
- Enter a report name in the Search box. The results matching the search criteria are displayed.
NOTE: Enter at least three characters to initiate a search operation.
Export Reports #
Only one-time reports can be exported from the SCALAR platform.
- From the left navigation pane, click Reports . The Reports page is displayed.
- Click View one-time. The One-time reports page is displayed.
- Select the required report to export, and then click Export. The report is exported and saved to the default Downloads folder.

INFORMATION: After a report is exported, you can open it from the default Downloads folder.
PDF report #
The PDF report provides data for all the selected drivers or assets in a tabular form.
This is a representative image of the details page of an asset-specific alarm report. 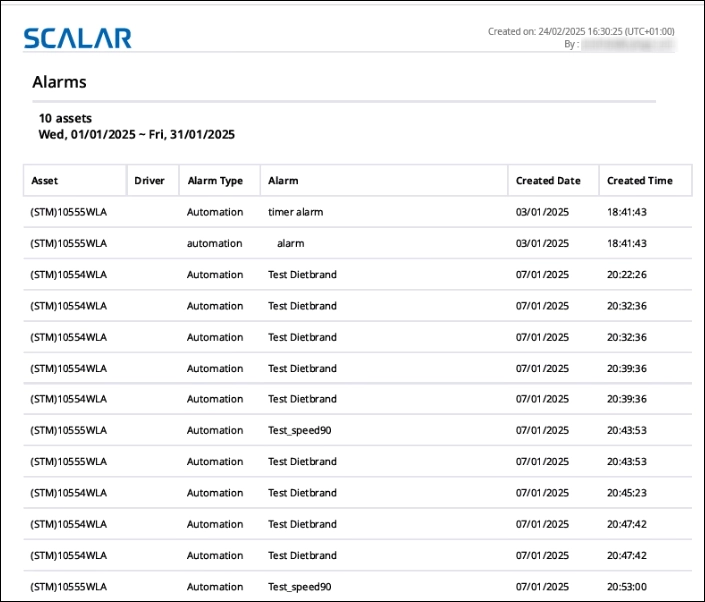
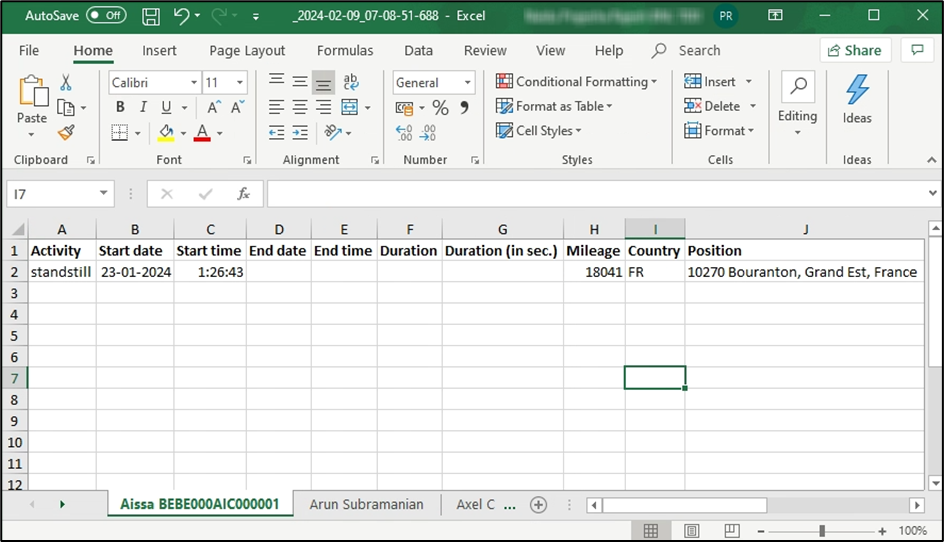
Excel report #
The excel report provides data for all the selected drivers or assets in one or separate tabs based on Tab per driver checkbox selection.
Search Reports by Tags #
To enable ease in searching and locating a report, you can search a report by its tag. This image shows the various tags assigned to the reports.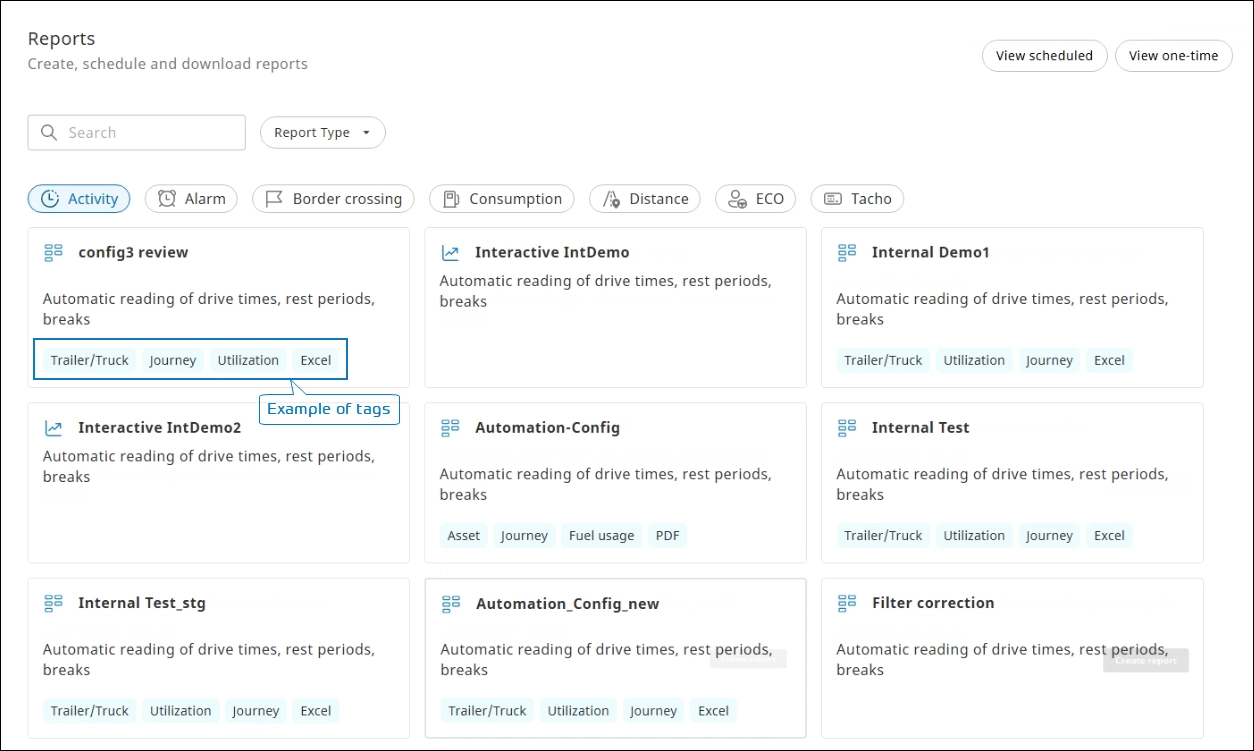
On the Reports page, in the Search box, enter the tag name, for example, ‘Asset’. All the reports tagged as Assets are displayed as cards.
Delete Reports #
You can remove one-time or scheduled reports from the reports log if you do not need the generated report or stop receiving recurring reports.
- From the left navigation pane, click Reports . The Reports page is displayed.
- Click the View scheduled or View One-time tab. The reports page for the selected tab is displayed.
- Select the report to be deleted. The report page is displayed.
- Click Delete. The Delete report dialog is displayed. To confirm the action, click Yes, delete. The report is deleted.
- Click Yes to confirm the action. The report is removed from the report log.


