An administrator can configure the general settings, such as enable or disable the impersonation settings, set the time zone and language, domain settings, and manage profiles at the organizational level from the Settings module.
This functionality is subject to user permissions. Only an administrator can access the Admin module.
View General Settings #
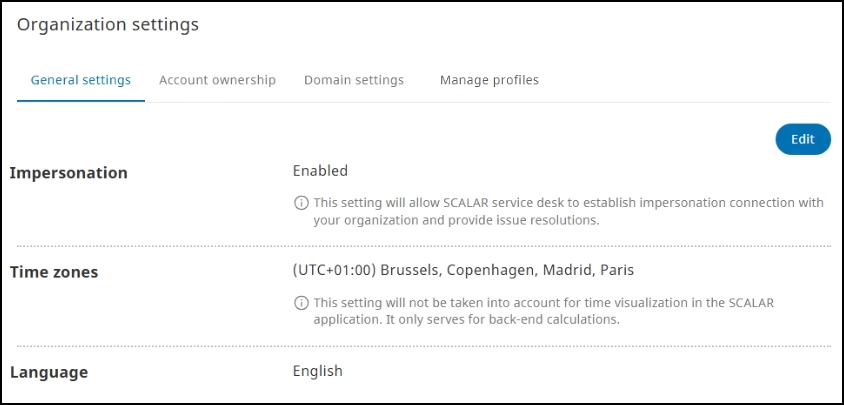
You can view the general settings applied at an organizational level on the Organization settings page. These settings are configured at the time of onboarding the first administrator.
In the Admin module > click Settings . The Organization settings page is displayed. This table describes the sections on the General settings tab.
| Section | Description |
| Impersonation | Indicates whether impersonation by the SCALAR Service desk is enabled or disabled. NOTE: * Impersonation facilitates the SCALAR Service desk to establish an impersonation connection with your organization. * The impersonation setting is enabled by default. * Enabling the impersonation setting will allow the SCALAR Service desk to investigate and troubleshoot an issue raised by impersonating a user. * To safeguard the user’s privacy and comply with internal security policies, you can disable the impersonation setting. For more information, see Edit General Settings. * If the impersonation setting is disabled, the SCALAR Service desk personnel will receive a notification indicating that the setting is disabled by the organization when they attempt to impersonate a user. They may contact you (administrator) should there be a requirement for impersonation. * To allow the SCALAR Service desk to impersonate the user, you can enable the impersonation setting for the required window period. * Disabling the impersonation setting will potentially increase the resolution time. |
| Time zones | Time zone set for the organization, for example, (UTC-08:00) Pacific Time (US & Canada) |
| Language | Language selected for the organization: the SCALAR platform is launched based on the language selected NOTE: Based on the language selected, the locale settings are applied to the SCALAR application. If the language is changed, you must re-launch the application to apply the settings. |
Edit General Settings #
You can edit general settings for the organization such as enabling or disabling impersonation settings and modifying the time zone and language.
- In the Admin module > click Settings
. The Organization settings page is displayed.
- Click Edit. The Impersonation, Time zones, and Language sections become editable.
- In the Impersonation section, select Enable or Disable as required.
- It may take up to 10 minutes for the impersonation setting changes to be reflected.
- If you have enabled impersonation to facilitate remote troubleshooting by the SCALAR Service Desk, you can disable the setting after the issue is resolved.
- In the Time Zone section, from the Time zone list, select the required time zone.
- In the Language section, from the Language list, select the required language, and then click Save settings. A confirmation message is displayed. To confirm the action, click Save. The modified configuration settings are saved.
The time zone setting is not considered for time visualization in the SCALAR application, but only serves to facilitate backend calculations.
View Account Owner Information #
The name and registered email address of the account owner is displayed on the Account ownership tab. The account owner details cannot be edited by the administrator in the Admin module. Only the ZF team can edit the account owner details.
Configure Domain Settings #
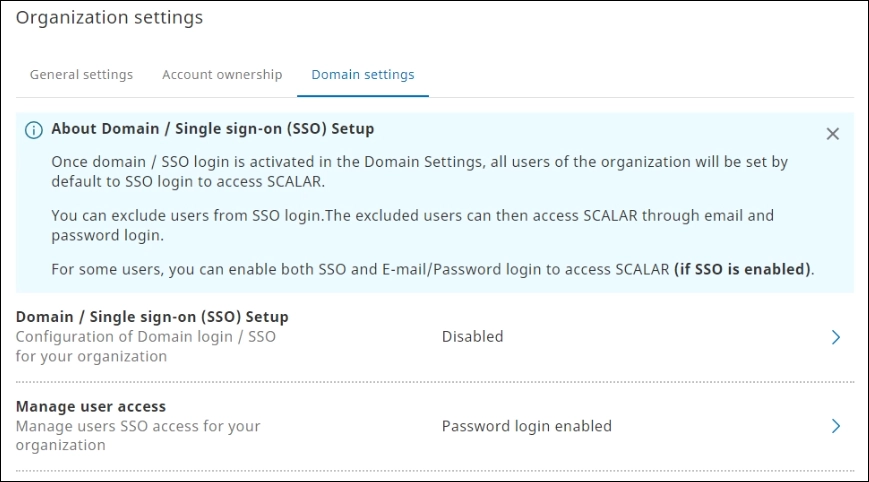
Users can sign into the SCALAR platform by using one of the authentication mechanisms:
- SSO (Single Sign-On) login
- Password login
- SSO and Password login
After the domain or SSO login is activated, all the users of the organization will be able to sign in to SCALAR by using SSO as the authentication mechanism.
- Disabling the SSO setup will disable the SSO login access for all users until it is enabled again. The users can access SCALAR only through the Email and Password login access mechanism if enabled for the users.
- You can exclude users from SSO login. The excluded users can then access SCALAR through email and password login.
- For some users, you can enable both SSO and email and password login to access SCALAR, provided SSO is enabled for their organization.
Manage SSO Login Access #
To enable or disable SSO login:
- On the Organization settings page, click the Domain settings tab. The settings configured for the authentication mechanisms are displayed.
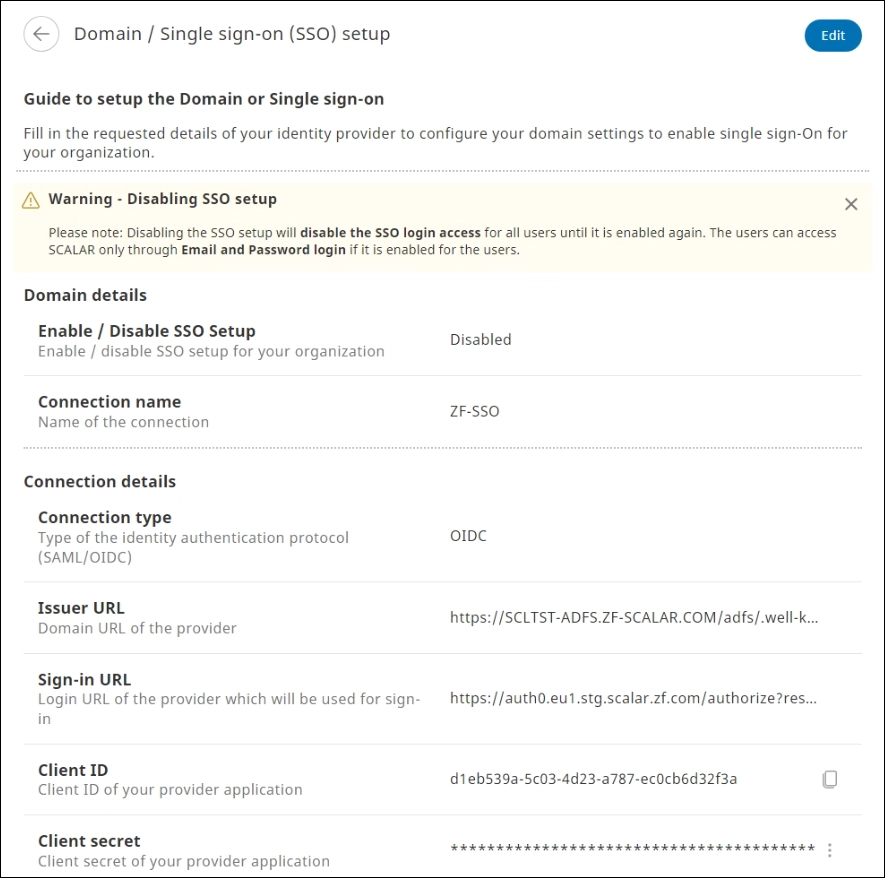
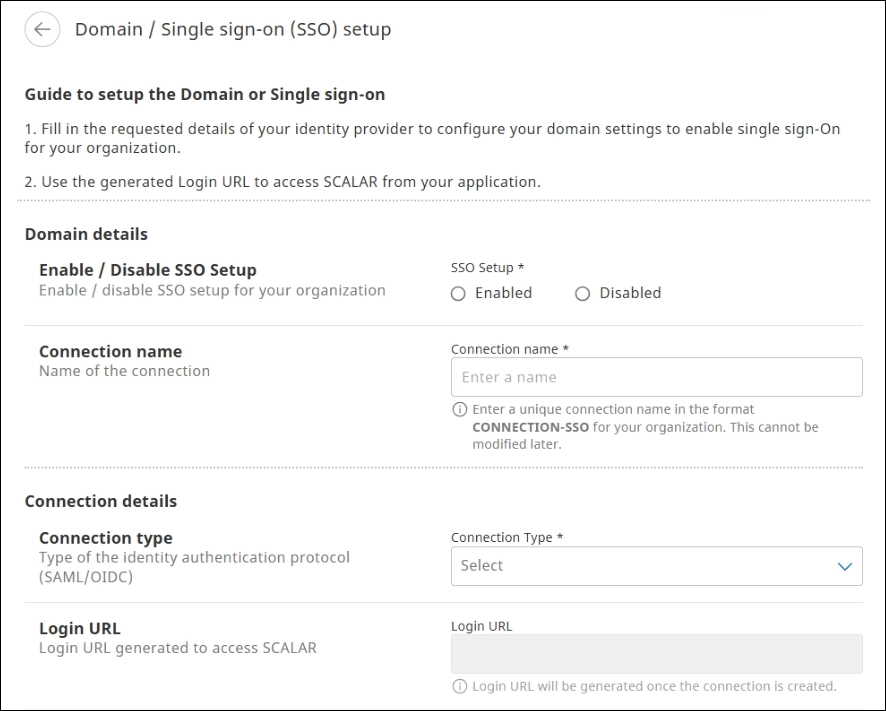
- Click the Domain / Single sign-on (SSO) Setup section. The Domain / Single sign-on (SSO) setup page is displayed.
- To configure settings for SSO setup, click Edit. The page is now in editable mode.
- Modify information in the various fields as described in this table, and then click Save. The SSO settings configured are updated.
Section and field Action or description Domain details Enable / Disable SSO Setup To enable or disable SSO, click the Enabled or Disabled option
NOTE:
After the domain or SSO login is enabled for the organization, all the users can be set to SSO login from the Login access page.
After the SSO setup is disabled for the organization, the SSO login access for all users will be disabled until enabled again. The users can then access SCALAR only through Email and Password login if enabled for them.Connection name Connection name is set to ‘ZF-SSO’
NOTE: This field cannot be modifiedConnection details Connection type Select the type of the identity authentication protocol: SAML or OIDC
SAML: Security Assertion Markup Language
OIDC: OpenID ConnectIssuer URL Enter the domain URL of the identity provider involved in authentication in this format: https://YOUR_DOMAIN/api/v1/sso/.well-known/openid-configuration Sign-in URL Enter the login URL of the identity provider that will be used for signing in to SCALAR Client ID Enter the client ID shared by your identity provider in alphanumeric format Client secret Enter the client secret shared by your identity provider
NOTE: Clickto view or hide the client secret.
X509 Signing certificate Applicable for SAML connection type: this section allows you to upload a SAMLP server public key encoded in pem or cer file format
1. Click Upload X509 signing certificate.
2. Drag the X509 Signing certificate file to the area or click Select file to browse and select the file. A message is displayed confirming addition of a file.
3. Click Save to upload the file. You are redirected to the Domain / Single sign-on (SSO) setup page.
The Issuer URL, Client ID, and Client secret fields are inapplicable for the SAMP connection type.
Manage user access #
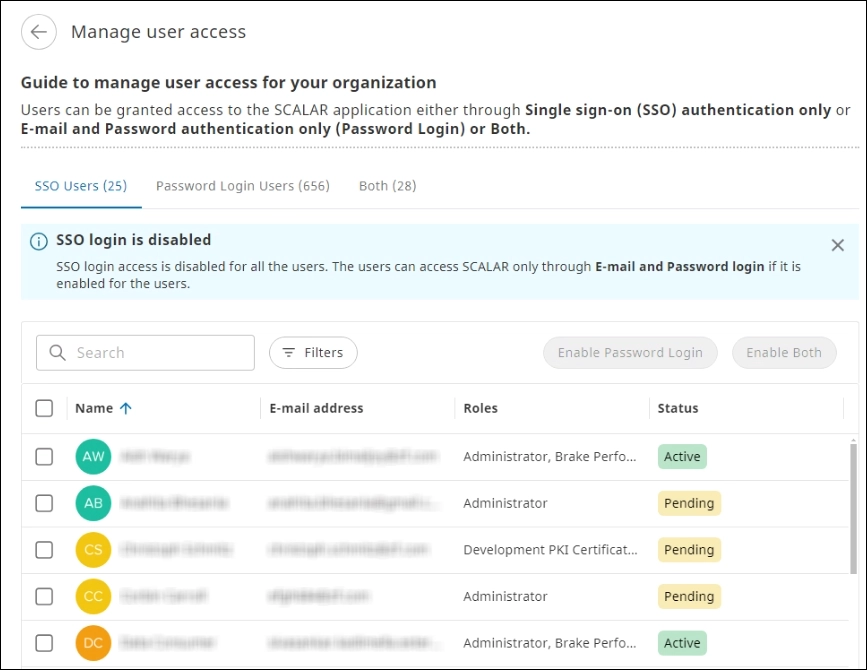
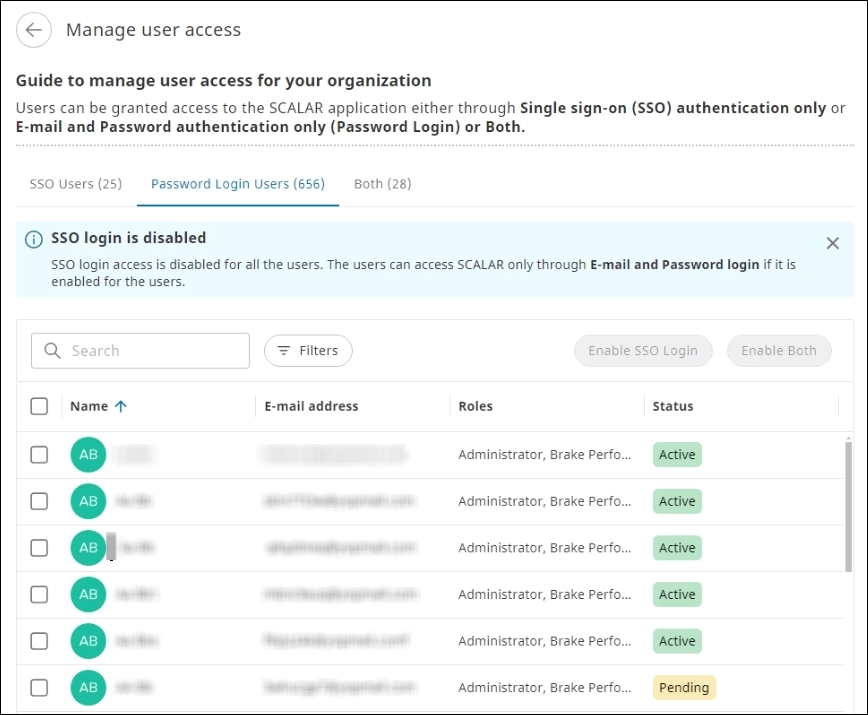
User access to the SCALAR platform can be managed in the Manage user access section. They can be assigned access either through Single sign-on (SSO) authentication only or Email and Password login authentication only (Password login) or both. You can also disable SSO or password login access if required.
SSO Users tab #
- Click the Manage user access section. The Manage user access page is displayed.
- On the SSO Users tab, do one of the following:
- Enable password login
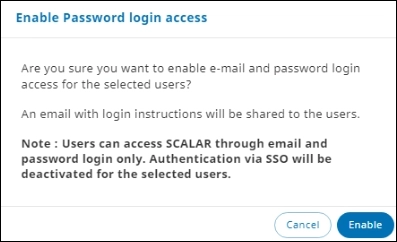
1. Select the checkbox next to the name, and then click Enable Password login. The Enable Password access login dialog is displayed.
2. To confirm the action, click Enable. The password login is enabled. - Enable both SSO and password login
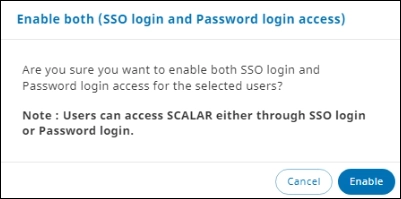
1. Select the checkbox next to the name, and then click Enable Both. The Enable both (SSO login and Password login access dialog is displayed.
2. To confirm the action, click Enable. The password login is enabled. SSO login and password login access are both enabled.
- Enable password login
In the Search box, enter the name or email address of the user. Records matching the search criteria are listed.
Password Login Users tab #
Users for whom the password login access is activated are listed on the Password Login Users tab.
On the Password Login Users tab, do one of the following:
- Enable SSO login
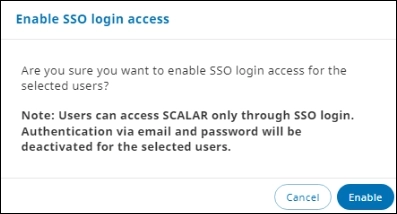
1. Select the checkbox next to the name, and then click Enable SSO login. The Enable SSO access login dialog is displayed.
2. To confirm the action, click Enable. The SSO login access is enabled. - Enable both SSO and password login
1. Select the checkbox next to the name, and then click Enable Both. The Enable both (SSO login and Password login access) dialog is displayed.
2. To confirm the action, click Enable. SSO login and password login access are both enabled.
Both tab #
On the Both tab, you can disable SSO or password login.
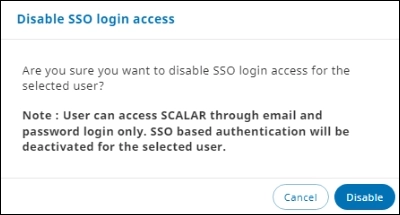
- Disable SSO login
1. Select the checkbox next to the name, and then click Disable SSO Login. The Disable SSO access login dialog is displayed.
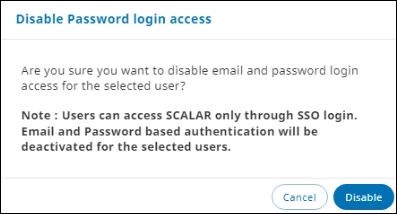
2. To confirm the action, click Disable. The SSO login access is disabled. - Disable password login
1. Select the checkbox next to the name, and then click Disable Password Login. The Disable Password login access dialog is displayed.
2. To confirm the action, click Disable. The password login is disabled.
Manage Profiles #
The Manage profile feature saves on the manual efforts required while configuring the same SSO settings for multiple child organizations. Through this feature, the parent organization can configure an SSO profile (domain and connection settings) as a one-time activity and later, through Data sharing > Framework agreement. When creating a new consumer organization, these SSO profiles can be reused to copy the entire SSO configurations automatically.
This feature is implemented to partially automate the workflow related to data sharing. The domain settings for your organization (parent) must be configured manually on the Domain settings tab. While sharing data with other organizations, you can create multiple profiles for child organizations as required on the Manage profiles tab. For data sharing agreements with child organizations, you can apply the same profile, eliminating the need to enter domain settings multiple times.
The Manage profile tab is visible for the administrator of respective organizations based on the required packages. The SSO- and Data sharing-related packages must be applied for the organization.
Illustration
Organization A (parent) enters into a data sharing agreement with organizations B, C, and D (child). Organization A can configure domain settings for child organizations by creating a single profile, e.g. ‘Profile1’. When creating the framework agreement for each child organization, you can select and apply profile ‘Profile1’, which reduces manual data entry.
If you need different domain settings for another child organization, create a new profile. For example, for child organization E, a new profile ‘Profile2’ can be created and applied.
You can set the required profile as the default one.
Create Profile #
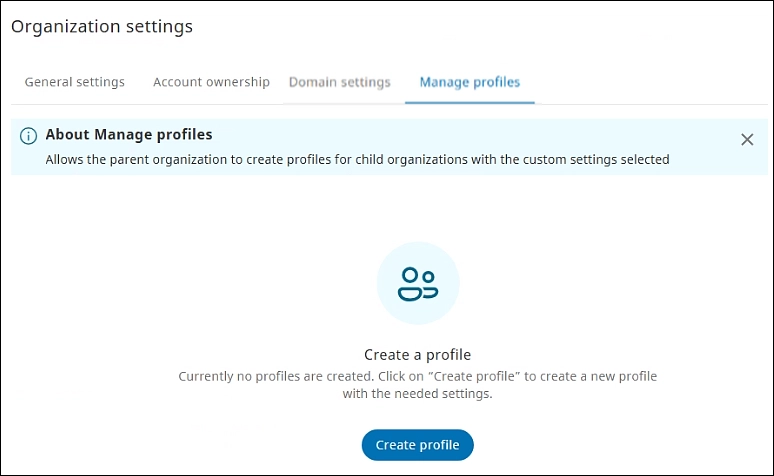
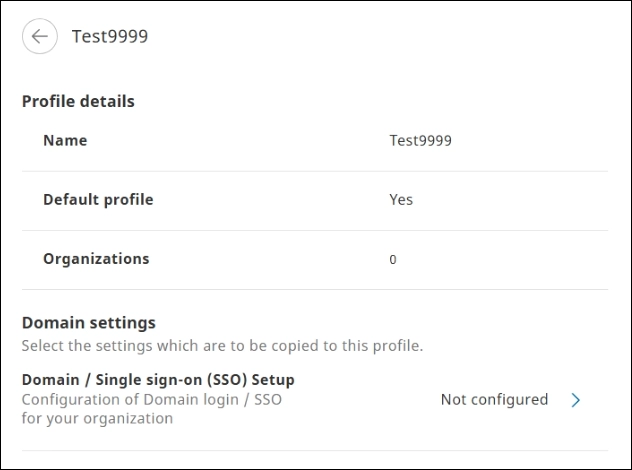
- On the Manage profiles tab, click Create profile. You are prompted to create a new profile.
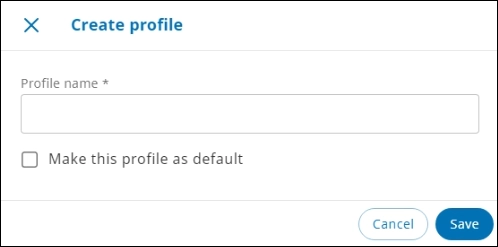
- Click Create profile. The Create profile dialog is displayed.
- In the Profile name box, enter a name for the profile. The profile is created and the details page is displayed.
- Click the Domain / Single sign-on (SSO) Setup section. The Domain / Single sign-on (SSO) setup page is displayed.
- Configure domain settings to specify domain and connection details. For more information on the various fields, see step 3 and 4 in the Manage SSO Login Access section.
- Click Save. You are redirected to the Create profile page. A confirmation message is displayed confirming the creation of a new profile.
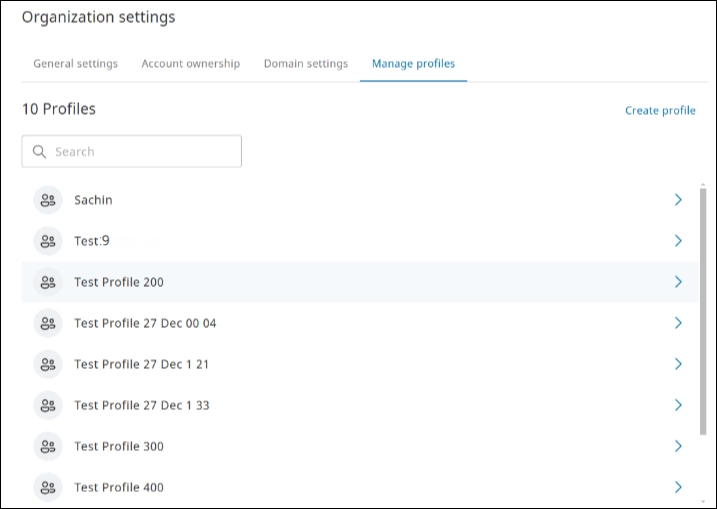
This is a representative image that lists multiple profiles created.
If required, select the Make this profile as default checkbox.
The login URL is formulated automatically as a concatenated string of SCALAR endpoint URL + Region + Connection name + Connection type
For example, https://app.zf-scalar.com?region=eu&connection-name=SSOTEST-OIDC
Edit Profile #
You can modify domain or connection settings from the Manage profiles tab.
- On the Manage profiles tab, click the required profile to modify. The Profile details page for the selected profile is displayed.
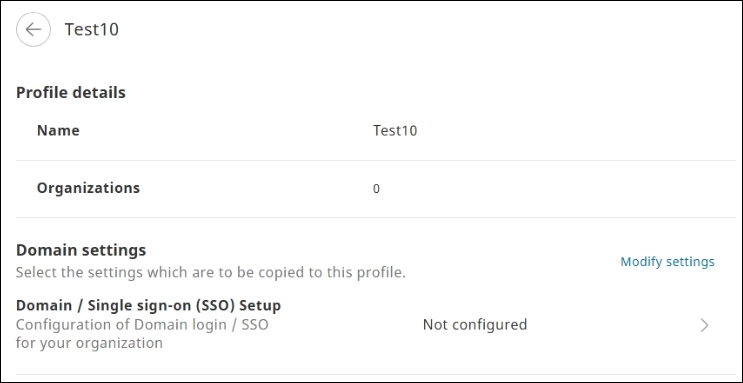
- Click Modify settings. The Domain / Single sign-on (SSO) Setup section will become editable. Click the section to reconfigure settings on the Domain / Single sign-on (SSO) setup page.
- Modify the required information in the Domain details and Connection details sections, and then click Save. The profile is updated. For more information on the various fields, see step 3 and 4 in the Manage SSO Login Access section.
The value next to the Organizations field represents the number of organizations to which this profile is applied.
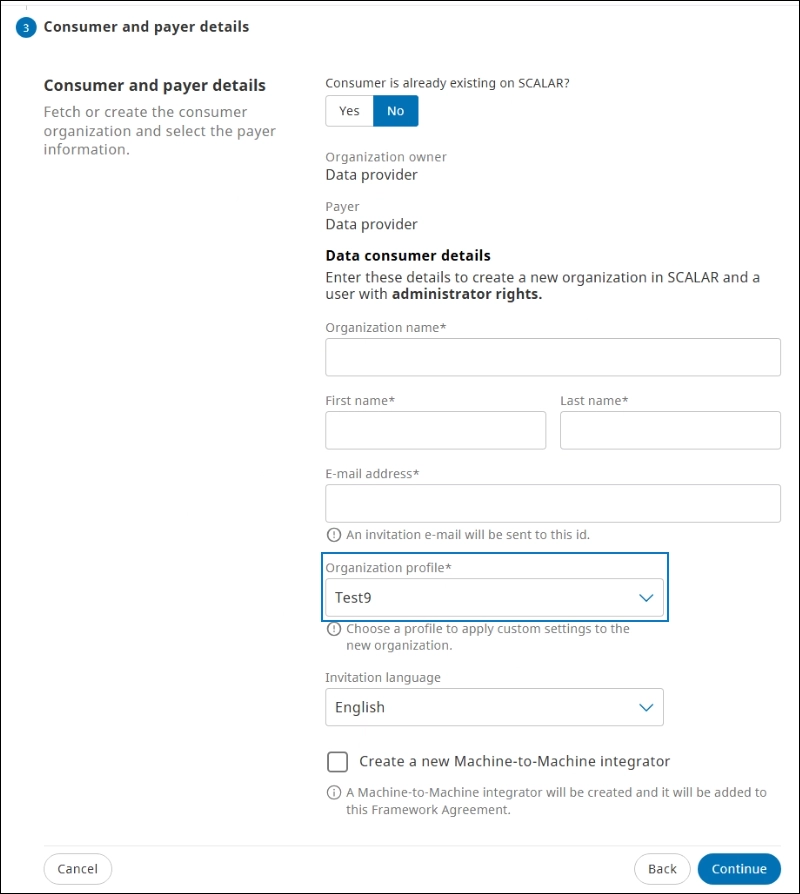
You can select the profile on the Add new framework agreement page while creating a new data consumer organization for sharing data. In this example, ‘Test9’ profile is selected.
