Permissions to access users, integrators, asset groups, place groups, and driver groups can be effectively managed through the Teams module.
A resource group (asset group, driver group, and place group) can be linked with teams. Only users and integrators can be assigned directly to teams. Resources such as assets, places, and drivers cannot be linked with teams directly.
- A team can be described as a user group.
- When a resource group is linked with a team, resources such as assets, drivers, and places are in
- A resource group can be assigned to multiple teams.
- Access to a parent group also provides access to its child groups. For example, when a resource group is linked with a team, access to all the resources of the group is assigned to users of the team. The access to all the resources of the subgroup is also assigned to users of the team.
In an organization, groups are structured in such a way so as to follow all the resources. An administrator can group assets, places, and drivers to organize the resources within SCALAR.
- Max. 250 teams can be created in an organization
- Max. 25 teams can be assigned to a user
- Max. 100 groups and subgroups can be assigned to a team
- Max. 5000 resources can be assigned to a resource group (including subgroups)
Add a Team #
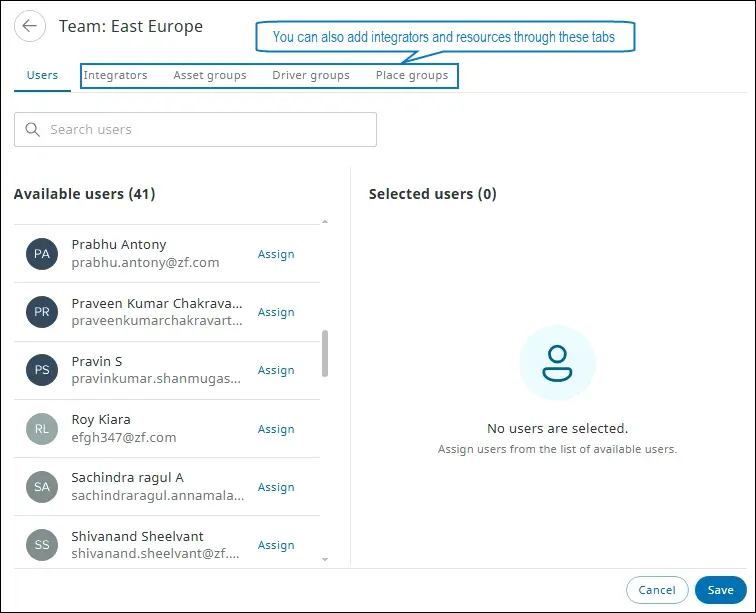
You can add a team, assign users and integrators, and assign resource groups such as asset groups, place groups, and driver groups.
This functionality is subject to user permissions. Only an administrator can access the Admin module.
- In the Admin module > click Teams
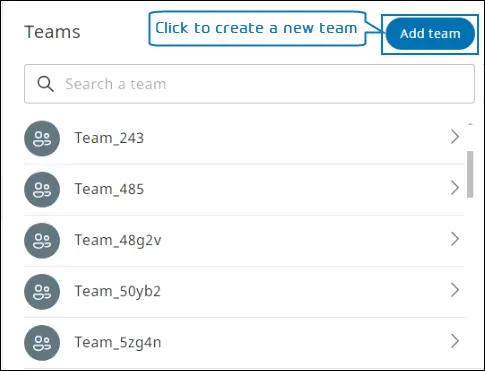
. The Teams page is displayed.
- Click Add team. The Add team dialog is displayed.
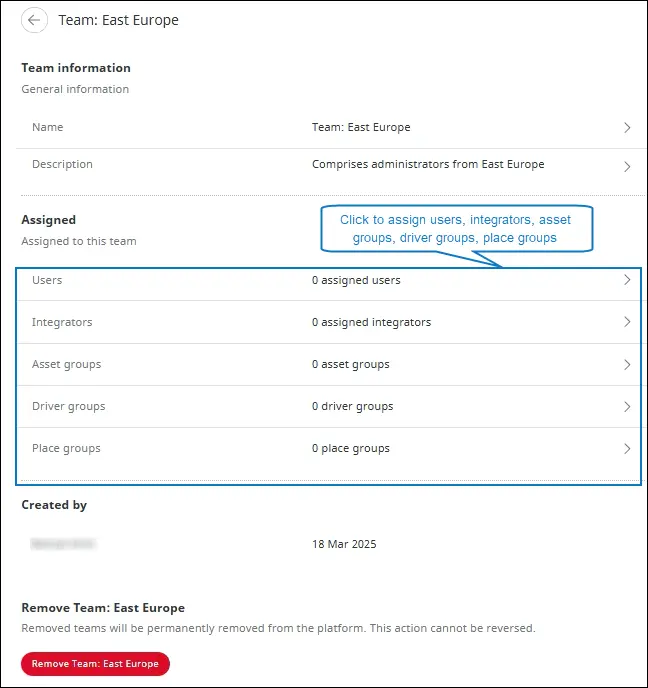
- In the Name box, enter a name, in the Description box, enter additional information, and then click Save. A message is displayed confirming that the team is created and the user is directed to the team details page. The name and description are auto-filled in the Team information section.
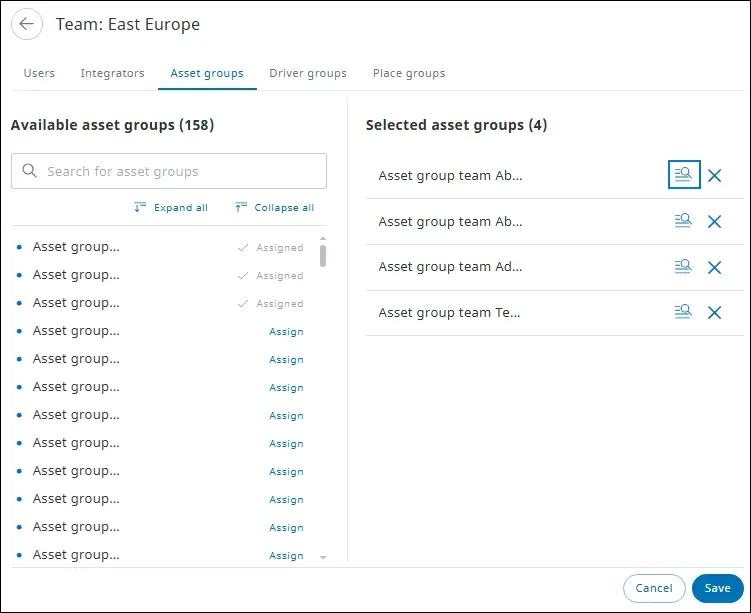
- In the Assigned section, assign users, integrators, asset groups, place groups, and driver groups.
The table below explains the actions that can be performed in the Assigned section.
Max. 250 teams can be created in an organization. Should the number of teams exceed this count and a new team must be created, an existing team will need to be deleted.
Field |
Action |
Users |
 NOTE:
In the Selected users section, click Unassign next to the user name. The user is unassigned. Click Save to permanently unassign the user with the team. |
Integrators |
NOTE:
In the Selected integrators section, click Unassign next to the integrator name. The integrator is unassigned. Click Save to permanently unassign the integrator from the team. |
Asset groups |
 NOTE:
In the Selected asset groups section, click the Unassign |
Driver groups |
NOTE:
In the Selected driver groups section, click the unassign |
Place groups |
NOTE:
In the Selected place groups section, click the Unassign |
Teams for integrators
Assets can be leased to multiple clients, which introduces the potential risk of exposing sensitive information to unauthorized users while sharing data across these clients. The Teams for Integrators feature provides a granular level of data access, ensuring that integrators can only access information related to resource groups assigned to their respective teams. This approach maintains confidentiality and prevents inadvertent data breaches. By restricting integrators to access only data relevant to their assigned groups, this feature ensures data privacy and strengthens security.
After assigning users, integrators, asset groups, driver groups, and place groups to the team, the total number of resources assigned to the team are displayed in the Assigned section on the Team information page.
Max. 5000 resources can be assigned to any resource group or subgroup. A user can follow a maximum of 25 teams x 100 groups x 5000 of each resource type (assets, places, drivers).
Edit Team Details #
From the team information page, you can edit team details such as general information and resources assigned, if required.
- In the Admin module, click Teams
. The Teams page is displayed.
- Select the required team. The team details page is displayed containing the following editable sections:
- General information
- Assigned
- Go to the relevant section, click the required fields, and then modify the information. The updated information is saved. For more information about each field, see Add Team.
View Teams #
You can view the list of teams created on the SCALAR platform and manage access to resources from the Teams page.
- In the Admin module > click Teams
. The Teams page is displayed with the list of teams.
Search a Team #
You can search a team on the Teams page by using the Search feature.
- In the Admin module > click Teams
. The Teams page is displayed. In the Search a team box, enter the team name. The user records matching the search criteria are displayed.
Enter at least three characters to start a search operation.
Remove a Team #
You can remove a team from the Teams page if it is no longer required.
- In the Admin module, click Teams
. The Teams page is displayed.
- Click the team name. The team details page is displayed.
- Click Remove <team name>. The Delete team dialog is displayed.
- Click Delete. The record is permanently removed from the SCALAR platform.

