The SCALAR platform has been developed to offer a comprehensive solution to the transportation and logistics sector to manage their fleet operations. This topic describes how new users can start using the SCALAR platform.
This functionality is subject to user permissions. Only an administrator can access the Admin module.
Help Conventions #
The following table provides a description of the conventions used throughout the SCALAR online help.
| Notation | Denotes |
| > | Successive menu options, navigation levels, or steps appear with a greater-than sign (>) between the UI text to be selected consecutively, for example, on the Units page > click Columns. |
| Bold text | Text in bold denotes the names of UI elements, such as page, options, lists, and commands. |
| * | The fields that are marked with an asterisk are mandatory. |
| NOTE | A note provides additional information that is useful but not critical to the reader. |
| TIP | A tip is a type of note that helps users apply the techniques and procedures described in the text to their specific needs. A tip suggests alternative methods that may not be obvious. It helps users understand the benefits and capabilities of the product. It is not essential for the basic understanding of the text. |
| IMPORTANT | An important note provides information that is essential to the completion of a task. Users can disregard information in a note and still complete a task, but they should not disregard an important note. |
| WARNING | A warning means “Don’t do this” or that this step might be irreversible, for example, leading to permanent data loss. |
Account Activation #
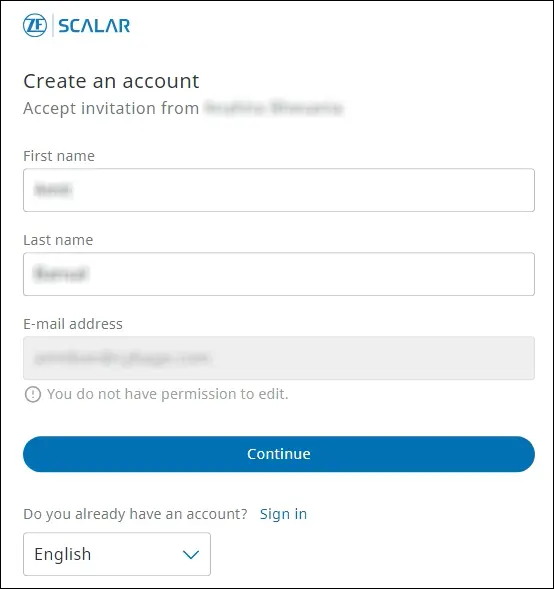
After the account owner is onboarded on the SCALAR platform, they can create additional user accounts to on-board other administrators or normal users. If you are a first-time user, you must create and activate your account to start using the platform.
The account owner is also referred to as the first administrator.

- Click the Create account link included in the Welcome email. The Create an account page open in a browser tab.
- On the Sign In page, enter your username and password.
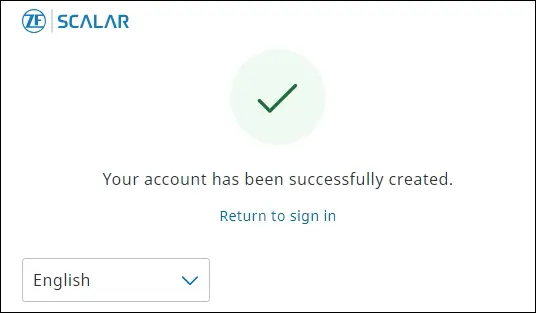
- Select the preferred language from the language list, and then click Continue. The account is created, and a confirmation message indicating that the account is successfully created is displayed.
- Click the Return to sign in link. The SCALAR platform sign-in page is displayed.
The account is then activated, and the account status changes to Active.
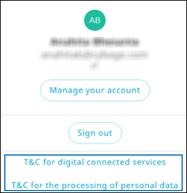
You must complete the activation process within time: the link is valid only for 72 hours. It is recommended that you click these links to browse through the terms and conditions: T&C for digital connected services and T&C for processing of personal data. As a first-time user, you can update your profile information, such as upload your profile photograph, change the password, and modify notification settings.
Sign in #
URL: https://app.zf-scalar.com
Supported Browsers #
- Google Chrome
- Microsoft Edge
- Mozilla Firefox
Access the SCALAR platform through your browser, and enter the login credentials
- To go to the SCALAR Sign in page, in the address bar of a browser, enter the URL address provided. The Sign in dialog is displayed.
- In the Email and Password boxes, enter your sign-in credentials, and then click Sign in. The Home page is displayed.
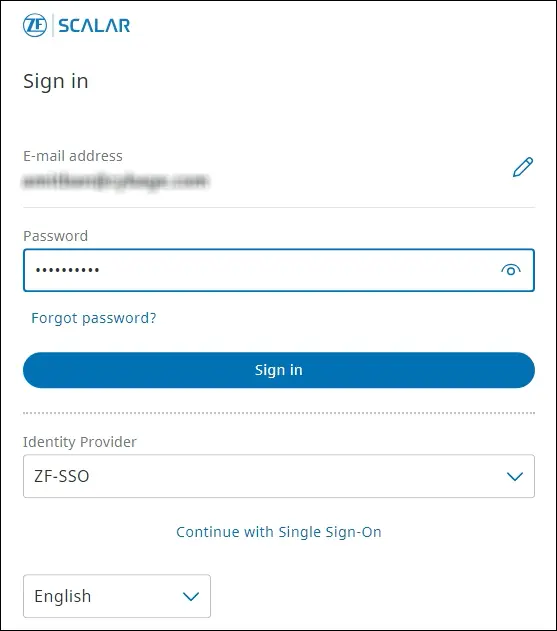
From the language list, select the preferred language in which the application is to be launched.
Reset Password #
You can reset the password if you forget your password.
- On the Sign in page, click the Forgot password link. The Forgot password dialog is displayed.
- Enter the email address at which the link to reset the password will be sent, and then click Reset password. A confirmation message is displayed indicating that the link for password reset is sent to the specified email address.
- Click the Reset Password link contained in the email.
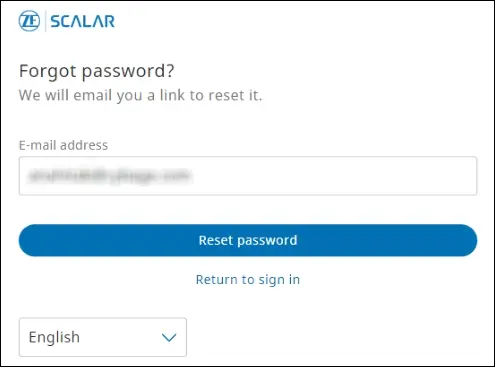
To cancel the password reset operation and go to the Sign in page, use the Return to sign in link.
The link to reset the password is valid only for 72 hours.
Sign out #
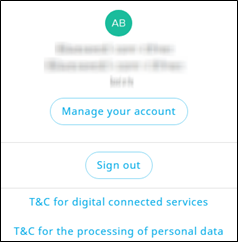
- From the top-right corner, click ZF account
. The manage your account menu is displayed.
- Click Sign out. You are signed out of the SCALAR platform.
Understand the User Interface – Navigation #
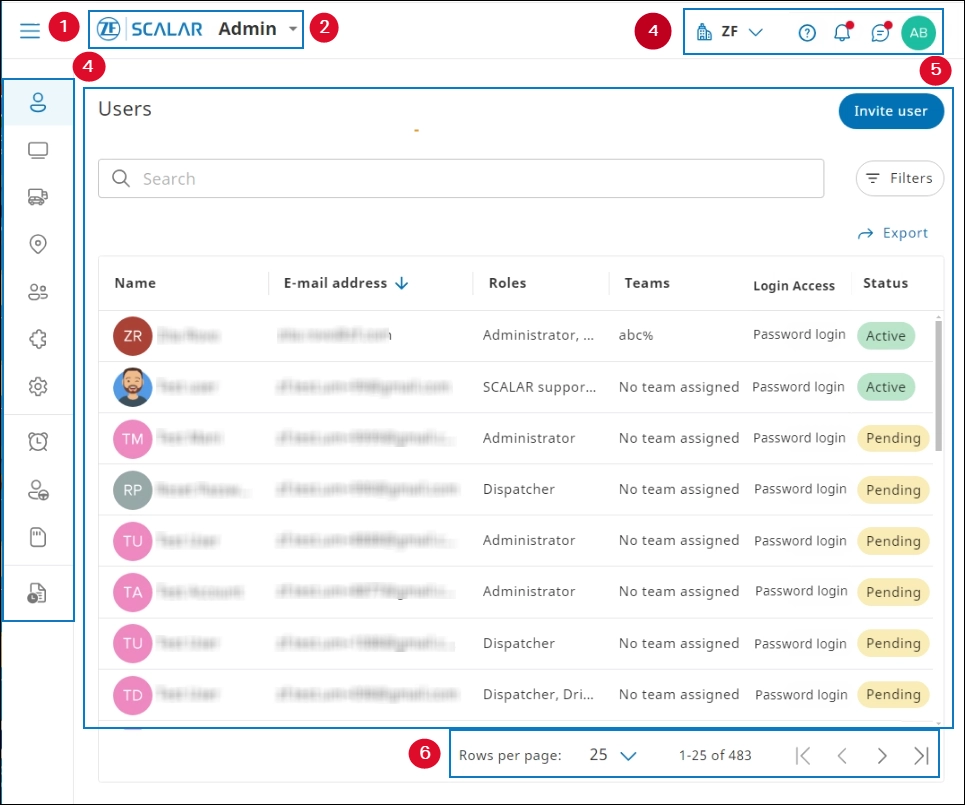
The Users module is your home screen when launching the SCALAR platform. This section helps you become familiar with the user interface.
| Number | Indicates |
| 1 | Click to expand and view the left navigation pane containing the module names. The modules are logically organized based on functions: organization, fleet operations, and serviceability. |
| 2 | Click to view the module list and switch between modules (also referred to as packages) |
| 3 |  Open the help widget Open the help widget Alarm notifications: View notifications for untreated alarms Alarm notifications: View notifications for untreated alarms View and manage current user profile View and manage current user profileNOTE: The Organization switcher feature is available only to those users who are invited and onboarded to two or more organizations. |
| 4 | Left navigation pane with available section in current module (role-specific) |
| 5 | Current module NOTE: In this example, the users list is displayed. |
Switch Between Modules #
- Use the module selection to switch to a different module:
. The available modules depend on the user permissions.
- Select the required module from the list. The selected module is launched in a new tab.

As an administrator, you can assign multiple roles to yourself and other users. Multiple roles can be assigned while or after creating a user account.
Switch Between Organizations #
In view of various business scenarios such as data sharing, hiring drivers on contract basis, resellers, and technicians who provide support and shared services to multiple organizations, such users can be associated with and onboarded to multiple organizations by means of the same email address, which forms the unique identifier.
An email address of the user is considered as the unique identification while onboarding them to multiple organizations.
Users who are associated with two or more organizations can switch between organizations by using the organization switcher feature without having to sign off and sign in again. The first organization that they are onboarded to is the default organization and is displayed in the header region at the time of signing in to SCALAR.
- To switch to a different organization, click the organization switcher
. The organizations to which you are onboarded are listed.
- Select the required organization. You are directed to the same module of the selected organization in a new tab. The roles and permissions will be based on what is set by the respective organizations.
- This feature is available only if an administrator invites and onboards a user to two or more organizations. In this example, the user’s default organization is ZF.
- The default organization can be changed from the Account page > Default Organization. For more information, see Profile management.

Common Functionalities #
The following table describes the common UI elements in the application.
| UI element | Indicates |
| Save | Saves the details of the specific page and reverts to the previous page. |
| Cancel | Cancels the current operation, closes the page, and reverts to the previous page. |
| Reset | Clears the entered data or cancels the changes made and retains the previously entered information. |
| Next | Opens the next page in the wizard or form |
| Pagination controls | |
 | A type of accordion menu click > to go to the next page |
Admin Module #
The SCALAR platform provides role-based access to the users. An administrator can view the following modules described in this table.
| Module | Description |
| Organization | |
| Users | Manage user-related functions, such as adding new users, editing user details, and viewing user list. In addition, a role can be assigned to a user, and it can be added to a team. |
| Units | Track unit information such as subscription start and end dates, linked asset, and status. |
| Assets | Manage various asset-related functions, such as adding new assets (vehicles) to a fleet, editing asset details, viewing asset list, and exporting asset details. In addition, you can assign an asset to a user or team. |
| Places | Create important places on the map and configure an alarm when an asset enters or leaves the area. |
| Teams | Create a new team and assign resources, such as users, assets, places, and drivers to the team. |
| Integrators | Add new integrators and define the access permissions for each feature. |
| Settings | Configure general settings, such as set the time zone and default language in which the application is to be launched for your organization. |
| Fleet operations | |
| Alarm rules | Add and configure rules for an alarm that will be triggered in case specified events occur, such as harsh braking, over speeding, and sudden fuel drop. |
| Drivers | Manage driver role-related functions, such as adding a driver, editing driver details, and viewing drivers list. |
| Tachograph | Manage the archiving and RDD requirements of a company through this module. You can configure rules for triggering alerts for warning and critical states for specific vehicle and diver-specific activities. |
| Serviceability | |
| Audit Log | Trace the changes made to various record types. |
| Module | Description |
| Organization | |
| Users | Manage user-related functions, such as adding new users, editing user details, and viewing user list. In addition, a role can be assigned to a user, and it can be added to a team. |
| Units | Track unit information such as subscription start and end dates, linked asset, and status. |
| Assets | Manage various asset-related functions, such as adding new assets (vehicles) to a fleet, editing asset details, viewing asset list, and exporting asset details. In addition, you can assign an asset to a user or team. |
| Places | Create important places on the map and configure an alarm when an asset enters or leaves the area. |
| Teams | Create a new team and assign resources, such as users, assets, places, and drivers to the team. |
| Integrators | Add new integrators and define the access permissions for each feature. |
| Settings | Configure general settings, such as set the time zone and default language in which the application is to be launched for your organization. |
| Fleet operations | |
| Alarm rules | Add and configure rules for an alarm that will be triggered in case specified events occur, such as harsh braking, over speeding, and sudden fuel drop. |
| Drivers | Manage driver role-related functions, such as adding a driver, editing driver details, and viewing drivers list. |
| Serviceability | |
| Audit Log | Trace the changes made to various record types. |
Initial Setup #
As an administrator, you must add the following organization resources and configure settings on the SCALAR platform prior to operationalizing the Track and Trace system:
- Invite users
- Add assets
- Add drivers
- Add places
- Add teams
- Add integrators
- Configure organization settings
- Add alarm rules
- Configure tachograph settings
After you have completed these functions, you are all set to manage your fleet operations.
