


The unit inspection for SCALAR EVO Touch, available in the Workshop module, is an installation and verification tool designed to assist field engineers and customer service partners in seamless installation, deployment, configuration, and verification of EVO Touch units.
Only authorized users who are assigned the Technician role can access the Workshop module that is integrated with the SCALAR platform.
Capabilities
- Installation verification overview: Provides a comprehensive overview of health statuses including Communication, Positioning, CAN Bus, Tachograph, Mass memory (RDD), and Digital Input.
- Real-time monitoring for quick identification of any issues during the installation process.
- Report generation: Generates a detailed report of the installation process, including information on each configured parameter and highlights any deviations or issues encountered during installation. Sends the installation report to a defined group of recipients.
Install, configure, and verify the SCALAR unit #
This section describes the installation, configuration, and verification of the SCALAR EVO Touch unit using the Workshop module.
The procedure below only uses a SCALAR EVO Touch unit as an example, but the procedure is the same for SCALAR EVO Flow and Flow v2.
- In the Workshop module, the Welcome to workshop page is displayed.
- Click the Unit inspection and more tile. The Connect to communication unit page is displayed.
- Do one of the following:
- Scan the QR code displayed on your communication unit for about 3 seconds and at a distance
of at least 15 cm. - Android 11 and later versions
- iOS 17.4.1 and later versions
- Click Enter serial number manually. The Unit serial number dialog is displayed.
NOTE:The QR code reader application is not required for scanning the QR. However, the web app must be assigned appropriate permission to access the hand-held device camera. You must have an active internet connection.
The Flash light functionality will be supported for the following:

- Scan the QR code displayed on your communication unit for about 3 seconds and at a distance
- Enter the serial number (IMEI) of the communication unit, and then click Continue. For example, if the serial number mentioned on the unit is ABC-123456789123456, the unit serial number will be numeric, which is 123456789123456.
- After hardware activation, click Continue. The Preparing unit for inspection dialog is displayed.


OR
The serial number is displayed on the device label.

After the unit is prepared for inspection, the SCALAR EVO Touch page is displayed.
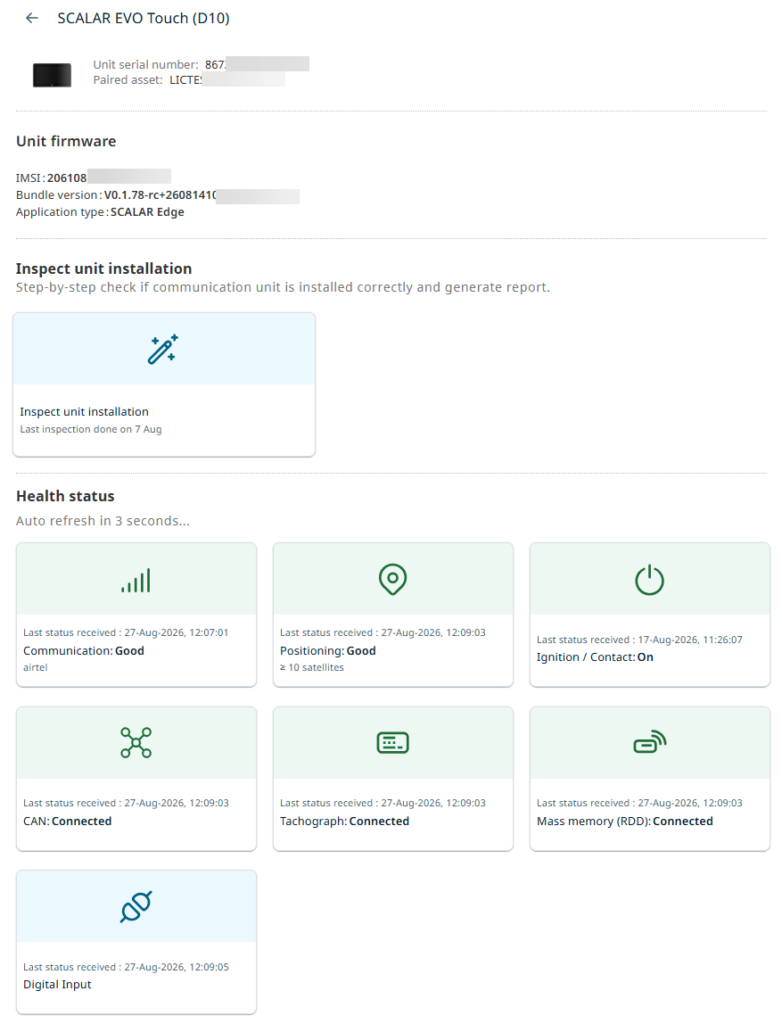
In the Inspect unit installation section, you can perform a step-by-step check to verify whether the communication unit is installed correctly and subsequently generate a report.
In the Health status section, you can view the device health as described in the View device health status section.
The overall health status is displayed on each tile.
Inspect unit installation #
Perform a step-by-step check to verify whether the communication unit is installed correctly and generate a report.
A technician can proceed with Inspect Unit Installation only if the unit or device is connected to an external power source.
Click the Inspect unit installation tile. The Preliminary inspection page is displayed.
The Preliminary inspection section will enable the technician to configure the capabilities at the unit level before proceeding with installation and subsequent inspection.
Based on the configuration done here, the stepper will be populated.
- Enable or disable the tachograph connection
- Enable or disable the mass memory connection
- Enable or disable the CAN termination
- Enable or disable the RDD termination
- Set the speed source, RPM source and mileage (km) source.
- Set the shutdown timer
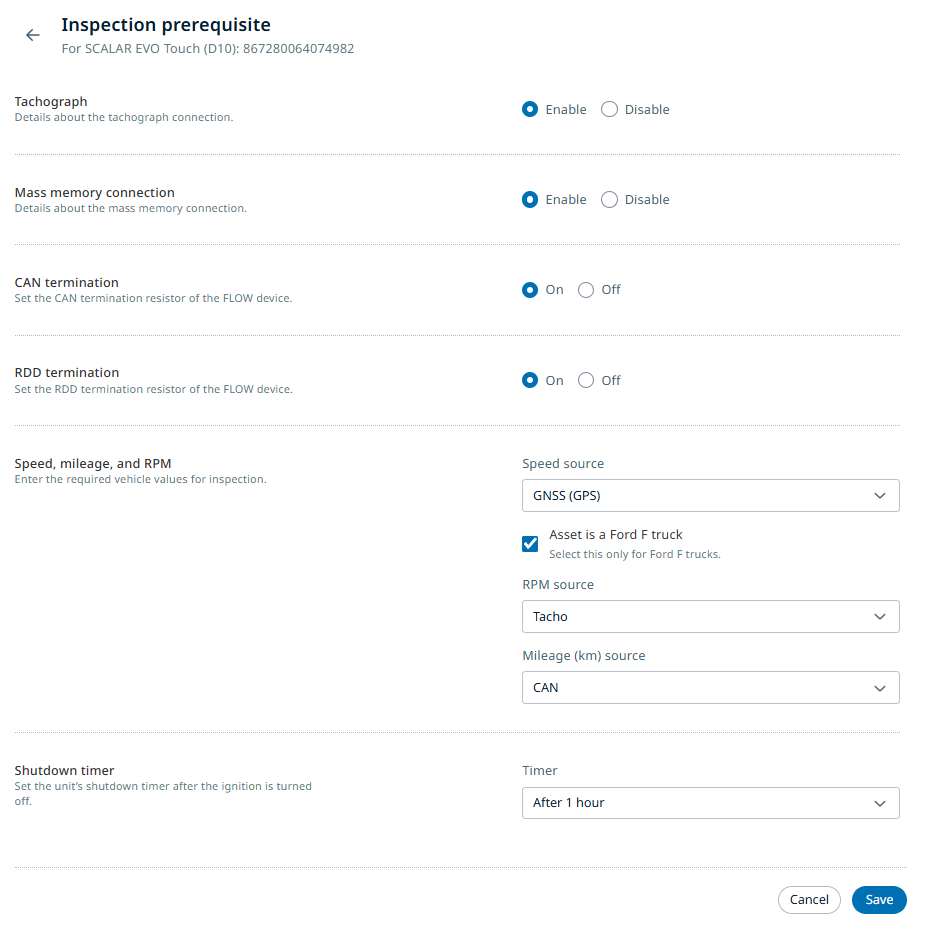
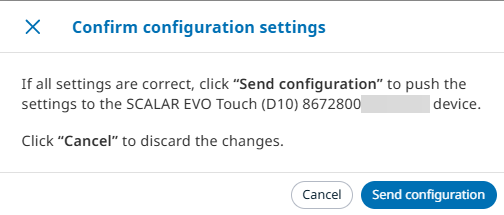
When all required parameters are enabled, click Save. A confirmation message will appear. Click Send configuration to send the configuration to the unit.
Click Continue. The Inspect Installation page is displayed.
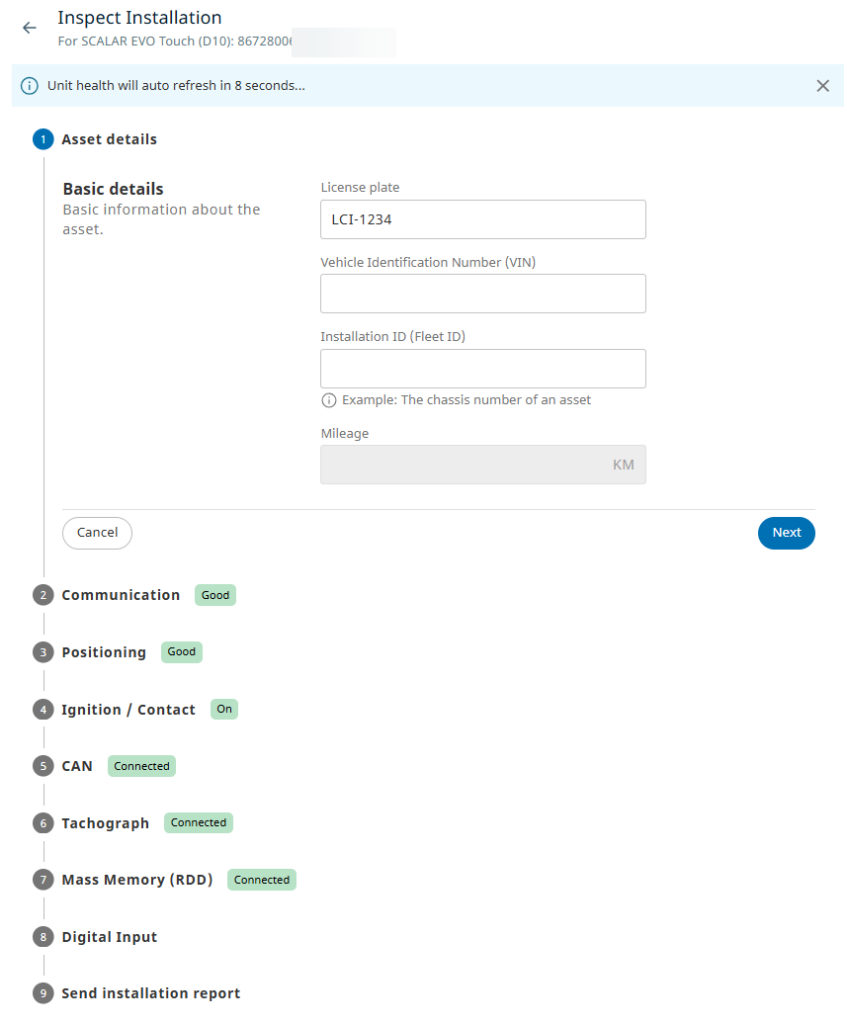
Verify the following:
Asset details
Communication
Positioning
Ignition / Contact
CAN
Tachograph
Mass memory (RDD)
Digital input
Send installation report
You can rerun the unit installation and inspection process to resolve issues with the unit’s health status, such as lack of GPS coverage or undetected TBS.
Asset details #
- Asset identification : License plate, Vehicle Identification Number (VIN), Unit installation code.
At least one value must be updated in this section to proceed further.
Click Next to continue.
Communication #
Verify the following:
Provider information is also shown to the technician.
- Communication unit status
- Signal quality

Click Next to continue.
Positioning #
Verify the following:
- GPS status: Good / Poor / No Coverage
- Last status received on GPS connectivity
- Satellites connections: Number of satellite connections covering the asset.
- SNR (Signal-to-Noise Ratio): Good / Poor / No Coverage
- HDOP (Horizontal Dilution of Precision: Good / Poor / No Coverage

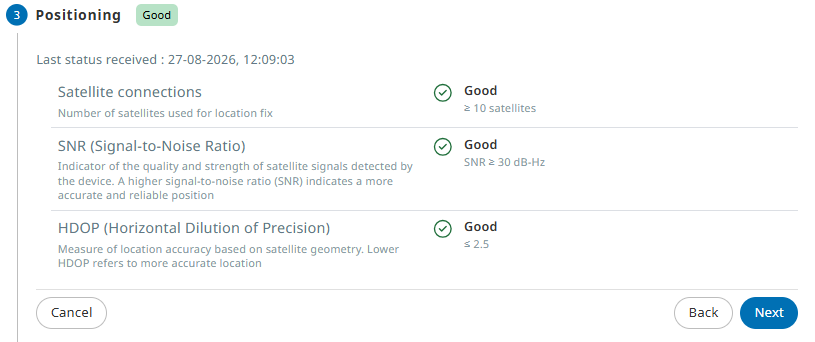
A minimum of five satellites are required for a good GPS position.
Click Next to continue.
Ignition / Contact #
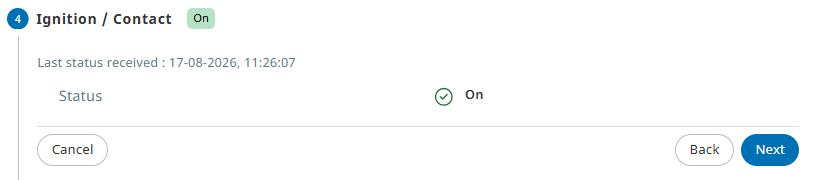
Verify the following:
- Last received valid status
- Status: On / Off

Click Next to continue.
CAN #
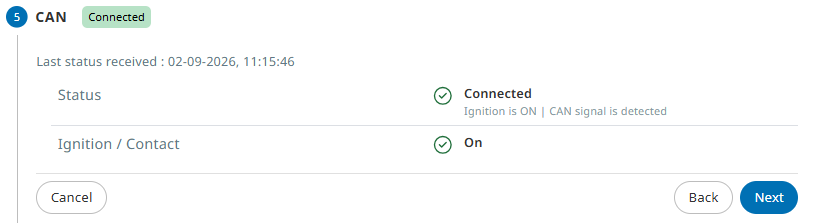
Verify the following:
- Last received valid status
- Status: Connected / Not connected
- Ignition / Contact: On / Off

Click Next to continue.
Tachograph #
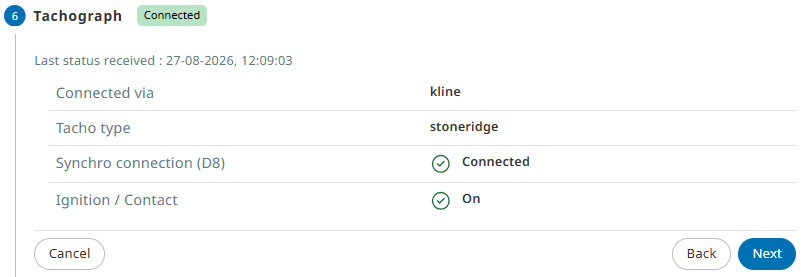
Verify the following:
- Last received valid status
- Tacho type
- Synchro connection: Connected / Not connected
- Ignition / Contact: On / Off

Click Next to continue.
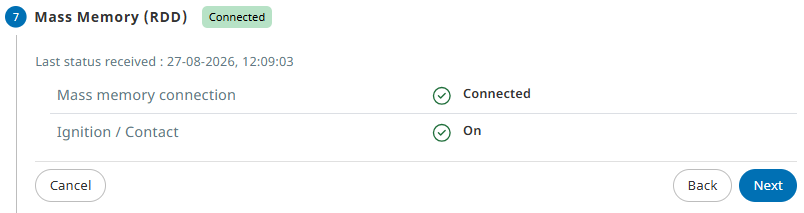
Mass Memory (RDD) #
Verify the following:
- Last received valid status
- Mass memory connection
- Ignition / Contact: On / Off

Digital input #
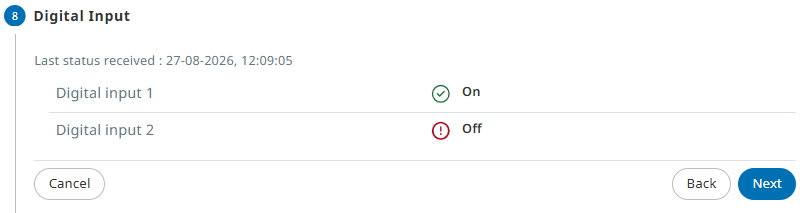
Verify the following:
- Last received valid status
- Digital input 1: On / Off
- Digital input 2: On / Off

Send installation report #
Send a report through email to confirm the correct installation. Enter the required parameters:
- Email address
- Comments
- Installer
- Workshop
- Add photos
You can send the report to multiple email addresses (a maximum of 10 email addresses are allowed.)
The installer’s email address is not editable. You can refer to it to identify the person who has completed the unit installation.
Click Send and finish to complete the process.

A confirmation email is sent to both customer and technician summarizing the device health status.
View device health status #
From the Health status section, click each tile to view the device health details for each parameter separately:
You can rerun the unit installation and inspection process to resolve issues with the unit’s health status, such as lack of GPS coverage or undetected TBS.
Communication #
Click the Communication tile to view detailed information about the communication unit.
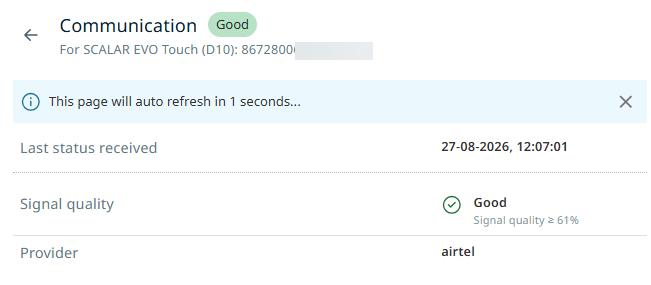
The following communication unit information is reported:
- Last status received: Date and time stamp of the last status received
- Signal quality: Good – Fair – Poor
- Provider: Mobile operator
Positioning #
Click the Positioning tile to view detailed information about the GPS positioning status.
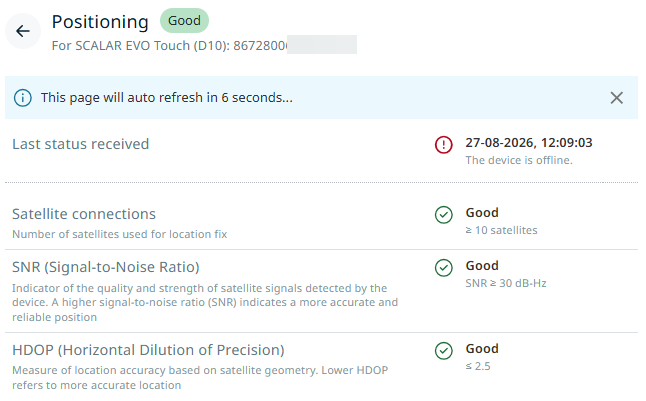
The following GPS information details are reported:
- Last status received: Date and time stamp of the last status received.
- Satellite connections: Number of satellites covering the trailer.
- SNR (Signal-to-Noise Ratio): Good / Poor / No Coverage
- HDOP (Horizontal Dilution of Precision: Good / Poor / No Coverage
A minimum of five satellites are required for a good GPS position. In case the GPS status is No Coverage, ensure that the position of the SCALAR EVO Touch meets the requirements (cf. SCALAR EVO Touch Installation Guide – SCALAR EVO Touch Position).
Ignition / Contact #
Click the Ignition / Contact tile to view detailed information about the status.
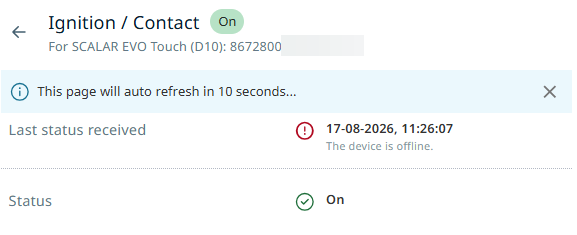
The following ignition details are reported:
- Last status received: Date and time stamp of the last status received
- Contact status: On / Off
CAN #
Click the CAN tile to view detailed information about the CAN connection status.
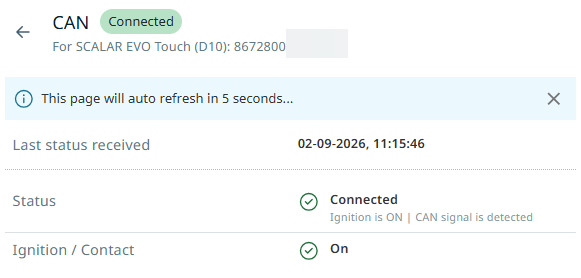
The following details are reported:
- Last status received: Date and time stamp of the last status received
- CAN status: Connected / Not connected
- Ignition / Contact: OK / Not OK
Tachograph #
Click the Tachograph tile to view detailed information about the Tachograph connection status.
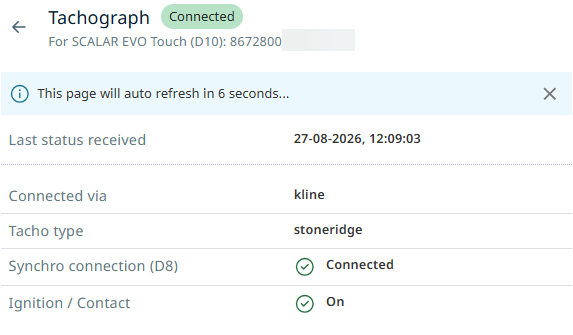
The following tacho details are reported:
- Last status received: Date and time stamp of the last status received
- Connected via: kline (tacho) / CAN
- Tacho type: stoneridge / VDO
- Synchro connection (D8): Connected / Not connected
- Ignition / Contact: OK / Not OK
Mass memory (RDD) #
Click the Mass memory (RDD) tile to view detailed information about the mass memory connection status.
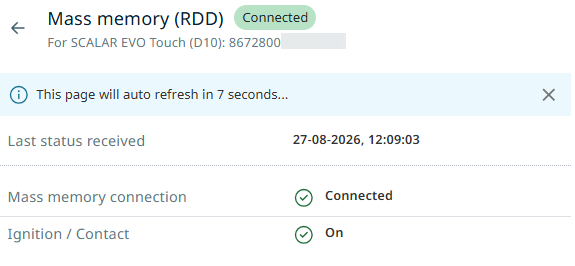
- Last status received: Date and time stamp of the last status received
- Mass memory connection: Connected / Not connected
- Ignition / Contact: OK / Not OK
Digital input #
Click the Digital input tile to view detailed information about the mass memory connection status.
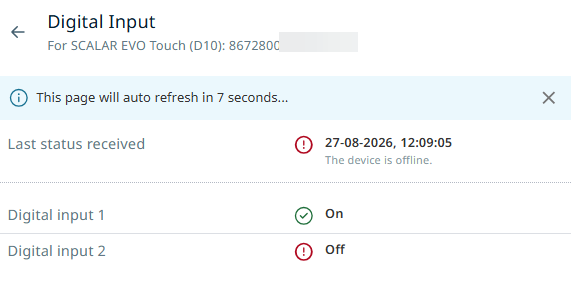
- Last status received: Date and time stamp of the last status received
- Digital input 1: On / Off
- Digital input 2: On / Off


